
Nutrition Facts
0 servings

September is National Preparedness Month, but if you’re anything like me, every month is preparedness month. With the rising cost of groceries—especially staples like butter—there’s never been a better time to take control of your food storage. This week, we headed to Walmart and stocked up on canning essentials so I could show you step-by-step how to pressure can butter at home.
Thanks to Annabelle for sending over the photos—let's get into this easy, cost-saving project that anyone can do!
Why Can Butter at Home?
The price of butter keeps climbing, and preserving it at home can save you a ton of money. Plus, shelf-stable butter is a powerful addition to your food storage. Whether you're preparing for emergencies or just want the convenience of ready-to-use pantry staples, home-canned butter is a game-changer.
")
Supplies You’ll Need for Canning Butter
Before we start, gather your supplies:
Unsalted sweet cream butter (I used 8 sticks from Sam’s Club)
Presto pressure canner
Pint-sized jars (wide-mouth if available)
Magnetic lid wand
Funnel
Jar lifter
Debubbler or spoon
Vinegar and paper towels
Stock pot or Dutch oven
Lids and rings (wide and regular mouth)
How to Prepare Your Jars and Equipment
Sanitize and Preheat Jars: Preheat your jars in the oven at 225°F while melting your butter.
Inspect Your Canner: Ensure your pressure canner's gauge reads zero and check all bolts and seals before you begin.
Simmer Your Lids: Keep your canning lids in a pot of hot (not boiling) water to soften the seals.
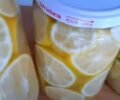
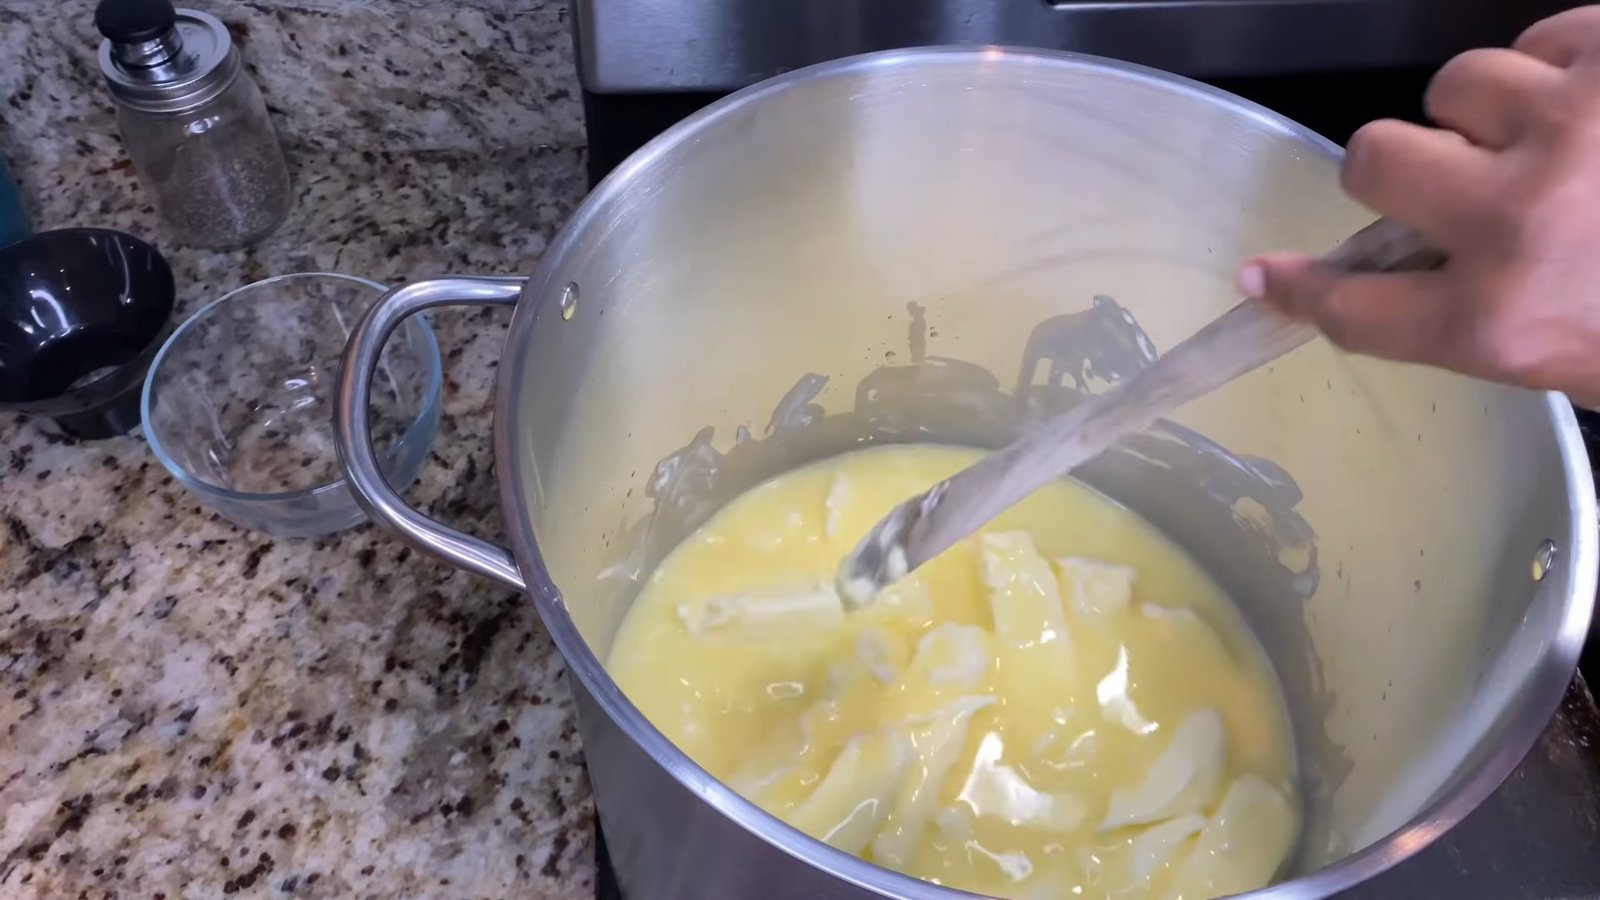
Melting and Clarifying the Butter
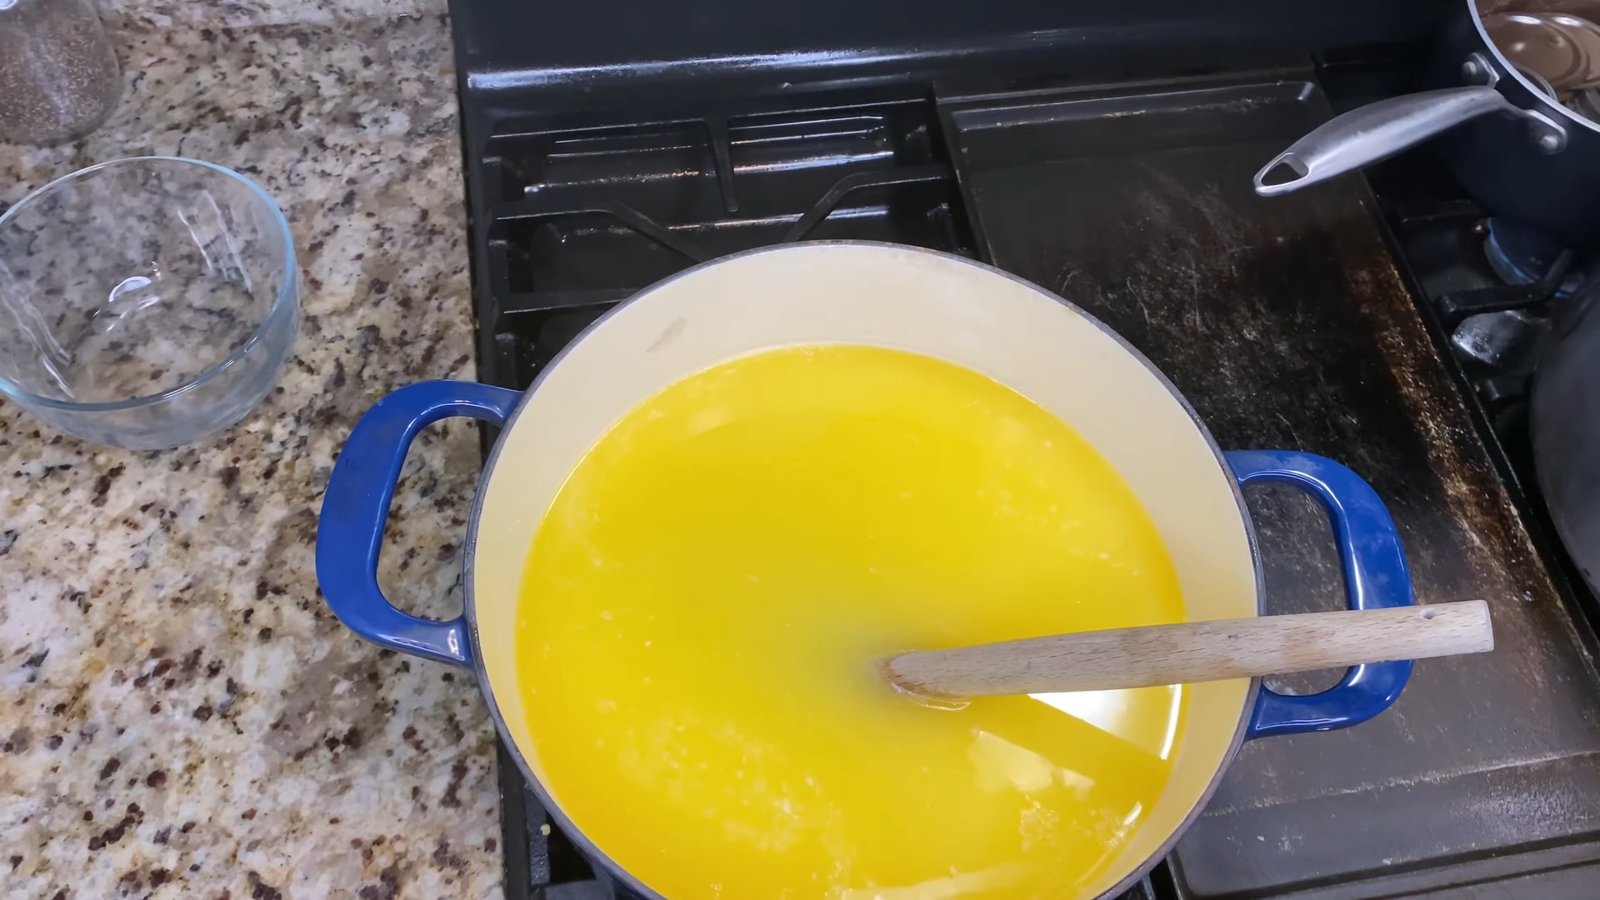
Melt the butter slowly in your Dutch oven on low heat. Once fully melted and starting to separate, increase to medium-high—just until it begins to bubble. Don’t let it boil.
Skim off the foam from the top. This is clarified butter, also known as ghee. Stir before scooping into jars to ensure the layers recombine.
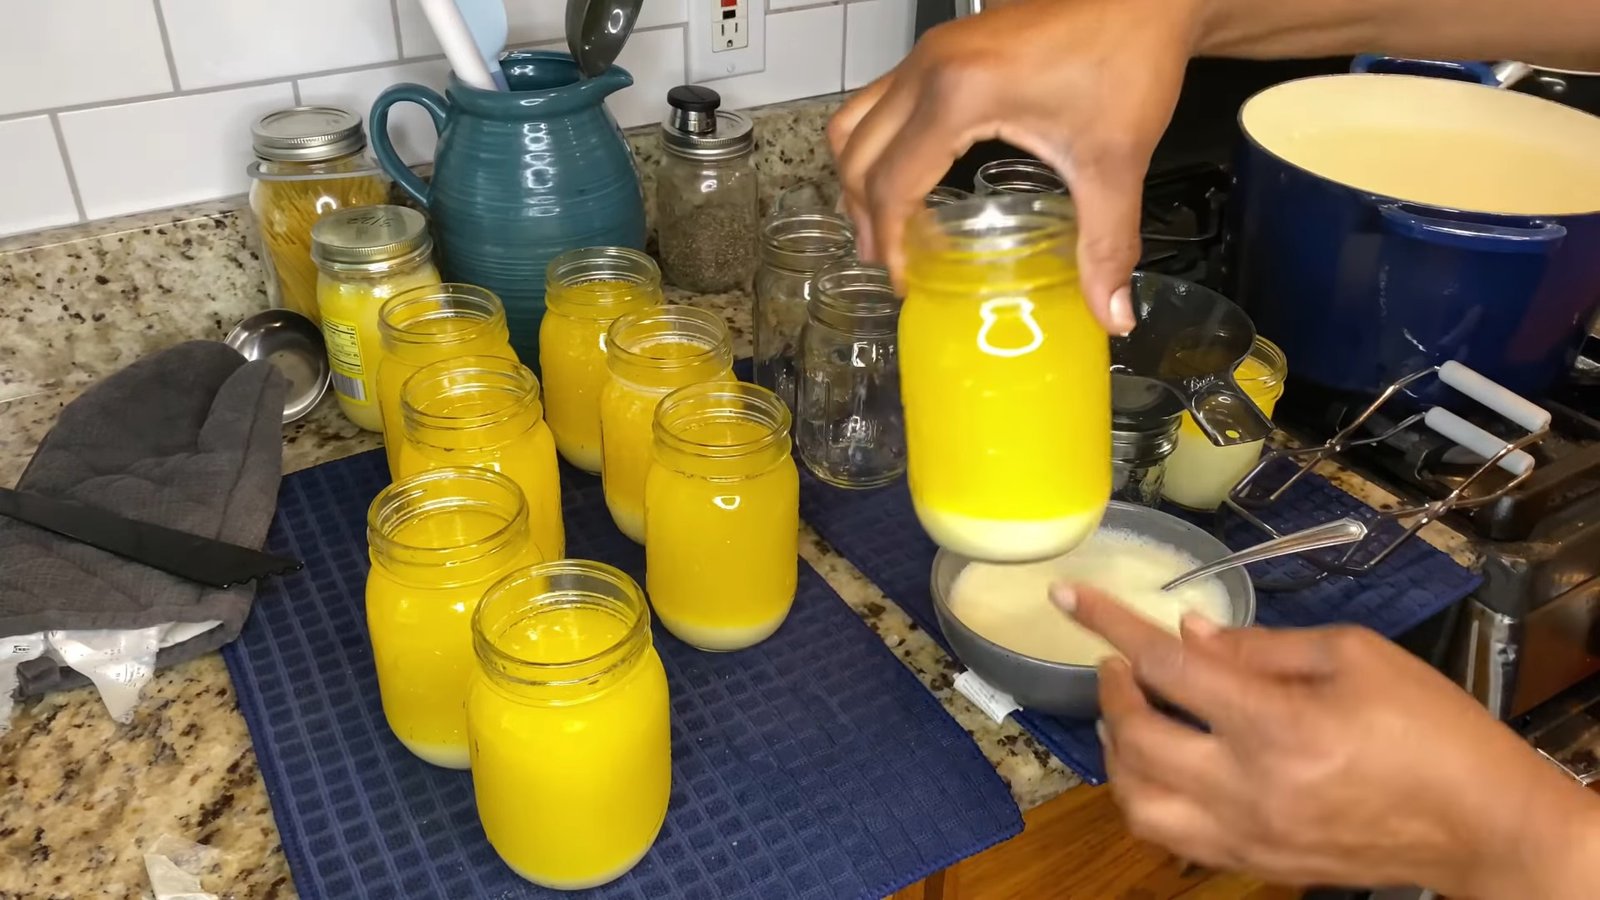
Filling and Sealing the Jars
Fill jars to 1-inch headspace.
Wipe the rims with vinegar-dampened paper towels to ensure a clean seal.
Apply lids and rings (fingertip tight).
For jars you don’t plan to pressure can, turn them upside down for 5 minutes, then upright—this helps them seal.
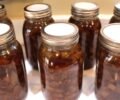
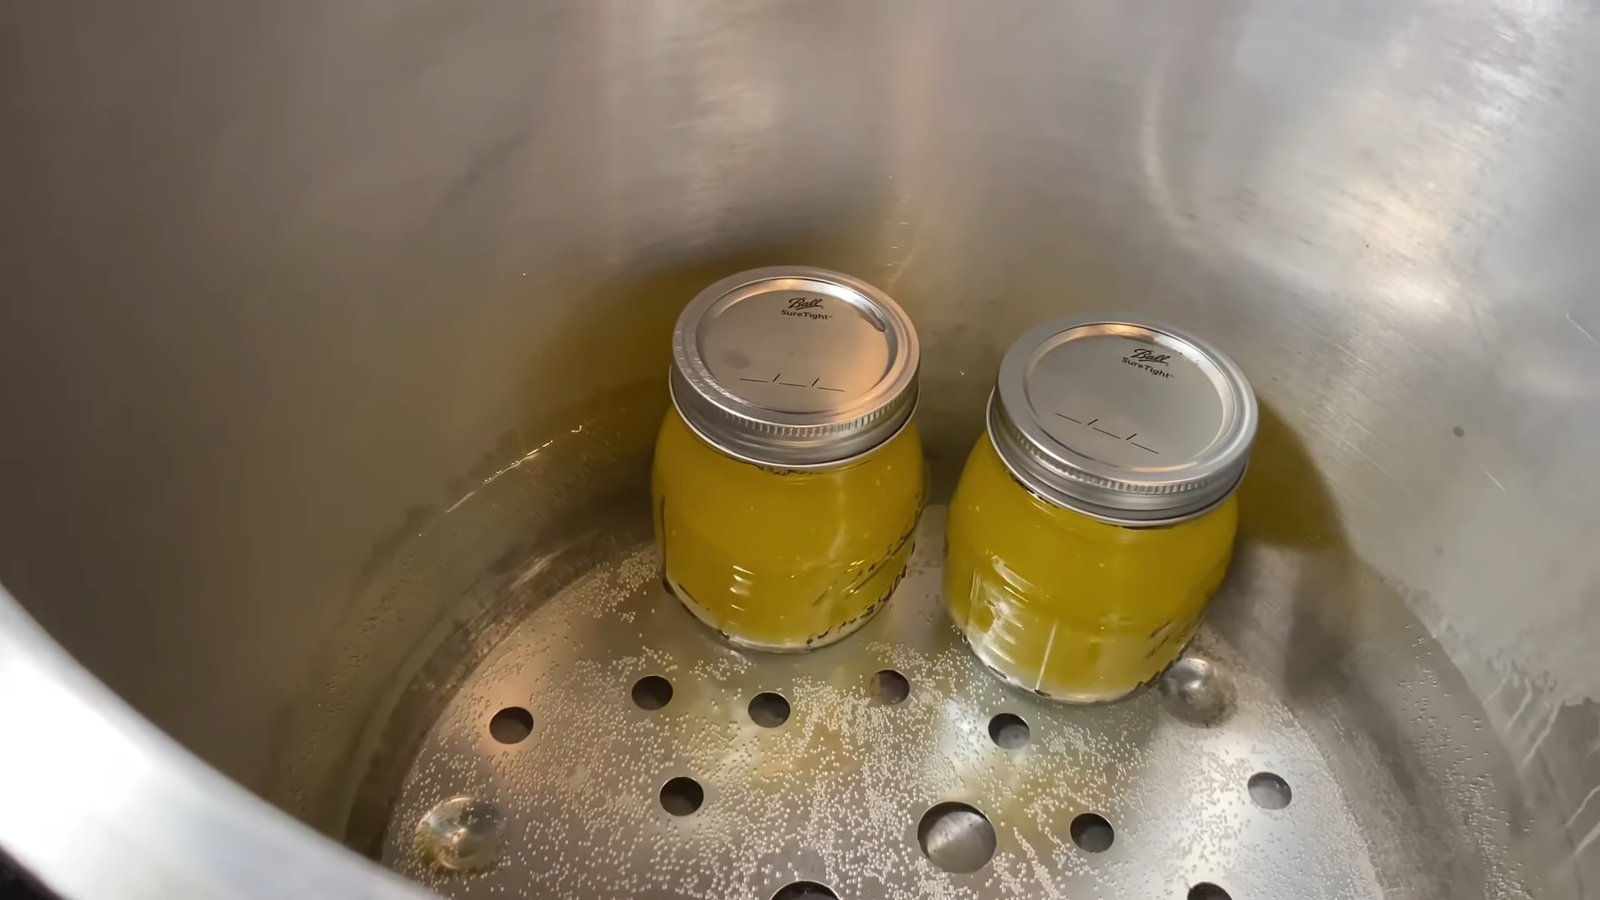
Pressure Canning Instructions
Add Jars to the Canner: Make sure the water level doesn’t go over the lids—aim for 1-2 inches of water in the bottom.
Vent Steam: Let your canner vent steam for 10 minutes before adding the weight.
Set the Pressure: Check your altitude—mine is above 1,000 ft, so I used 11 pounds of pressure. Use 10 lbs below 1,000 ft (check with your local extension office if unsure).
")
Process: Maintain pressure for 75 minutes for pint jars.
Cool Down: Turn off the heat and let
")
the canner depressurize naturally. Don’t open it until the gauge is at zero and the safety valve has dropped.
")
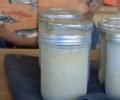
The Results: Shelf-Stable Butter
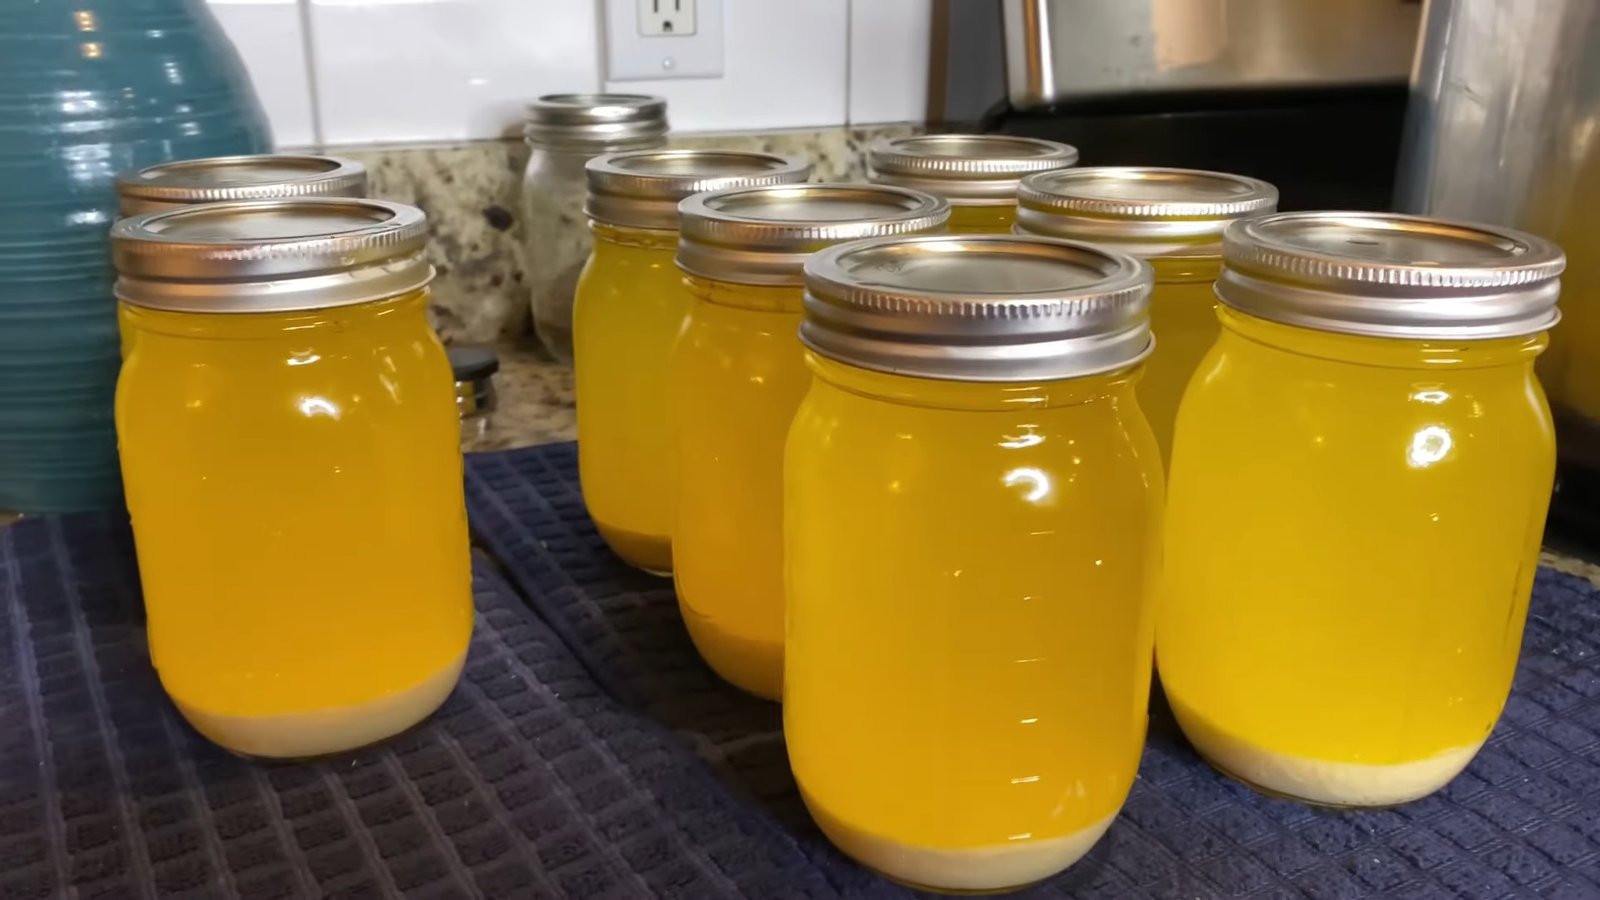
After 75 minutes and some cooling, you'll hear the sweet sound of your jars sealing—pings and pops that mean success. I ended up with 8 pint-sized jars of butter, all sealed beautifully. Even my non-canned butter sealed well using the upside-down method.
I labeled and dated my jars the next morning, and they looked just like store-bought ghee—but better, because I made them myself.
Final Tips
Use vinegar in the canner to reduce cloudy jars.
Monitor your pressure carefully—don’t walk away!
Store your jars in a cool, dark pantry.
You can also store clarified butter without pressure canning for up to 3 years (but canning extends shelf life to 5+ years).
Ready to Try It?
Canning butter is easier than it sounds and incredibly rewarding. With food prices rising and uncertain times ahead, adding shelf-stable butter to your pantry is a smart move for any homesteader or preparedness-minded household.
So what are you waiting for? Grab your jars, your butter, and let’s get canning!
")
September is National Preparedness Month, but if you’re anything like me, every month is preparedness month. With the rising cost of groceries—especially staples like butter—there’s never been a better time to take control of your food storage. This week, we headed to Walmart and stocked up on canning essentials so I could show you step-by-step how to pressure can butter at home.
Thanks to Annabelle for sending over the photos—let's get into this easy, cost-saving project that anyone can do!
Why Can Butter at Home?
The price of butter keeps climbing, and preserving it at home can save you a ton of money. Plus, shelf-stable butter is a powerful addition to your food storage. Whether you're preparing for emergencies or just want the convenience of ready-to-use pantry staples, home-canned butter is a game-changer.
Supplies You’ll Need for Canning Butter
Before we start, gather your supplies:
Unsalted sweet cream butter (I used 8 sticks from Sam’s Club)
Presto pressure canner
Pint-sized jars (wide-mouth if available)
Magnetic lid wand
Funnel
Jar lifter
Debubbler or spoon
Vinegar and paper towels
Stock pot or Dutch oven
Lids and rings (wide and regular mouth)
How to Prepare Your Jars and Equipment
Sanitize and Preheat Jars: Preheat your jars in the oven at 225°F while melting your butter.
Inspect Your Canner: Ensure your pressure canner's gauge reads zero and check all bolts and seals before you begin.
Simmer Your Lids: Keep your canning lids in a pot of hot (not boiling) water to soften the seals.
Melting and Clarifying the Butter
Melt the butter slowly in your Dutch oven on low heat. Once fully melted and starting to separate, increase to medium-high—just until it begins to bubble. Don’t let it boil.
Skim off the foam from the top. This is clarified butter, also known as ghee. Stir before scooping into jars to ensure the layers recombine.
Filling and Sealing the Jars
Fill jars to 1-inch headspace.
Wipe the rims with vinegar-dampened paper towels to ensure a clean seal.
Apply lids and rings (fingertip tight).
For jars you don’t plan to pressure can, turn them upside down for 5 minutes, then upright—this helps them seal.
Pressure Canning Instructions
Add Jars to the Canner: Make sure the water level doesn’t go over the lids—aim for 1-2 inches of water in the bottom.
Vent Steam: Let your canner vent steam for 10 minutes before adding the weight.
Set the Pressure: Check your altitude—mine is above 1,000 ft, so I used 11 pounds of pressure. Use 10 lbs below 1,000 ft (check with your local extension office if unsure).
Process: Maintain pressure for 75 minutes for pint jars.
Cool Down: Turn off the heat and let
the canner depressurize naturally. Don’t open it until the gauge is at zero and the safety valve has dropped.
The Results: Shelf-Stable Butter
After 75 minutes and some cooling, you'll hear the sweet sound of your jars sealing—pings and pops that mean success. I ended up with 8 pint-sized jars of butter, all sealed beautifully. Even my non-canned butter sealed well using the upside-down method.
I labeled and dated my jars the next morning, and they looked just like store-bought ghee—but better, because I made them myself.
Final Tips
Use vinegar in the canner to reduce cloudy jars.
Monitor your pressure carefully—don’t walk away!
Store your jars in a cool, dark pantry.
You can also store clarified butter without pressure canning for up to 3 years (but canning extends shelf life to 5+ years).
Ready to Try It?
Canning butter is easier than it sounds and incredibly rewarding. With food prices rising and uncertain times ahead, adding shelf-stable butter to your pantry is a smart move for any homesteader or preparedness-minded household.
So what are you waiting for? Grab your jars, your butter, and let’s get canning!
0 servings