Nutrition Facts
0 servings

If you've ever wondered whether you can water bath can kiwis, you're not alone—and you’re not crazy either! While most people reach for peaches, pears, or apples, there’s a small but passionate group of us who want to can kiwis. Unfortunately, resources are scarce. The Ball Blue Book doesn’t cover it, most County Extension offices don’t have guidance, and a quick online search turns up next to nothing. So, after a lot of research and a bit of trial and error, here's how I successfully water bath canned 18 pounds of fresh kiwi fruit—and ended up with 16 beautiful jars of tangy, tropical goodness.
Are Kiwis Safe to Water Bath Can?
The first step was researching the pH level of kiwi fruit. According to information I found through one California county and the National Kiwi Association, the pH of ripe kiwis ranges from 3.1 to 3.9. This puts them well within the safe range for water bath canning (generally pH 4.6 or lower). That was the green light I needed!
But remember: pH matters. Just like with mangoes—ripe ones can be safely water-bathed, but green mangoes cannot—kiwi's ripeness affects its acidity. Always double-check the pH of the fruit you’re working with.
Preparing the Kiwi for Canning
Here’s how I prepared my kiwi fruit:
Start with ripe fruit. I had 9 packages of kiwis, each 2 pounds, for a total of 18 pounds.
Peel the fruit. I found that using a thin spoon (not thick!) to scoop the flesh after cutting off the top and bottom worked best and reduced waste.
Whizz it up. I blended the peeled fruit into a puree. I saved a few cups of this puree for other recipes, like fruit sauces or smoothies.
")
Mixing with Orange Juice for a Tangy Twist
Instead of canning plain kiwi, I added unsweetened orange juice to complement the tart flavor. I used frozen orange juice concentrate (Great Value brand) and added the required water before blending it all together with the kiwi puree. The result? A sweet-tart blend with tropical vibes.
Canning Process (Hot Pack Method)
Here’s the full water bath canning process I used:
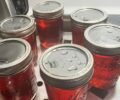
Heat the puree: Bring the kiwi-orange blend to a bubbling hot temperature.
Fill jars: Ladle the hot mixture into sterilized jars, leaving 1/4 inch headspace.
Wipe the rims, apply hot lids, and screw bands on finger-tight.
Water bath canning: Process the jars in boiling water for 20 minutes. Make sure the water covers the jars by at least 1 inch.
")
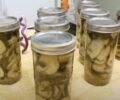
Cool and check: After processing, turn off the heat, remove the canner lid, and let the jars sit for 5 minutes before removing. Allow them to cool for 24 hours, then check seals and label your jars.
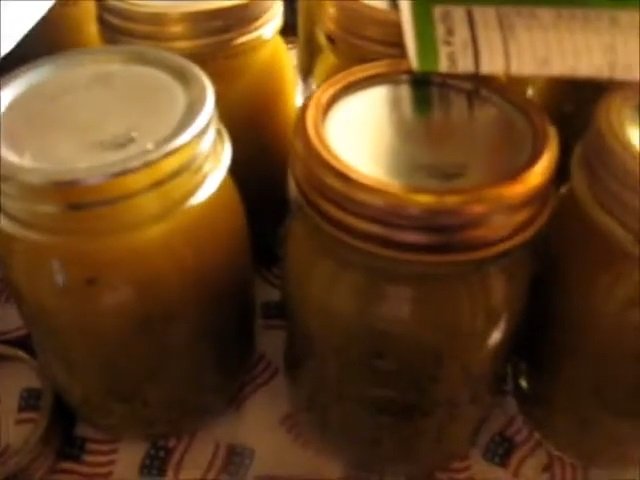
Final Yield and Storage
From my 18 pounds of kiwi, I ended up with two batches of eight jars—that’s 16 jars total. I labeled and dated each jar and stored them in my pantry after removing the rings and checking the seals.
")
And let me tell you, the flavor is incredible—a perfect balance of kiwi’s tartness and orange’s brightness. These jars are not only great for snacks but also perfect for toppings, smoothies, or even as a sauce base for desserts.
A Word of Caution for Home Canners
Just because a fruit seems similar doesn’t mean it’s safe to can the same way. Always check the pH level:
Kiwi (pH 3.1–3.9): ✅ Safe for water bath canning.
Ripe mango (pH 3.4–4.8): ✅ Safe.
Green mango (pH 5.8–6.0): ❌ Not safe for water bath, pressure can only.
When in doubt, consult resources like:
The National Center for Home Food Preservation
")
University of Wisconsin–Madison Extension
Your local County Extension Office (but don’t be surprised if they haven’t canned kiwis either!)
Final Thoughts
Water bath canning kiwis may not be conventional, but it’s absolutely doable—and delicious. With a little creativity and a lot of persistence, you can safely preserve kiwi and enjoy it all year long. Just follow proper canning procedures, respect acidity levels, and have fun experimenting.
")
If you've ever wondered whether you can water bath can kiwis, you're not alone—and you’re not crazy either! While most people reach for peaches, pears, or apples, there’s a small but passionate group of us who want to can kiwis. Unfortunately, resources are scarce. The Ball Blue Book doesn’t cover it, most County Extension offices don’t have guidance, and a quick online search turns up next to nothing. So, after a lot of research and a bit of trial and error, here's how I successfully water bath canned 18 pounds of fresh kiwi fruit—and ended up with 16 beautiful jars of tangy, tropical goodness.
Are Kiwis Safe to Water Bath Can?
The first step was researching the pH level of kiwi fruit. According to information I found through one California county and the National Kiwi Association, the pH of ripe kiwis ranges from 3.1 to 3.9. This puts them well within the safe range for water bath canning (generally pH 4.6 or lower). That was the green light I needed!
But remember: pH matters. Just like with mangoes—ripe ones can be safely water-bathed, but green mangoes cannot—kiwi's ripeness affects its acidity. Always double-check the pH of the fruit you’re working with.
Preparing the Kiwi for Canning
Here’s how I prepared my kiwi fruit:
Start with ripe fruit. I had 9 packages of kiwis, each 2 pounds, for a total of 18 pounds.
Peel the fruit. I found that using a thin spoon (not thick!) to scoop the flesh after cutting off the top and bottom worked best and reduced waste.
Whizz it up. I blended the peeled fruit into a puree. I saved a few cups of this puree for other recipes, like fruit sauces or smoothies.
Mixing with Orange Juice for a Tangy Twist
Instead of canning plain kiwi, I added unsweetened orange juice to complement the tart flavor. I used frozen orange juice concentrate (Great Value brand) and added the required water before blending it all together with the kiwi puree. The result? A sweet-tart blend with tropical vibes.
Canning Process (Hot Pack Method)
Here’s the full water bath canning process I used:
Heat the puree: Bring the kiwi-orange blend to a bubbling hot temperature.
Fill jars: Ladle the hot mixture into sterilized jars, leaving 1/4 inch headspace.
Wipe the rims, apply hot lids, and screw bands on finger-tight.
Water bath canning: Process the jars in boiling water for 20 minutes. Make sure the water covers the jars by at least 1 inch.
Cool and check: After processing, turn off the heat, remove the canner lid, and let the jars sit for 5 minutes before removing. Allow them to cool for 24 hours, then check seals and label your jars.
Final Yield and Storage
From my 18 pounds of kiwi, I ended up with two batches of eight jars—that’s 16 jars total. I labeled and dated each jar and stored them in my pantry after removing the rings and checking the seals.
And let me tell you, the flavor is incredible—a perfect balance of kiwi’s tartness and orange’s brightness. These jars are not only great for snacks but also perfect for toppings, smoothies, or even as a sauce base for desserts.
A Word of Caution for Home Canners
Just because a fruit seems similar doesn’t mean it’s safe to can the same way. Always check the pH level:
Kiwi (pH 3.1–3.9): ✅ Safe for water bath canning.
Ripe mango (pH 3.4–4.8): ✅ Safe.
Green mango (pH 5.8–6.0): ❌ Not safe for water bath, pressure can only.
When in doubt, consult resources like:
The National Center for Home Food Preservation
University of Wisconsin–Madison Extension
Your local County Extension Office (but don’t be surprised if they haven’t canned kiwis either!)
Final Thoughts
Water bath canning kiwis may not be conventional, but it’s absolutely doable—and delicious. With a little creativity and a lot of persistence, you can safely preserve kiwi and enjoy it all year long. Just follow proper canning procedures, respect acidity levels, and have fun experimenting.
0 servings