Nutrition Facts
0 servings

If you're looking for a simple, no-sugar way to preserve fresh blueberries, you’re in the right place! I’m Amanda from Freedom Acres, and today I’m sharing how I water bath can fresh blueberries using just clean water — no syrup, no added sugar, and no preservatives. Whether you're prepping for winter baking or just want to make the most of your seasonal fruit haul, this easy method keeps your berries shelf-stable and delicious.
Why Can Blueberries?
Summer is in full swing, and while the garden hasn’t exploded yet, fruit is coming in fast — especially blueberries and plums. When you have more berries than you can eat fresh, canning is a fantastic way to preserve their flavor and nutrients without needing freezer space.
Plus, canned blueberries are perfect for muffins, pies, or pancakes — no thawing required!
Tools You’ll Need:
Water bath canner
Pints jars (sterilized)
Stockpot with hot water (filtered or distilled)
Jar lifter, canning funnel, ladle
White vinegar (for wiping jar rims)
Fresh blueberries (cleaned and sorted)
A Note About Water Quality
Before we begin, here’s an important tip: don’t can with untreated city tap water. It may contain chlorine or fluoride that can affect your preserves’ taste and shelf life. I use water from my Berkey filter, but distilled water is a great alternative. If you’re on well water, you’re already ahead of the game!
Step-by-Step: How I Can Blueberries in Water
1. Prep Your Jars
Start by sterilizing your jars. I use pint-sized jars and set them on the countertop, ready to go. I also keep my water bath canner heating up while I work.
")
2. Heat the Blueberries
Fill a pot with fresh blueberries and bring them to a gentle boil — just enough to see them plump up. This takes about 30 seconds. As soon as they swell and the color deepens, they’re ready. Don’t overcook them or they’ll burst.
💡 Tip: Move fast during this step! Overcooked berries can get mushy. But don’t worry about a few that burst — especially if you're using them for baked goods later.
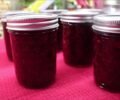
3. Fill the Jars
Use a ladle and funnel to fill your hot jars with the softened berries. Be careful not to overfill; leave about 1 inch of headspace. Gently de-bubble with a non-metallic utensil.
4. Add the Water
Here’s where some people will disagree with me, but I use the same hot water from the berry pot (as long as it’s still clean and not dark from burst berries). Pour it over the blueberries in each jar, again leaving 1 inch of headspace.
")
5. Wipe Rims and Add Lids
Dip a clean cloth or paper towel in white vinegar and wipe the rims of your jars. This ensures a good seal. Add your lids and rings, finger-tight.
6. Process in Water Bath
Place jars into the boiling water bath canner. Process for 15 minutes (adjust for altitude as needed) according to the National Center for Home Food Preservation.
7. Cool and Store
After processing, let your jars cool undisturbed for 12–24 hours. Remove the rings, check the seals, and wash the jars before labeling and storing them in your pantry.
")
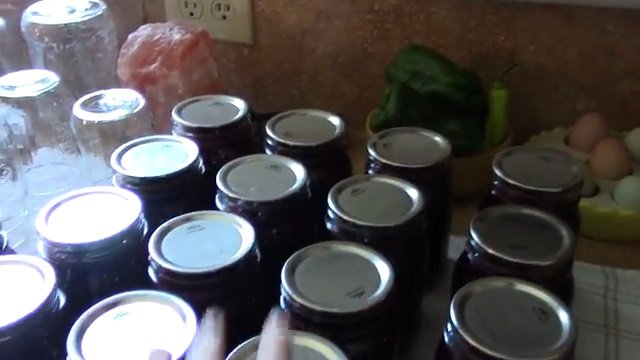
Final Tally
This batch yielded 17 pints of canned blueberries, plus 7 pints of plum jam on the side. All done in the middle of a typical homesteading day, with chicken stock going in the canner and garden chores waiting in the wings!
Quick Tips for Success
Use trusted sources: The National Center for Home Food Preservation is my go-to for reliable canning instructions.
No need for syrup: Unless you prefer a sweeter taste, canning in water preserves the natural flavor — and cuts down on sugar!
Multi-tasking is key: Don’t worry if your kitchen’s chaotic. Summertime canning is all about using what you have, when you have it.
Thanks for Stopping By!
Whether you're a seasoned canner or just getting started, I hope this guide helps you feel confident about preserving your summer blueberries. I appreciate you spending time with me here at Freedom Acres. If you enjoyed this post, leave a comment and let me know where you're tuning in from — it's always fun to hear from folks around the world.
Happy canning,
")
If you're looking for a simple, no-sugar way to preserve fresh blueberries, you’re in the right place! I’m Amanda from Freedom Acres, and today I’m sharing how I water bath can fresh blueberries using just clean water — no syrup, no added sugar, and no preservatives. Whether you're prepping for winter baking or just want to make the most of your seasonal fruit haul, this easy method keeps your berries shelf-stable and delicious.
Why Can Blueberries?
Summer is in full swing, and while the garden hasn’t exploded yet, fruit is coming in fast — especially blueberries and plums. When you have more berries than you can eat fresh, canning is a fantastic way to preserve their flavor and nutrients without needing freezer space.
Plus, canned blueberries are perfect for muffins, pies, or pancakes — no thawing required!
Tools You’ll Need:
Water bath canner
Pints jars (sterilized)
Stockpot with hot water (filtered or distilled)
Jar lifter, canning funnel, ladle
White vinegar (for wiping jar rims)
Fresh blueberries (cleaned and sorted)
A Note About Water Quality
Before we begin, here’s an important tip: don’t can with untreated city tap water. It may contain chlorine or fluoride that can affect your preserves’ taste and shelf life. I use water from my Berkey filter, but distilled water is a great alternative. If you’re on well water, you’re already ahead of the game!
Step-by-Step: How I Can Blueberries in Water
1. Prep Your Jars
Start by sterilizing your jars. I use pint-sized jars and set them on the countertop, ready to go. I also keep my water bath canner heating up while I work.
2. Heat the Blueberries
Fill a pot with fresh blueberries and bring them to a gentle boil — just enough to see them plump up. This takes about 30 seconds. As soon as they swell and the color deepens, they’re ready. Don’t overcook them or they’ll burst.
💡 Tip: Move fast during this step! Overcooked berries can get mushy. But don’t worry about a few that burst — especially if you're using them for baked goods later.
3. Fill the Jars
Use a ladle and funnel to fill your hot jars with the softened berries. Be careful not to overfill; leave about 1 inch of headspace. Gently de-bubble with a non-metallic utensil.
4. Add the Water
Here’s where some people will disagree with me, but I use the same hot water from the berry pot (as long as it’s still clean and not dark from burst berries). Pour it over the blueberries in each jar, again leaving 1 inch of headspace.
5. Wipe Rims and Add Lids
Dip a clean cloth or paper towel in white vinegar and wipe the rims of your jars. This ensures a good seal. Add your lids and rings, finger-tight.
6. Process in Water Bath
Place jars into the boiling water bath canner. Process for 15 minutes (adjust for altitude as needed) according to the National Center for Home Food Preservation.
7. Cool and Store
After processing, let your jars cool undisturbed for 12–24 hours. Remove the rings, check the seals, and wash the jars before labeling and storing them in your pantry.
Final Tally
This batch yielded 17 pints of canned blueberries, plus 7 pints of plum jam on the side. All done in the middle of a typical homesteading day, with chicken stock going in the canner and garden chores waiting in the wings!
Quick Tips for Success
Use trusted sources: The National Center for Home Food Preservation is my go-to for reliable canning instructions.
No need for syrup: Unless you prefer a sweeter taste, canning in water preserves the natural flavor — and cuts down on sugar!
Multi-tasking is key: Don’t worry if your kitchen’s chaotic. Summertime canning is all about using what you have, when you have it.
Thanks for Stopping By!
Whether you're a seasoned canner or just getting started, I hope this guide helps you feel confident about preserving your summer blueberries. I appreciate you spending time with me here at Freedom Acres. If you enjoyed this post, leave a comment and let me know where you're tuning in from — it's always fun to hear from folks around the world.
Happy canning,
0 servings