
Nutrition Facts
0 servings

Y’all, it’s harvest season—and that means it’s time to put up food for the winter. If you’ve been blessed with a backyard bounty like we have, it’s time to break out the jars, roll up your sleeves, and start preserving.
From canning apple pie filling to freezing garden-fresh tomatoes and beans, this post walks you through how we’re turning today’s haul into shelf-stable and freezer-ready goodness—plus, we’re making a cayenne pepper heat salve too!
🍏 A Basket Overflowing With Goodness
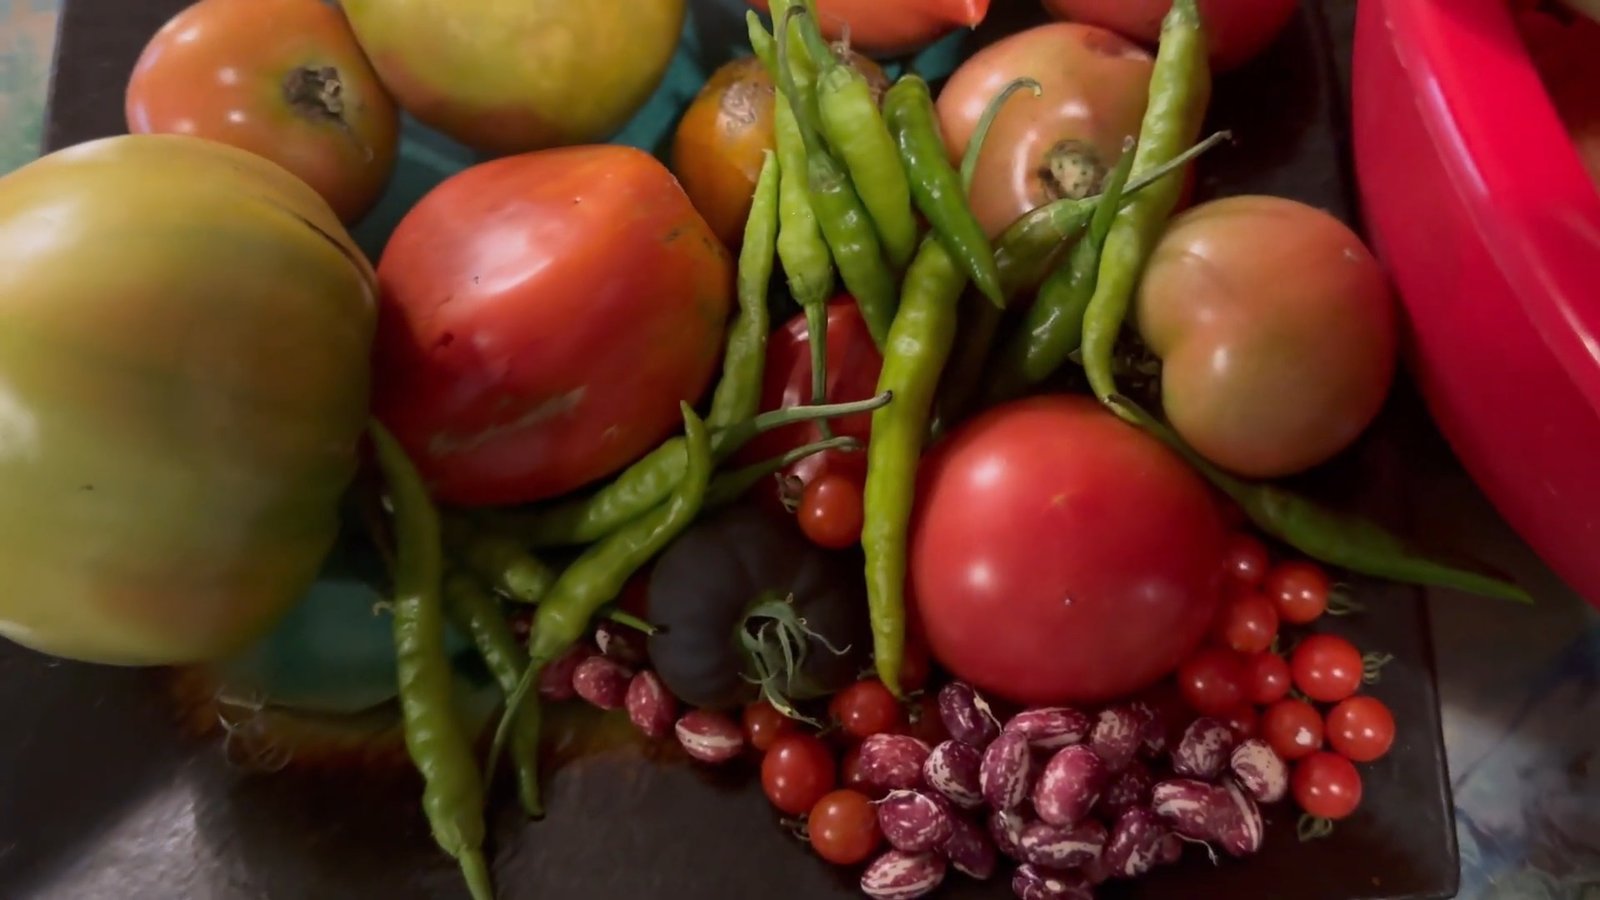
Today’s harvest warmed my soul—apples, tomatoes, green beans, and cayenne peppers straight from the garden. My basket was overflowing so much, I had to grab another one!
Here’s what we’re doing with each harvest:
Green Beans: Washed, cut, and frozen for hearty winter stews.
Tomatoes: Washed and frozen for sauces and soups later.
Cayenne Peppers: Will be turned into a homemade heat salve for muscle pain.
Apples: The star of the show—peeled, cored, and canned into homemade apple pie filling.
Even the dogs were eyeing the apples—so you know it’s good!
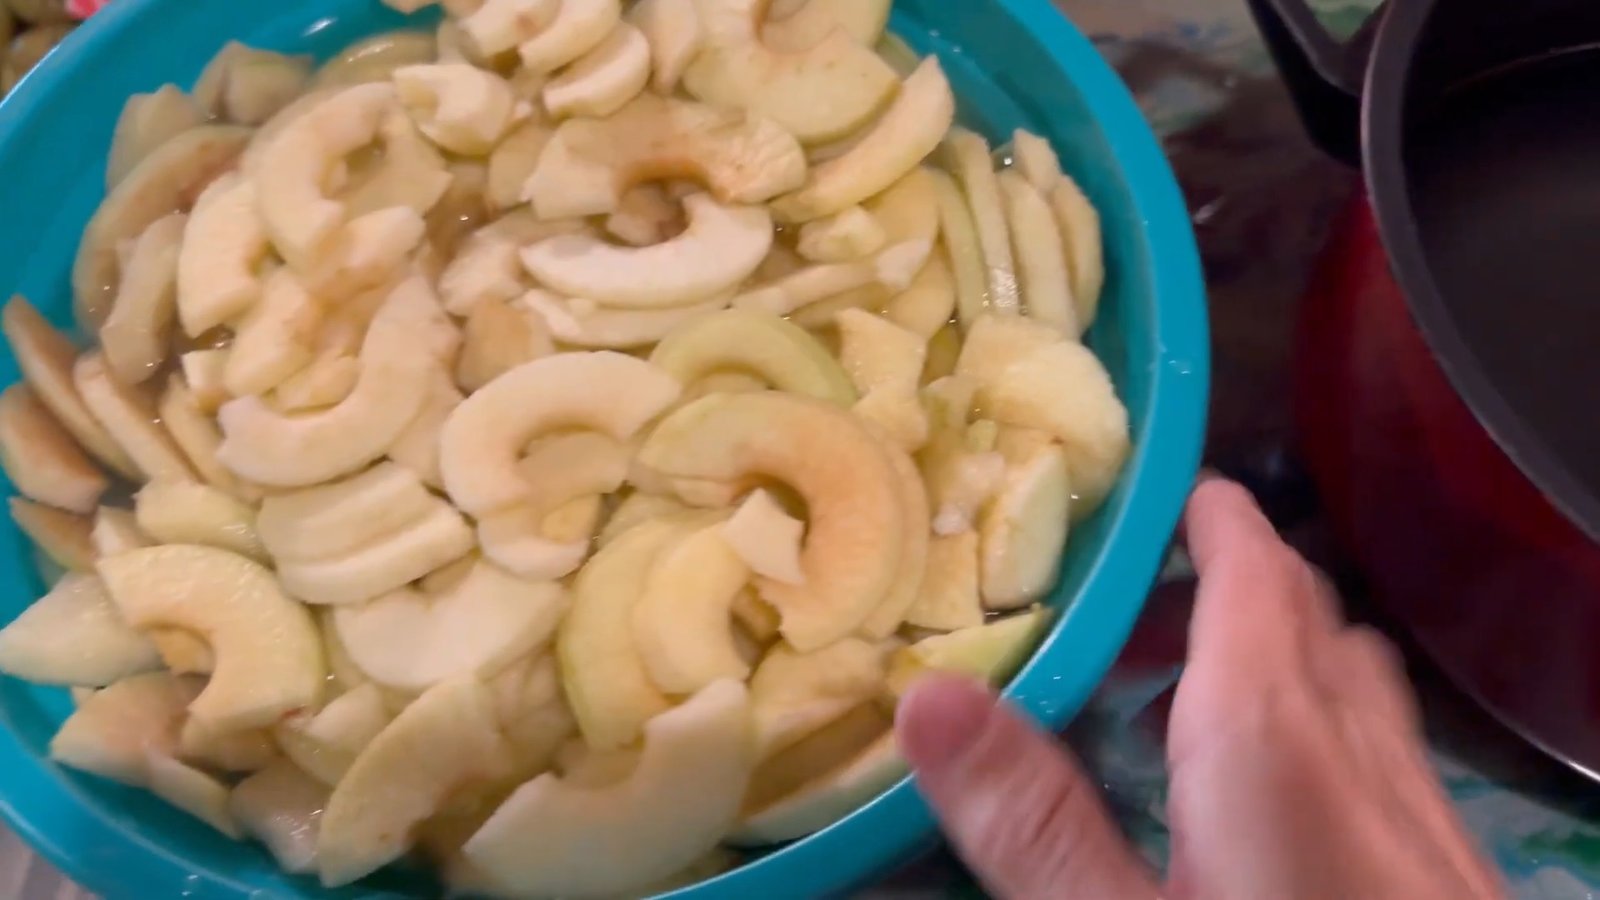
🍎 How to Prep Apples for Canning Apple Pie Filling
We started with the first-picked apples and saved the rest for the next day. To keep things moving, we used a game-changing apple peeler-corer-slicer. If you don’t have one, trust me—get one. It makes quick work of a big bowl of apples.
")
Apple Prep Tips:
Peel, core, and slice apples (¼" thickness is ideal).
Soak slices in lemon water to prevent browning.
Save peels and cores for compost or homemade apple cider vinegar.
🧂 Ingredients for Homemade Apple Pie Filling (Canning-Safe)
We’re using Clear Jel, a canning-safe thickener that holds up to high heat and storage—don’t use cornstarch!
Dry Mix:
4½ cups sugar
1 cup Clear Jel
¼ tsp ground nutmeg
2 tsp ground cinnamon
")
Wet Mix:
10 cups water (you can sub a few cups with apple juice for added flavor)
¼ to ⅓ cup bottled lemon juice
Pro Tip: Mix your dry ingredients before adding to water to avoid lumps. Clear Jel flies everywhere, so mix gently or wear a mask!
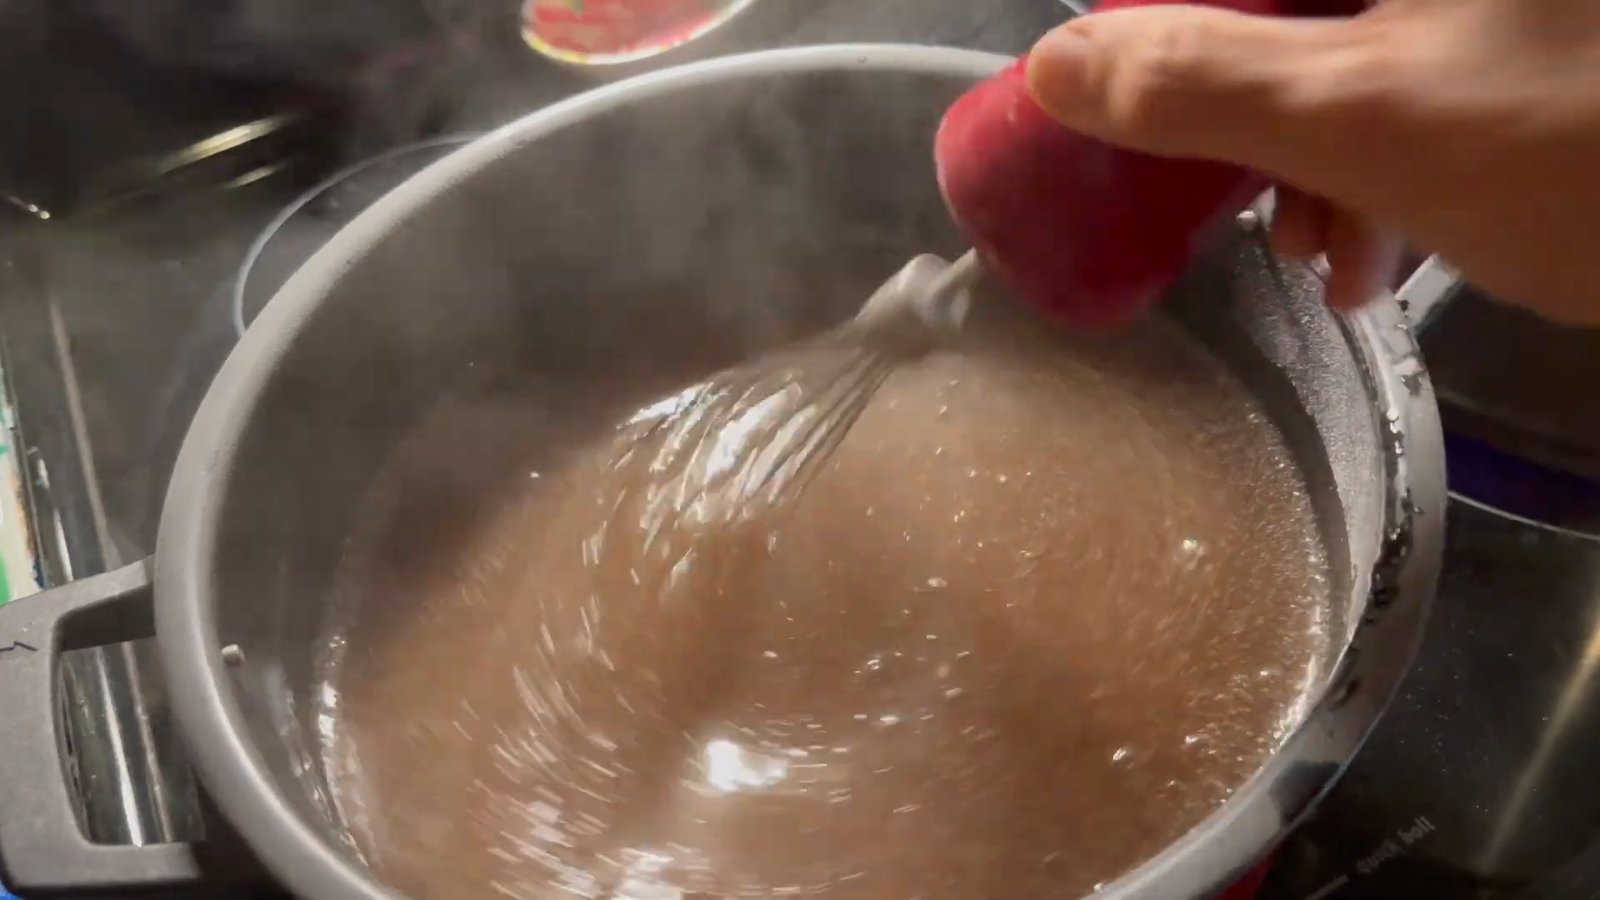
🍯 Cooking the Pie Filling Base
In a large pot, mix the dry ingredients with water.
Stir constantly over medium heat until it thickens.
Once bubbly and thick (think pie-filling texture), stir in the lemon juice.
Turn off the heat—it’s time to jar it up!
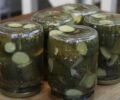
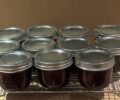
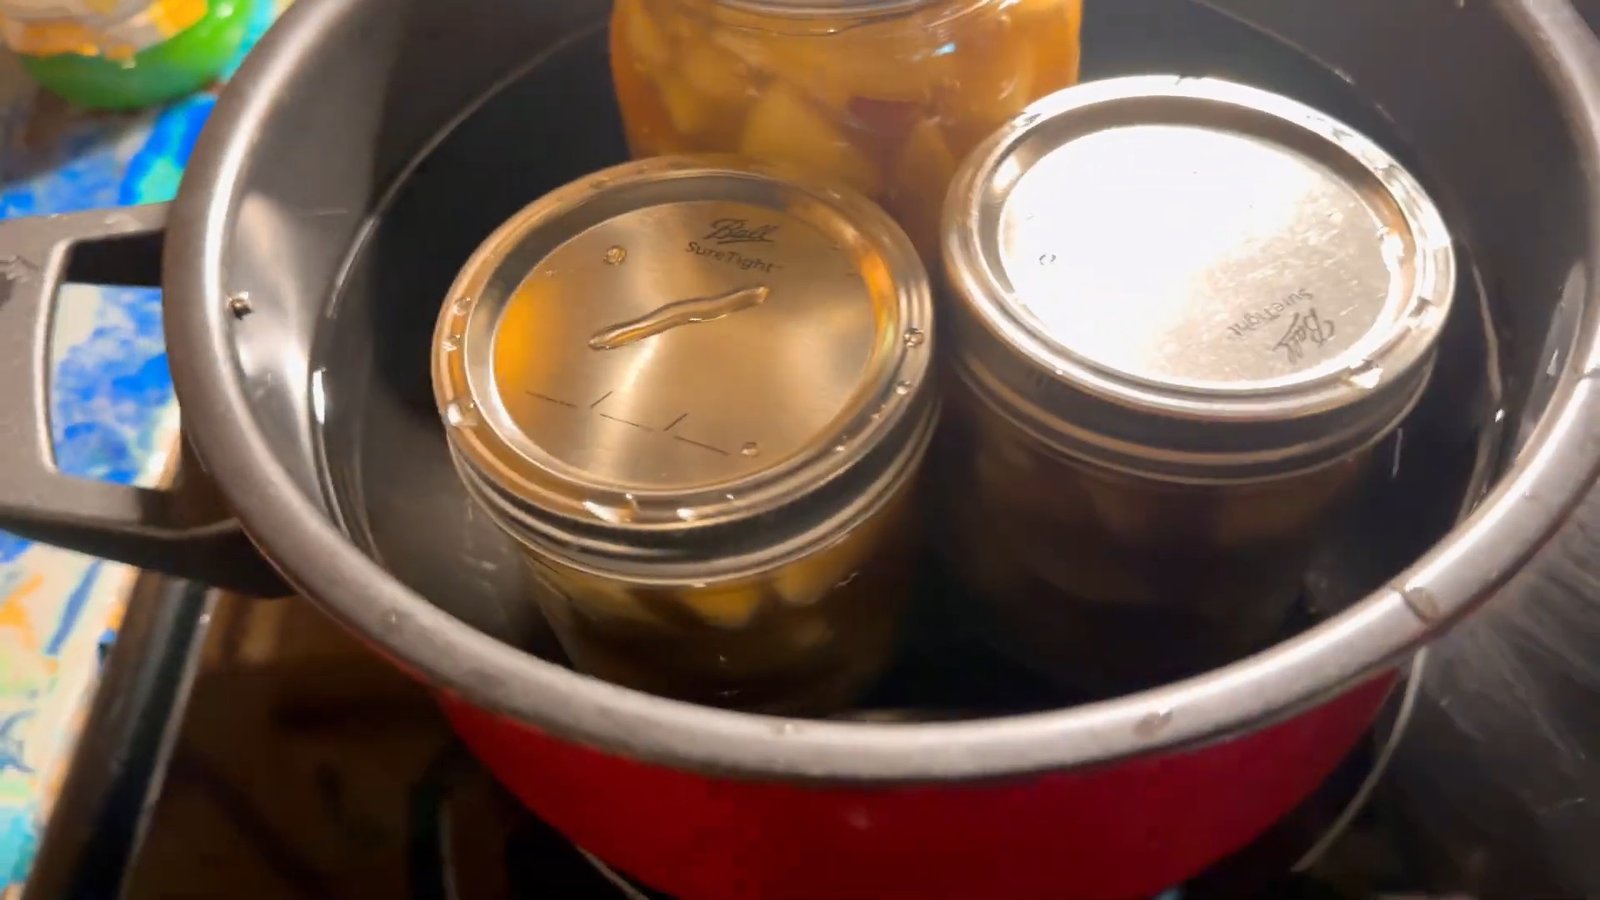
🫙 Jarring and Water Bath Canning Apple Pie Filling
Step-by-Step Canning:
Pack sliced apples tightly into sterilized jars, leaving 1 inch of headspace.
Pour hot syrup over apples, removing air bubbles as you go.
Wipe jar rims clean, add lids and rings (or Weck clips).
Process jars in a boiling water bath for 30–35 minutes.
Let jars cool undisturbed. Listen for the “ping” of success!
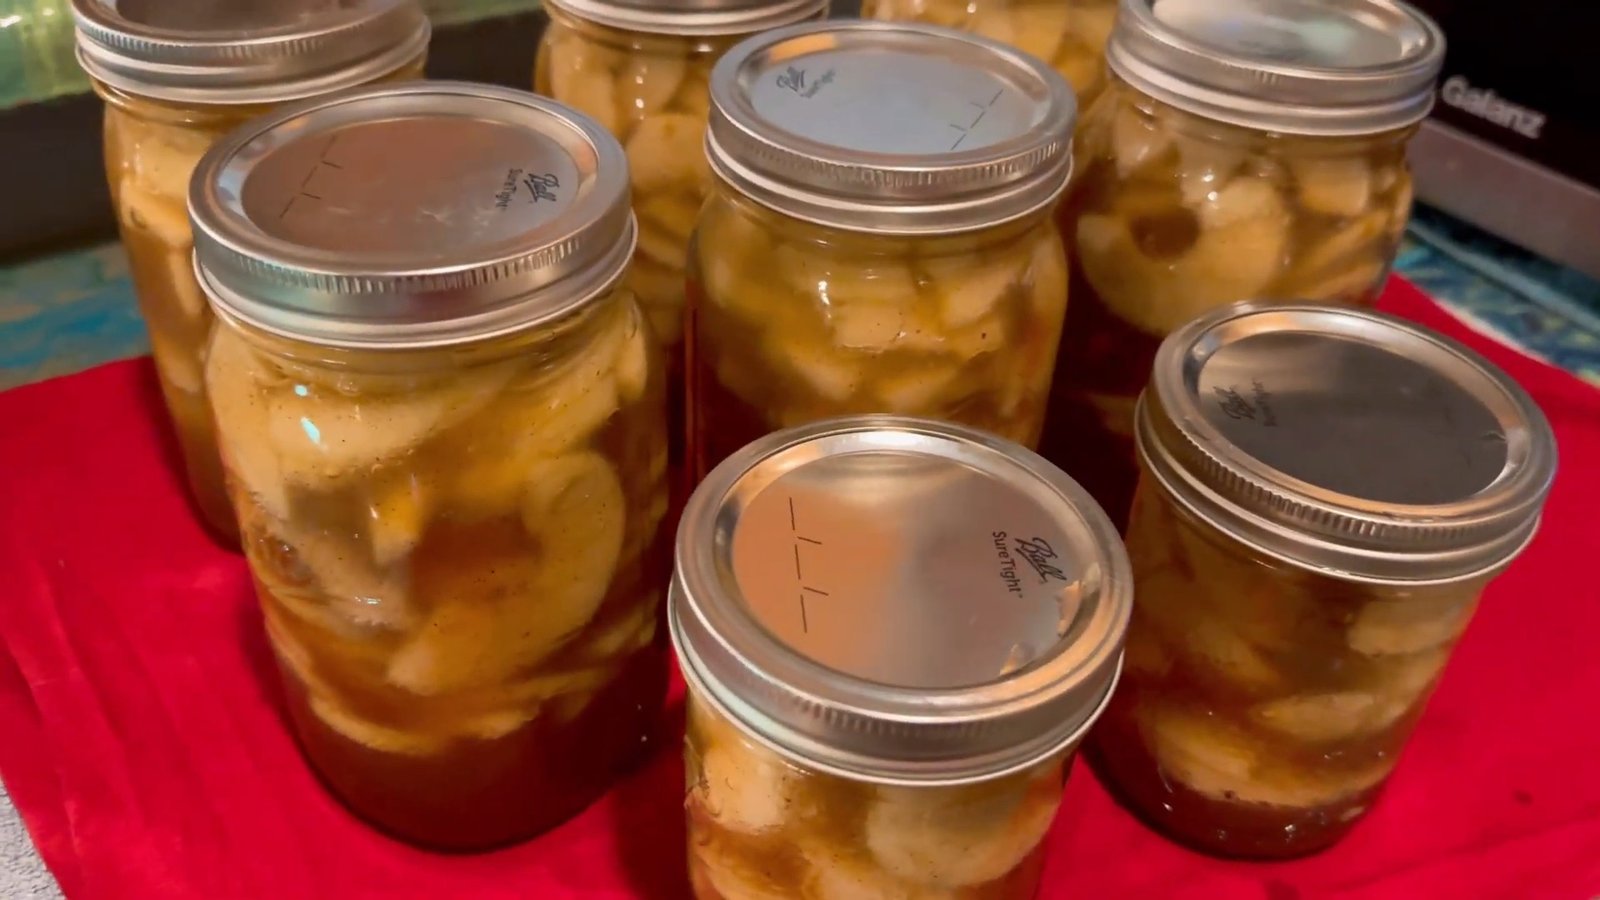
We ended up with seven beautiful quarts of apple pie filling—and there’s still plenty more apples on the trees for future batches.
🥧 Why You Should Plant Apple Trees Now
Y’all, if you don’t already have fruit trees, plant one today. We planted ours just four years ago. The first two years? Nothing. Last year? Two apples. But this year? A full harvest. It’s so worth it.
🌳 "The best time to plant a tree was 10 years ago. The second-best time is now." 🌳
")
These jars of apple pie filling will be perfect for holidays, cozy winter nights, or surprise desserts for the kids. And the satisfaction of opening a jar you made yourself? Priceless.
🎯 Final Thoughts: Stocking the Pantry With Love
Preserving your harvest doesn’t have to be fancy. It’s about taking what you have, doing what you can, and setting your family up for good, nourishing food all year long.
Whether you’re freezing beans, simmering down tomatoes, or turning apples into pie filling, this kind of work connects you to your food, your land, and your future.
")
Thanks for hanging out with me in the kitchen today. Happy canning, and happy homesteading!
")
Y’all, it’s harvest season—and that means it’s time to put up food for the winter. If you’ve been blessed with a backyard bounty like we have, it’s time to break out the jars, roll up your sleeves, and start preserving.
From canning apple pie filling to freezing garden-fresh tomatoes and beans, this post walks you through how we’re turning today’s haul into shelf-stable and freezer-ready goodness—plus, we’re making a cayenne pepper heat salve too!
🍏 A Basket Overflowing With Goodness
Today’s harvest warmed my soul—apples, tomatoes, green beans, and cayenne peppers straight from the garden. My basket was overflowing so much, I had to grab another one!
Here’s what we’re doing with each harvest:
Green Beans: Washed, cut, and frozen for hearty winter stews.
Tomatoes: Washed and frozen for sauces and soups later.
Cayenne Peppers: Will be turned into a homemade heat salve for muscle pain.
Apples: The star of the show—peeled, cored, and canned into homemade apple pie filling.
Even the dogs were eyeing the apples—so you know it’s good!
🍎 How to Prep Apples for Canning Apple Pie Filling
We started with the first-picked apples and saved the rest for the next day. To keep things moving, we used a game-changing apple peeler-corer-slicer. If you don’t have one, trust me—get one. It makes quick work of a big bowl of apples.
Apple Prep Tips:
Peel, core, and slice apples (¼" thickness is ideal).
Soak slices in lemon water to prevent browning.
Save peels and cores for compost or homemade apple cider vinegar.
🧂 Ingredients for Homemade Apple Pie Filling (Canning-Safe)
We’re using Clear Jel, a canning-safe thickener that holds up to high heat and storage—don’t use cornstarch!
Dry Mix:
4½ cups sugar
1 cup Clear Jel
¼ tsp ground nutmeg
2 tsp ground cinnamon
Wet Mix:
10 cups water (you can sub a few cups with apple juice for added flavor)
¼ to ⅓ cup bottled lemon juice
Pro Tip: Mix your dry ingredients before adding to water to avoid lumps. Clear Jel flies everywhere, so mix gently or wear a mask!
🍯 Cooking the Pie Filling Base
In a large pot, mix the dry ingredients with water.
Stir constantly over medium heat until it thickens.
Once bubbly and thick (think pie-filling texture), stir in the lemon juice.
Turn off the heat—it’s time to jar it up!
🫙 Jarring and Water Bath Canning Apple Pie Filling
Step-by-Step Canning:
Pack sliced apples tightly into sterilized jars, leaving 1 inch of headspace.
Pour hot syrup over apples, removing air bubbles as you go.
Wipe jar rims clean, add lids and rings (or Weck clips).
Process jars in a boiling water bath for 30–35 minutes.
Let jars cool undisturbed. Listen for the “ping” of success!
We ended up with seven beautiful quarts of apple pie filling—and there’s still plenty more apples on the trees for future batches.
🥧 Why You Should Plant Apple Trees Now
Y’all, if you don’t already have fruit trees, plant one today. We planted ours just four years ago. The first two years? Nothing. Last year? Two apples. But this year? A full harvest. It’s so worth it.
🌳 "The best time to plant a tree was 10 years ago. The second-best time is now." 🌳
These jars of apple pie filling will be perfect for holidays, cozy winter nights, or surprise desserts for the kids. And the satisfaction of opening a jar you made yourself? Priceless.
🎯 Final Thoughts: Stocking the Pantry With Love
Preserving your harvest doesn’t have to be fancy. It’s about taking what you have, doing what you can, and setting your family up for good, nourishing food all year long.
Whether you’re freezing beans, simmering down tomatoes, or turning apples into pie filling, this kind of work connects you to your food, your land, and your future.
Thanks for hanging out with me in the kitchen today. Happy canning, and happy homesteading!
0 servings