Nutrition Facts
0 servings


If you've found a great deal on fresh pineapples, there's no better way to preserve them than by canning. In this guide, we're walking you through how to make and can your own crushed pineapple using simple tools and ingredients. Whether you're stocking your pantry or preparing for price increases later in the year, home-canned pineapple is a delicious, economical option.
Why Can Pineapple Now?
Pineapples were recently on sale for $1.49 each at Aldi—a great deal for size #6 pineapples. While many home canners wait for the 99-cent sales, prices are trending upward due to inflation and renewed travel demand for tropical fruit. Preserving pineapple now can save you money in the months ahead, especially around the holidays when demand peaks.
Supplies You'll Need
Fresh pineapples (about 6 for 6–9 pints)
A food processor
A cutting board and knife
Saucepan or stockpot
Ball FreshTech or a water bath canner
Jars, lids, and rings
Vinegar and paper towels
Funnel and chopstick (for debubbling)
Step 1: Prepare the Pineapple
Start by slicing off the top and bottom of the pineapple. Carefully cut down the sides to remove the skin, preserving as much of the fruit as possible. Don't worry if you miss a few "eyes"—you’ll clean those up later.
To remove the core, cut the pineapple in half lengthwise and then slice down both sides of the core. Save the core pieces to flavor your syrup later.
Next, chop the pineapple into chunks and pulse in a food processor to make crushed pineapple. Be sure not to over-process; you want texture, not puree.
Step 2: Simmer the Pineapple
Transfer the crushed pineapple to a saucepan and heat it over medium heat. Simmer for 10 minutes until warmed through, stirring occasionally. Meanwhile, boil the saved cores in water to create a lightly flavored syrup for future canning projects.
Step 3: Sterilize Your Jars
While your pineapple simmers, sterilize your jars, lids, and rings. This step is essential for safe, shelf-stable canning. You can place them in boiling water or use a dishwasher cycle with a high-heat dry setting. Also, soak your funnel and debubbler tools in hot water to reduce contamination risk.
Step 4: Fill the Jars
Using a funnel, ladle the hot crushed pineapple into jars, leaving a ½-inch headspace. Debubble each jar with a chopstick to remove trapped air, and top off with more pineapple if needed.
")
Wipe each jar rim with a paper towel dipped in vinegar. This removes sticky residue that could prevent a proper seal.
Step 5: Seal and Process
Place sterilized lids and rings onto the jars. Tighten the rings to fingertip tight—not too tight, or pressure won't escape during processing.
Process the jars in a water bath canner or Ball FreshTech canner for 15 minutes at a full rolling boil.
Step 6: Check Your Seals
After processing, turn off the heat and carefully remove the jars. Let them cool for five minutes before placing them on a towel to rest. Allow the jars to cool overnight.
Check for vacuum seals by pressing the center of the lid. If it doesn’t flex, it’s sealed. If a lid pops, refrigerate and use that jar first.
What to Do if a Jar Fails
")
Sometimes, even experienced canners encounter a jar that fails to seal. In this session, one jar's ring had a slight gouge, likely causing it to blow during processing. Always inspect your rings for damage before using them.
")
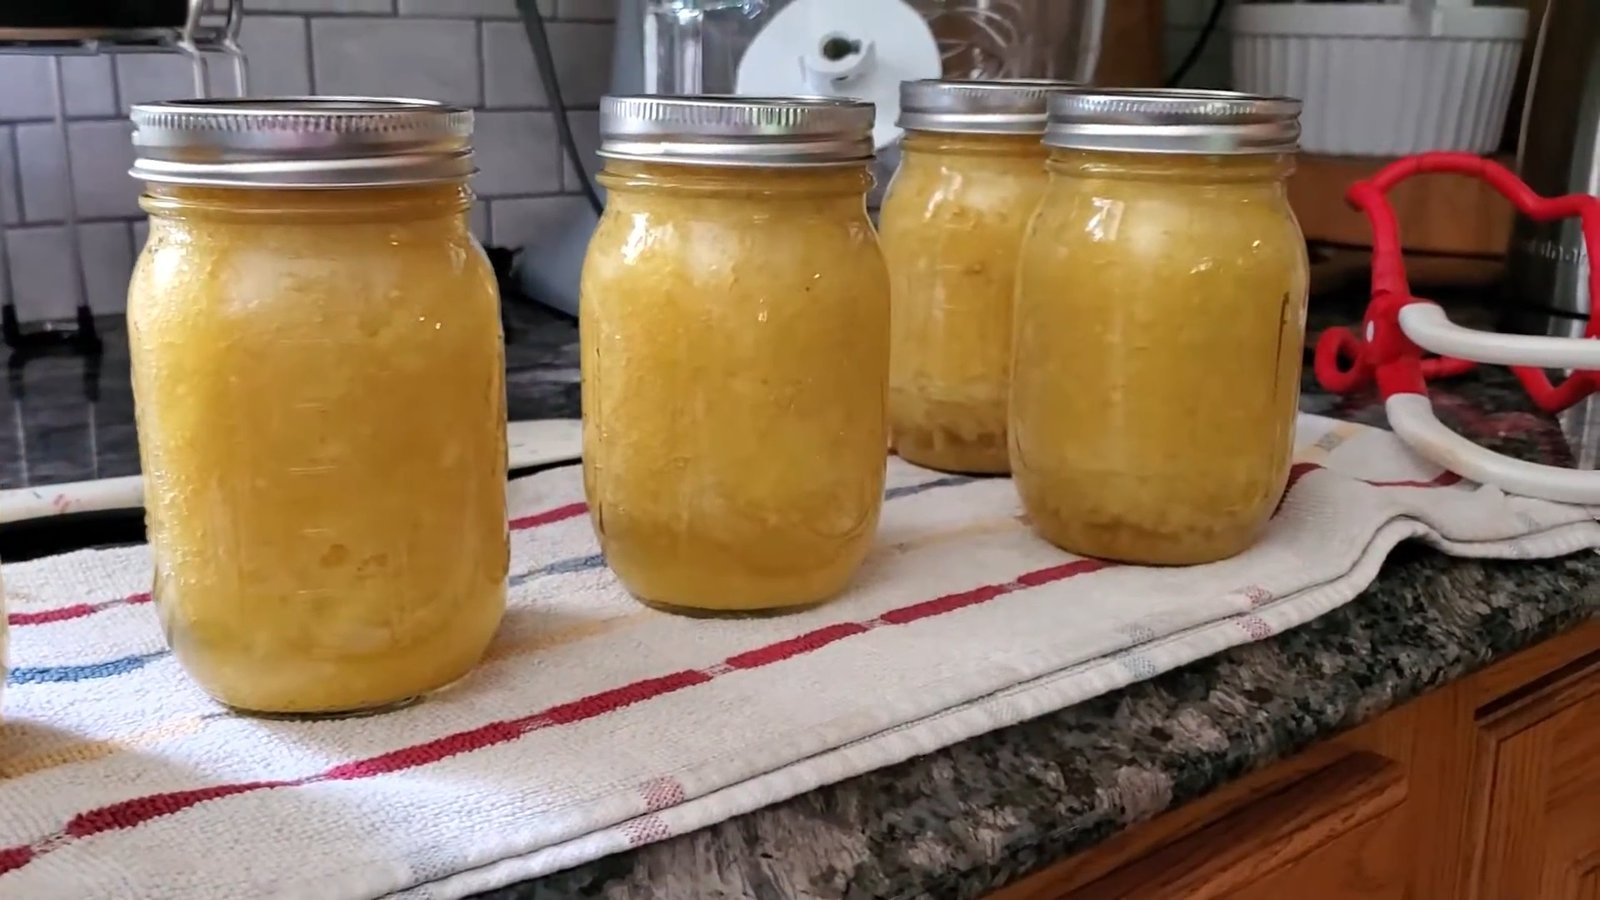
Final Yield
In this batch, six pints of crushed pineapple were successfully canned—short of the expected nine pints due to using a smaller saucepan. With a bit more pineapple and the right-sized pot, it's easy to reach your canning goals.
Conclusion
")
Canning crushed pineapple is a rewarding way to stretch your grocery budget and enjoy tropical flavor year-round. Even when the price isn’t rock-bottom, strategic purchasing and preservation can pay off in the long run. So grab those fresh pineapples, dust off your canner, and stock your shelves with home-canned goodness!
")
If you've found a great deal on fresh pineapples, there's no better way to preserve them than by canning. In this guide, we're walking you through how to make and can your own crushed pineapple using simple tools and ingredients. Whether you're stocking your pantry or preparing for price increases later in the year, home-canned pineapple is a delicious, economical option.
Why Can Pineapple Now?
Pineapples were recently on sale for $1.49 each at Aldi—a great deal for size #6 pineapples. While many home canners wait for the 99-cent sales, prices are trending upward due to inflation and renewed travel demand for tropical fruit. Preserving pineapple now can save you money in the months ahead, especially around the holidays when demand peaks.
Supplies You'll Need
Fresh pineapples (about 6 for 6–9 pints)
A food processor
A cutting board and knife
Saucepan or stockpot
Ball FreshTech or a water bath canner
Jars, lids, and rings
Vinegar and paper towels
Funnel and chopstick (for debubbling)
Step 1: Prepare the Pineapple
Start by slicing off the top and bottom of the pineapple. Carefully cut down the sides to remove the skin, preserving as much of the fruit as possible. Don't worry if you miss a few "eyes"—you’ll clean those up later.
To remove the core, cut the pineapple in half lengthwise and then slice down both sides of the core. Save the core pieces to flavor your syrup later.
Next, chop the pineapple into chunks and pulse in a food processor to make crushed pineapple. Be sure not to over-process; you want texture, not puree.
Step 2: Simmer the Pineapple
Transfer the crushed pineapple to a saucepan and heat it over medium heat. Simmer for 10 minutes until warmed through, stirring occasionally. Meanwhile, boil the saved cores in water to create a lightly flavored syrup for future canning projects.
Step 3: Sterilize Your Jars
While your pineapple simmers, sterilize your jars, lids, and rings. This step is essential for safe, shelf-stable canning. You can place them in boiling water or use a dishwasher cycle with a high-heat dry setting. Also, soak your funnel and debubbler tools in hot water to reduce contamination risk.
Step 4: Fill the Jars
Using a funnel, ladle the hot crushed pineapple into jars, leaving a ½-inch headspace. Debubble each jar with a chopstick to remove trapped air, and top off with more pineapple if needed.
Wipe each jar rim with a paper towel dipped in vinegar. This removes sticky residue that could prevent a proper seal.
Step 5: Seal and Process
Place sterilized lids and rings onto the jars. Tighten the rings to fingertip tight—not too tight, or pressure won't escape during processing.
Process the jars in a water bath canner or Ball FreshTech canner for 15 minutes at a full rolling boil.
Step 6: Check Your Seals
After processing, turn off the heat and carefully remove the jars. Let them cool for five minutes before placing them on a towel to rest. Allow the jars to cool overnight.
Check for vacuum seals by pressing the center of the lid. If it doesn’t flex, it’s sealed. If a lid pops, refrigerate and use that jar first.
What to Do if a Jar Fails
Sometimes, even experienced canners encounter a jar that fails to seal. In this session, one jar's ring had a slight gouge, likely causing it to blow during processing. Always inspect your rings for damage before using them.
Final Yield
In this batch, six pints of crushed pineapple were successfully canned—short of the expected nine pints due to using a smaller saucepan. With a bit more pineapple and the right-sized pot, it's easy to reach your canning goals.
Conclusion
Canning crushed pineapple is a rewarding way to stretch your grocery budget and enjoy tropical flavor year-round. Even when the price isn’t rock-bottom, strategic purchasing and preservation can pay off in the long run. So grab those fresh pineapples, dust off your canner, and stock your shelves with home-canned goodness!
0 servings