
Nutrition Facts
0 servings


Hey everyone! Jenny from Homestead Corner here. Today, I’m excited to share a simple and practical way to preserve a big harvest of garlic by canning garlic at home. If you’ve ever found yourself with more garlic than you can use before it spoils, this method is a perfect solution. While this technique is not USDA approved, it’s a method that has worked wonderfully for my family — always research and do what you feel is safe for your household!
Why Can Garlic?
A dear friend gifted me a beautiful basket full of fresh garlic, and there was no way we could use it all before it went bad. Instead of letting it go to waste, I decided to can a portion and dehydrate the rest (if you're interested, check out my video on how to dehydrate garlic for garlic powder). Canning helps keep the garlic fresh and ready to use for months, making it a great pantry staple.
Supplies You’ll Need
Fresh garlic
White vinegar
8-ounce canning jars (or pints if you prefer)
Lids and rings
Water bath canner
Pot for boiling vinegar
Jar lifter
Debubbler or a clean knife
Optional: Crushed red pepper, dill, or pickling spices for added flavor
")
Step-by-Step Canning Instructions
1. Prepare Your Garlic
Start by peeling your garlic. I ended up with three quarts of peeled cloves – yes, it takes a while, but it’s worth it!
")
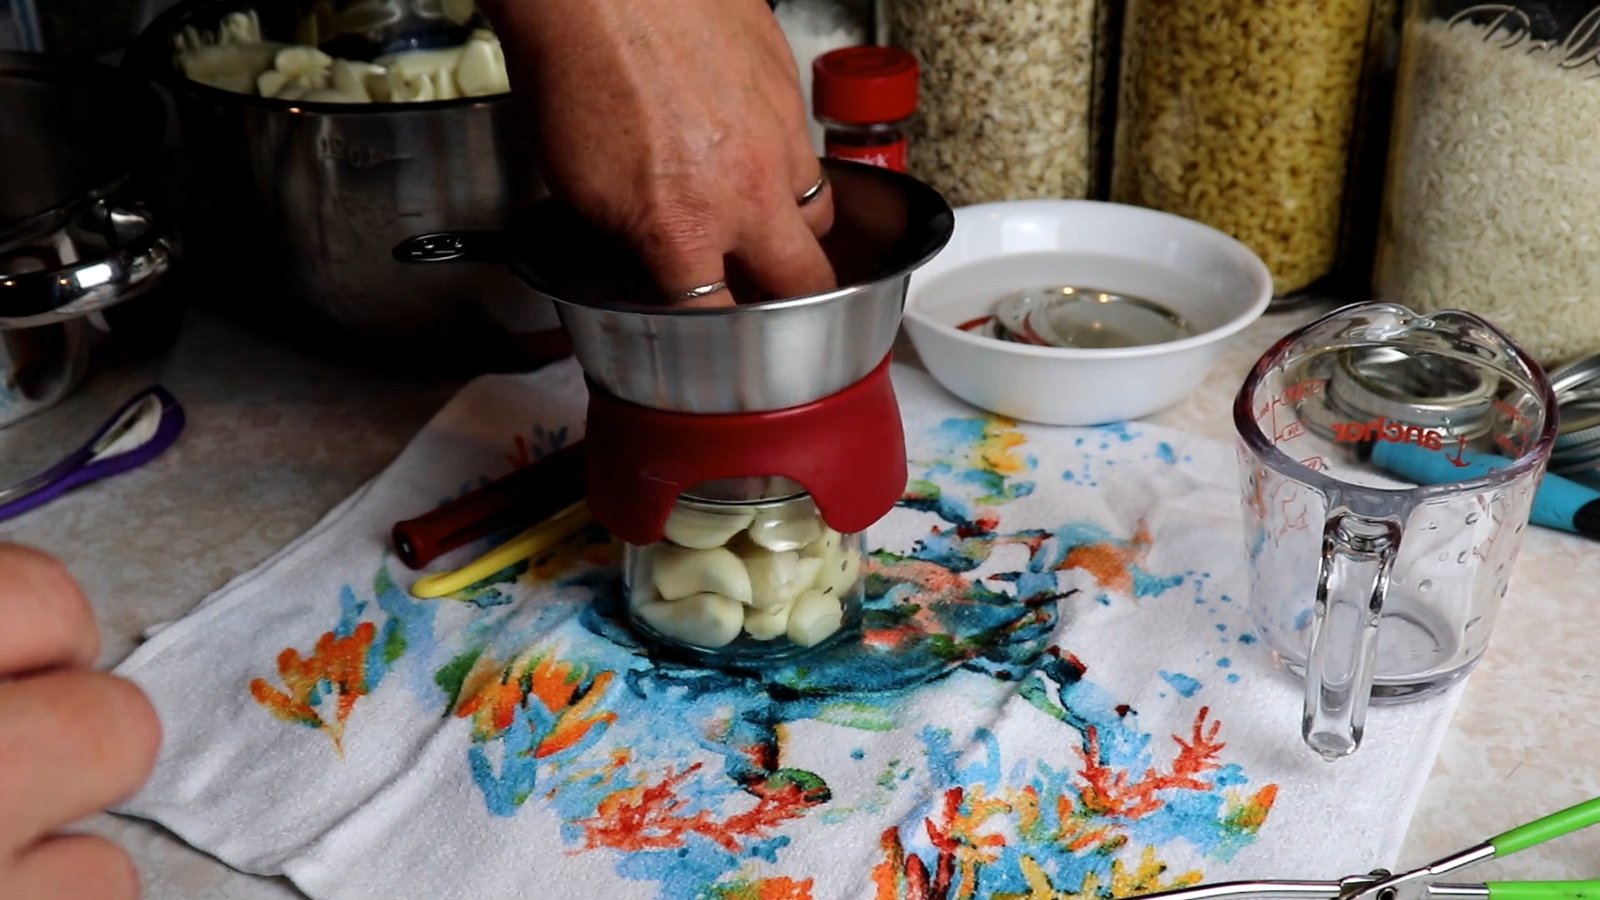
2. Sterilize Your Jars
Place your canning jars into your water bath canner. Bring the water to a boil and let the jars sterilize for 10 minutes.
3. Heat Your Vinegar
In a separate pot, bring a couple of quarts of white vinegar to a boil. This will be the liquid you’ll use to preserve the garlic.
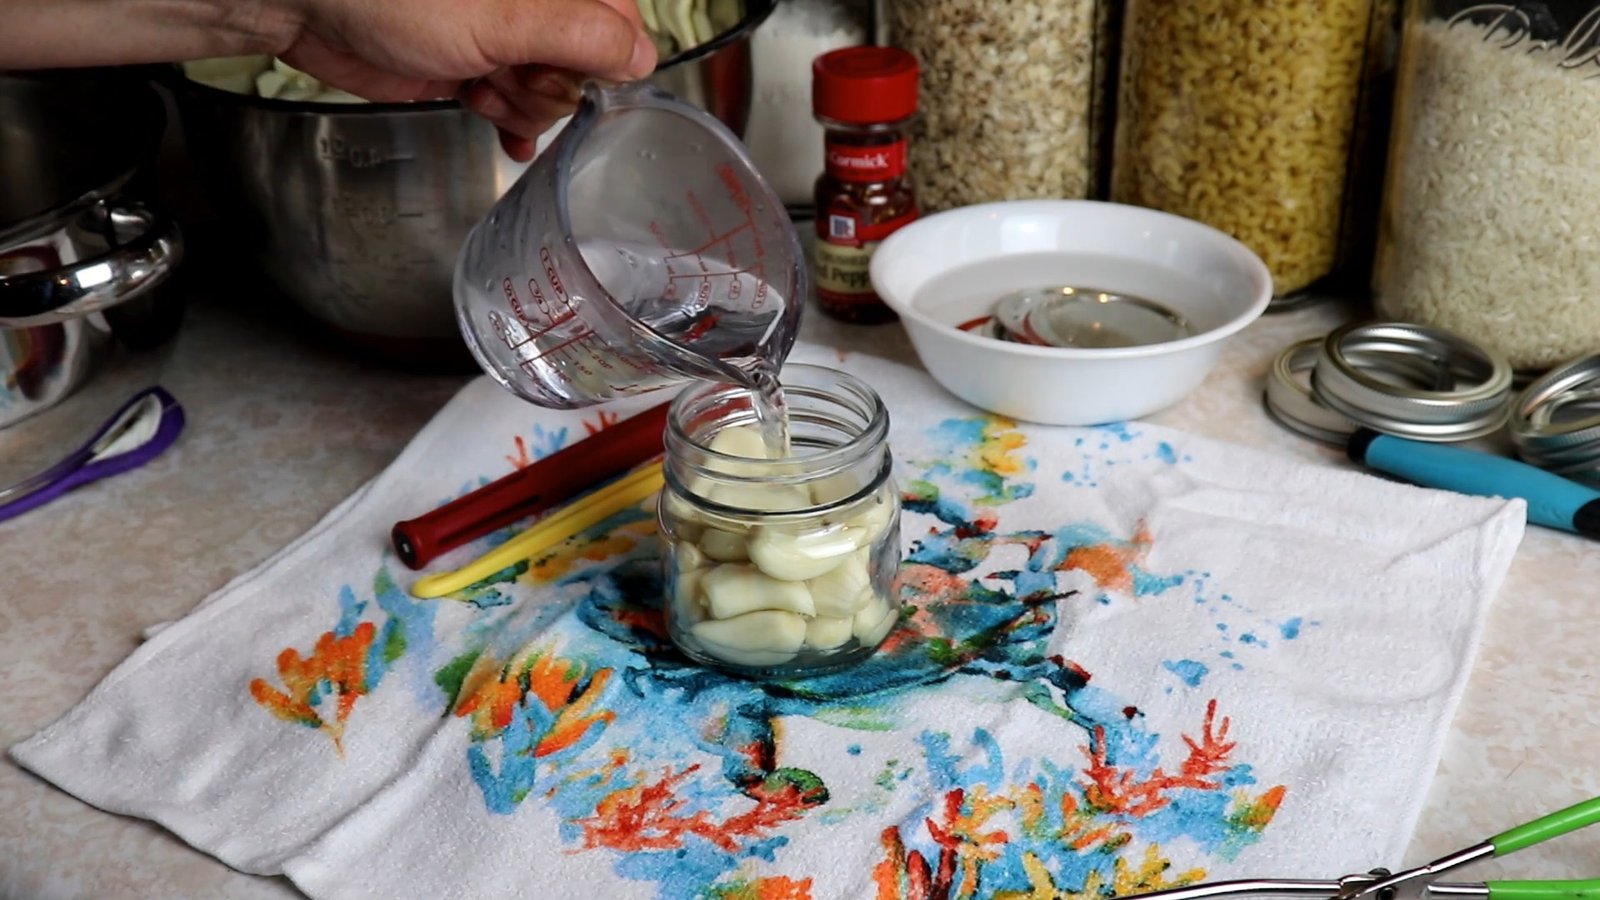
4. Fill the Jars
One jar at a time:
Remove a hot jar from the canner.
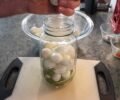
Pack it with peeled garlic, leaving about 1 inch of headspace.
Pour the boiling vinegar over the garlic, making sure it’s completely covered.
De-bubble the jar using a clean knife or debubbler tool.
Wipe the rim clean to ensure a good seal.
Add a warm lid and screw on the ring finger-tight.
Optional Flavor Add-ins:
For a spicy twist, you can add a tiny bit of crushed red pepper to some jars. Dill or pickling spices also make delicious variations!
5. Process the Jars
Once all your jars are filled and sealed, return them to the canner. Bring it back up to a boil and process the jars for 10 minutes.
")
6. Cool and Store
After processing, remove the jars and let them cool completely. You’ll notice that some garlic cloves may turn a little blue — don't worry! This color change is completely normal and doesn’t affect the safety or flavor. Garlic can sometimes turn blue when exposed to acidic environments like vinegar, but it remains delicious and safe to eat.
Final Results
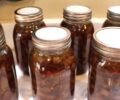
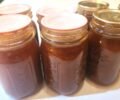
I ended up with 15 beautiful 8-ounce jars of canned garlic ready for the pantry. They look amazing, and I’m thrilled to have this garlic on the shelf for future meals.
")
Hey everyone! Jenny from Homestead Corner here. Today, I’m excited to share a simple and practical way to preserve a big harvest of garlic by canning garlic at home. If you’ve ever found yourself with more garlic than you can use before it spoils, this method is a perfect solution. While this technique is not USDA approved, it’s a method that has worked wonderfully for my family — always research and do what you feel is safe for your household!
Why Can Garlic?
A dear friend gifted me a beautiful basket full of fresh garlic, and there was no way we could use it all before it went bad. Instead of letting it go to waste, I decided to can a portion and dehydrate the rest (if you're interested, check out my video on how to dehydrate garlic for garlic powder). Canning helps keep the garlic fresh and ready to use for months, making it a great pantry staple.
Supplies You’ll Need
Fresh garlic
White vinegar
8-ounce canning jars (or pints if you prefer)
Lids and rings
Water bath canner
Pot for boiling vinegar
Jar lifter
Debubbler or a clean knife
Optional: Crushed red pepper, dill, or pickling spices for added flavor
Step-by-Step Canning Instructions
1. Prepare Your Garlic
Start by peeling your garlic. I ended up with three quarts of peeled cloves – yes, it takes a while, but it’s worth it!
2. Sterilize Your Jars
Place your canning jars into your water bath canner. Bring the water to a boil and let the jars sterilize for 10 minutes.
3. Heat Your Vinegar
In a separate pot, bring a couple of quarts of white vinegar to a boil. This will be the liquid you’ll use to preserve the garlic.
4. Fill the Jars
One jar at a time:
Remove a hot jar from the canner.
Pack it with peeled garlic, leaving about 1 inch of headspace.
Pour the boiling vinegar over the garlic, making sure it’s completely covered.
De-bubble the jar using a clean knife or debubbler tool.
Wipe the rim clean to ensure a good seal.
Add a warm lid and screw on the ring finger-tight.
Optional Flavor Add-ins:
For a spicy twist, you can add a tiny bit of crushed red pepper to some jars. Dill or pickling spices also make delicious variations!
5. Process the Jars
Once all your jars are filled and sealed, return them to the canner. Bring it back up to a boil and process the jars for 10 minutes.
6. Cool and Store
After processing, remove the jars and let them cool completely. You’ll notice that some garlic cloves may turn a little blue — don't worry! This color change is completely normal and doesn’t affect the safety or flavor. Garlic can sometimes turn blue when exposed to acidic environments like vinegar, but it remains delicious and safe to eat.
Final Results
I ended up with 15 beautiful 8-ounce jars of canned garlic ready for the pantry. They look amazing, and I’m thrilled to have this garlic on the shelf for future meals.
0 servings