Nutrition Facts
0 servings


Welcome back to the homestead! Today, we're diving into a delicious and practical way to preserve flavor and nutrition—canning ham bone broth. If you've got leftover ham bones, don’t toss them! With a little time and the right tools, you can turn them into a rich, nourishing broth that’s shelf-stable and ready to use any time.
In this post, I’ll walk you through how I made and pressure canned my homemade ham bone broth, including prep tips, canning safety guidelines, and processing times. Plus, I’ll introduce you to a new YouTube friend who just launched her channel!
Starting the Ham Bone Broth
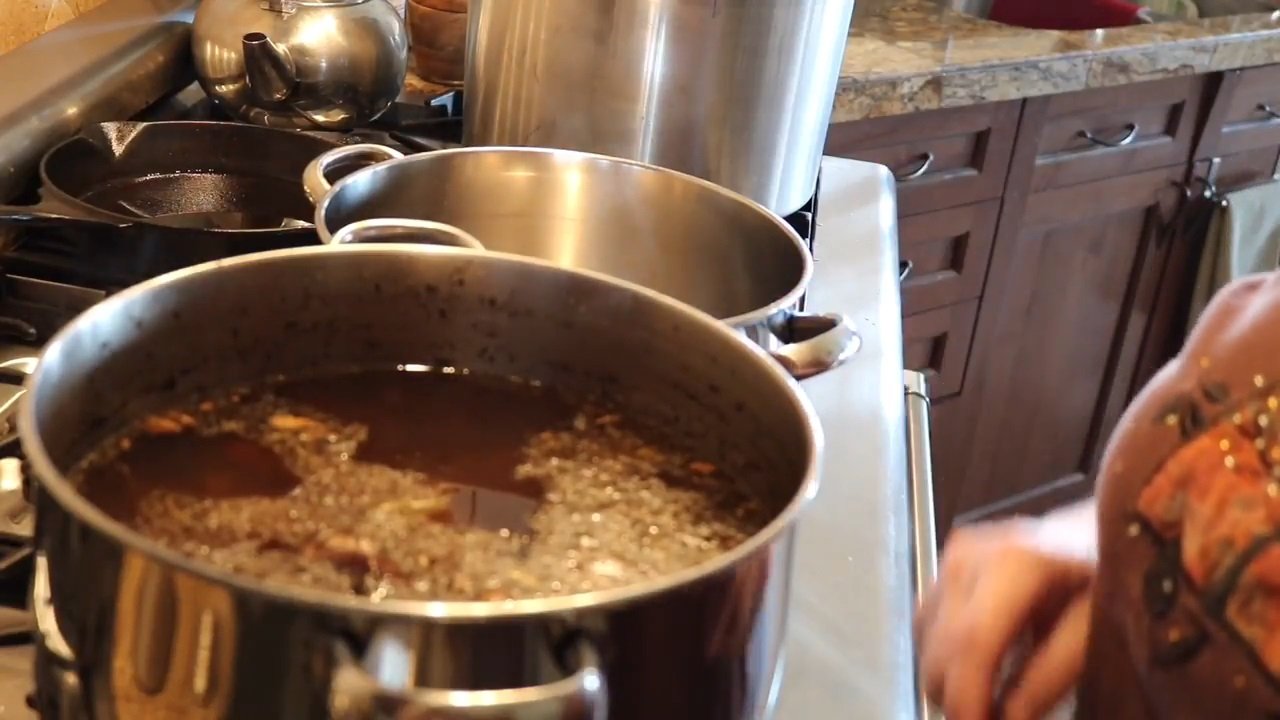
Yesterday, I began simmering a large pot of ham bone broth—it’s been going for nearly 24 hours on very low heat. I packed it with goodness: onions, onion skins, herbs, and of course, a meaty ham bone that’s now falling apart from all the slow-cooked flavor.
The key to great broth is time. This long simmer pulls out all the nutrients and collagen from the bones, resulting in a deeply flavorful and nutritious base for soups, stews, gravies, and more.
Straining the Broth
Once the broth has simmered long enough, it’s time to strain it:
Remove large solids like bones, onion skins, and herbs with a slotted spoon.
Strain the broth through a fine mesh strainer lined with cheesecloth to catch the finer bits.
")
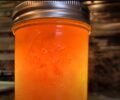
The result? A beautifully clear and golden ham broth—perfect for pressure canning.
Prepping for Pressure Canning
Here are the basic steps I followed to safely pressure can ham bone broth:
I used pint jars (processing time is 20 minutes for pints, 25 minutes for quarts).
I preheated my water in the pressure canner while I checked my jars for cracks or chips.
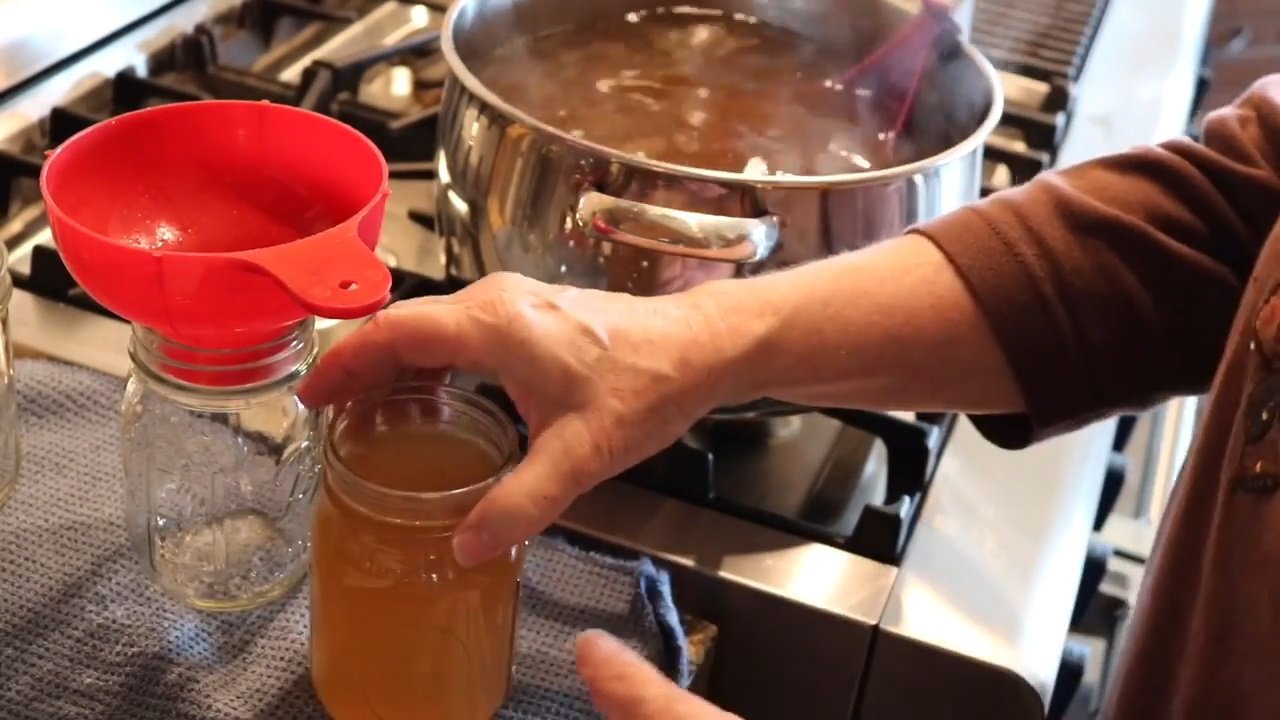
Using a funnel, I filled each jar, leaving one inch of headspace.
I wiped the rims clean, placed warm lids on each jar, and secured the bands.
🛑 Important: Meat broths must be pressure canned—never water bath can meat or bone broth, as it won’t reach safe temperatures to eliminate bacteria like botulism.
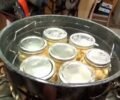
Pressure Canning Time and Pressure
I process my pints for 20 minutes in a pressure canner.
My altitude requires 13 pounds of pressure if using a dial gauge.
I use an All-American canner with a weighted gauge, so I go with 15 pounds of pressure.
Once the processing time is complete, I let the pressure release naturally (no quick-release!). Then I remove the weight and wait 5 more minutes before opening the lid, and another 5 minutes before removing the jars to prevent siphoning.
The Final Result
And here they are—14 beautiful pints of golden, homemade ham bone broth. One jar was slightly under-filled, but the rest came out perfect. I set them on a tea towel to cool overnight.
Tomorrow, I’ll:
Wipe the jars clean
Label them with the date
Store them in my pantry for future use
")
This broth is packed with flavor and is a great way to stretch your resources and reduce waste—homesteading at its best!
A Special Shoutout 🎉
Before we wrap up, I want to give a big THANK YOU to my sweet subscriber Laurie from Whippoorwill Holler. She surprised me with the most beautiful set of bamboo spoons—almost too pretty to use! Laurie just started her own YouTube channel and released her first video. If you're looking for more homesteading inspiration, go show her some support and encouragement. I’ve linked her channel below!
Final Thoughts
Canning ham bone broth is simple, satisfying, and a great way to stock your pantry with homemade goodness. Whether you're prepping for winter, avoiding food waste, or just love having ready-made broth on hand, this project is worth your time.
")
Welcome back to the homestead! Today, we're diving into a delicious and practical way to preserve flavor and nutrition—canning ham bone broth. If you've got leftover ham bones, don’t toss them! With a little time and the right tools, you can turn them into a rich, nourishing broth that’s shelf-stable and ready to use any time.
In this post, I’ll walk you through how I made and pressure canned my homemade ham bone broth, including prep tips, canning safety guidelines, and processing times. Plus, I’ll introduce you to a new YouTube friend who just launched her channel!
Starting the Ham Bone Broth
Yesterday, I began simmering a large pot of ham bone broth—it’s been going for nearly 24 hours on very low heat. I packed it with goodness: onions, onion skins, herbs, and of course, a meaty ham bone that’s now falling apart from all the slow-cooked flavor.
The key to great broth is time. This long simmer pulls out all the nutrients and collagen from the bones, resulting in a deeply flavorful and nutritious base for soups, stews, gravies, and more.
Straining the Broth
Once the broth has simmered long enough, it’s time to strain it:
Remove large solids like bones, onion skins, and herbs with a slotted spoon.
Strain the broth through a fine mesh strainer lined with cheesecloth to catch the finer bits.
The result? A beautifully clear and golden ham broth—perfect for pressure canning.
Prepping for Pressure Canning
Here are the basic steps I followed to safely pressure can ham bone broth:
I used pint jars (processing time is 20 minutes for pints, 25 minutes for quarts).
I preheated my water in the pressure canner while I checked my jars for cracks or chips.
Using a funnel, I filled each jar, leaving one inch of headspace.
I wiped the rims clean, placed warm lids on each jar, and secured the bands.
🛑 Important: Meat broths must be pressure canned—never water bath can meat or bone broth, as it won’t reach safe temperatures to eliminate bacteria like botulism.
Pressure Canning Time and Pressure
I process my pints for 20 minutes in a pressure canner.
My altitude requires 13 pounds of pressure if using a dial gauge.
I use an All-American canner with a weighted gauge, so I go with 15 pounds of pressure.
Once the processing time is complete, I let the pressure release naturally (no quick-release!). Then I remove the weight and wait 5 more minutes before opening the lid, and another 5 minutes before removing the jars to prevent siphoning.
The Final Result
And here they are—14 beautiful pints of golden, homemade ham bone broth. One jar was slightly under-filled, but the rest came out perfect. I set them on a tea towel to cool overnight.
Tomorrow, I’ll:
Wipe the jars clean
Label them with the date
Store them in my pantry for future use
This broth is packed with flavor and is a great way to stretch your resources and reduce waste—homesteading at its best!
A Special Shoutout 🎉
Before we wrap up, I want to give a big THANK YOU to my sweet subscriber Laurie from Whippoorwill Holler. She surprised me with the most beautiful set of bamboo spoons—almost too pretty to use! Laurie just started her own YouTube channel and released her first video. If you're looking for more homesteading inspiration, go show her some support and encouragement. I’ve linked her channel below!
Final Thoughts
Canning ham bone broth is simple, satisfying, and a great way to stock your pantry with homemade goodness. Whether you're prepping for winter, avoiding food waste, or just love having ready-made broth on hand, this project is worth your time.
0 servings