Nutrition Facts
0 servings


Welcome to Rose Red Homestead! As the crisp September air rolls in, it’s officially apple season—a favorite time of year for homesteaders and canners alike. While this year's crop from our own trees was a total loss due to coddling moths, we were lucky to receive a generous box of homegrown Granny Smith apples from a kind neighbor. And that means one thing: it’s time to make and can homemade apple pie filling.
In this guide, we’ll walk you through the entire process, from prepping the apples to water bath canning, using Clear Jel for a shelf-stable, thick, and delicious apple pie filling you can enjoy all season long.
🍏 Apple Season Setback and Silver Lining
Bad news: Our homegrown apples were devastated by worms—multiple per apple, sadly.
Good news: Thanks to our thoughtful neighbor, we’ve got plenty of beautiful Granny Smith apples to preserve.
")
With these apples, we’re going to create apple pie filling perfect for water bath canning. We’ll also share tips on how to save your peels and cores for jelly and the best tools for prepping your apples quickly.
🛠️ Essential Tools for Making Apple Pie Filling
Before diving in, gather the following:
Apple peeler-corer-slicer: Speeds up prep time by peeling, coring, and slicing apples to a consistent ¼ inch thickness—perfect for a well-blended apple pie texture.
Large stainless steel pot (16 qt): Ideal for preparing the filling.
Wide-mouth canning jars (Weck jars used in this tutorial): Makes for easy filling and beautiful presentation.
Water bath canner: Required for safe canning.
Clear Jel (modified corn starch): The only safe thickening agent approved for canning pie fillings.
")
🍎 How to Prepare Apples for Canning
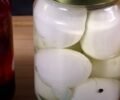
Wash and peel apples. Use the apple peeler-corer-slicer to quickly process each one. Remove any worm-damaged sections and discard them.
Soak slices in lemon water to prevent browning.
Blanch apple slices for 1 minute in boiling water. This step removes excess air and precooks them slightly, ensuring even texture post-canning.
🧂 Making the Apple Pie Filling with Clear Jel
Ingredients:
5½ cups sugar
1½ cups Clear Jel
4 tsp pumpkin pie spice (or your favorite apple pie blend)
7½ cups apple juice (or a blend of juice and water)
¾ cup bottled lemon juice
Instructions:
Mix sugar, Clear Jel, and spices in a bowl.
Add the mixture to the apple juice in a large pot and stir constantly.
Heat to a slow boil, stirring until the mixture thickens (use a flat-bottom spatula to avoid scorching).
Add lemon juice and boil for one minute more.
")
Stir in the blanched apple slices and remove from heat.
🫙 Filling and Processing the Jars
Ladle the hot filling into warm, sterilized jars. Leave at least 1 inch of headspace to prevent boil-over.
Attach lids and clips (if using Weck jars) or lids and rings (if using traditional jars).
")
Process in a water bath canner for 35 minutes, making sure water covers jars by at least 1 inch.
Turn off heat and let jars sit in hot water for 10–20 minutes to reduce siphoning.
Remove jars and let them cool. Check seals after 12–24 hours.
🥧 Tips for Using Canned Apple Pie Filling
When baking, add a few pats of butter on top of the filling before adding the crust for extra flavor.
This filling is perfect not just for pies, but also for tarts, hand pies, and even apple crisp.
")
🍂 Final Thoughts: Preparing for the Holidays
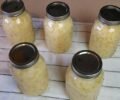
With five liters of apple pie filling canned and ready, we’re feeling a step ahead for the upcoming holiday season. Whether you're an experienced canner or just starting out, this method using Clear Jel creates a safe, shelf-stable apple pie filling with a texture and flavor that shines.
Happy canning—and may your holidays be filled with the sweet, spiced aroma of homemade apple pie!
")
Welcome to Rose Red Homestead! As the crisp September air rolls in, it’s officially apple season—a favorite time of year for homesteaders and canners alike. While this year's crop from our own trees was a total loss due to coddling moths, we were lucky to receive a generous box of homegrown Granny Smith apples from a kind neighbor. And that means one thing: it’s time to make and can homemade apple pie filling.
In this guide, we’ll walk you through the entire process, from prepping the apples to water bath canning, using Clear Jel for a shelf-stable, thick, and delicious apple pie filling you can enjoy all season long.
🍏 Apple Season Setback and Silver Lining
Bad news: Our homegrown apples were devastated by worms—multiple per apple, sadly.
Good news: Thanks to our thoughtful neighbor, we’ve got plenty of beautiful Granny Smith apples to preserve.
With these apples, we’re going to create apple pie filling perfect for water bath canning. We’ll also share tips on how to save your peels and cores for jelly and the best tools for prepping your apples quickly.
🛠️ Essential Tools for Making Apple Pie Filling
Before diving in, gather the following:
Apple peeler-corer-slicer: Speeds up prep time by peeling, coring, and slicing apples to a consistent ¼ inch thickness—perfect for a well-blended apple pie texture.
Large stainless steel pot (16 qt): Ideal for preparing the filling.
Wide-mouth canning jars (Weck jars used in this tutorial): Makes for easy filling and beautiful presentation.
Water bath canner: Required for safe canning.
Clear Jel (modified corn starch): The only safe thickening agent approved for canning pie fillings.
🍎 How to Prepare Apples for Canning
Wash and peel apples. Use the apple peeler-corer-slicer to quickly process each one. Remove any worm-damaged sections and discard them.
Soak slices in lemon water to prevent browning.
Blanch apple slices for 1 minute in boiling water. This step removes excess air and precooks them slightly, ensuring even texture post-canning.
🧂 Making the Apple Pie Filling with Clear Jel
Ingredients:
5½ cups sugar
1½ cups Clear Jel
4 tsp pumpkin pie spice (or your favorite apple pie blend)
7½ cups apple juice (or a blend of juice and water)
¾ cup bottled lemon juice
Instructions:
Mix sugar, Clear Jel, and spices in a bowl.
Add the mixture to the apple juice in a large pot and stir constantly.
Heat to a slow boil, stirring until the mixture thickens (use a flat-bottom spatula to avoid scorching).
Add lemon juice and boil for one minute more.
Stir in the blanched apple slices and remove from heat.
🫙 Filling and Processing the Jars
Ladle the hot filling into warm, sterilized jars. Leave at least 1 inch of headspace to prevent boil-over.
Attach lids and clips (if using Weck jars) or lids and rings (if using traditional jars).
Process in a water bath canner for 35 minutes, making sure water covers jars by at least 1 inch.
Turn off heat and let jars sit in hot water for 10–20 minutes to reduce siphoning.
Remove jars and let them cool. Check seals after 12–24 hours.
🥧 Tips for Using Canned Apple Pie Filling
When baking, add a few pats of butter on top of the filling before adding the crust for extra flavor.
This filling is perfect not just for pies, but also for tarts, hand pies, and even apple crisp.
🍂 Final Thoughts: Preparing for the Holidays
With five liters of apple pie filling canned and ready, we’re feeling a step ahead for the upcoming holiday season. Whether you're an experienced canner or just starting out, this method using Clear Jel creates a safe, shelf-stable apple pie filling with a texture and flavor that shines.
Happy canning—and may your holidays be filled with the sweet, spiced aroma of homemade apple pie!
0 servings