Canning is a fantastic way to preserve seasonal vegetables while enhancing their flavors with delicious brines and spices. Today, we’re diving into canning Mexican pickled vegetables, a vibrant mix of jalapeños, sweet onions, carrots, and garlic, all infused with a bold and tangy brine. Follow this guide to create a flavorful condiment perfect for snacking or serving alongside your favorite meals.
Ingredients for Mexican Pickled Vegetables
For this recipe, you’ll need:
6 cups white vinegar
4.5 cups water
¼ cup sugar
2 heaping tablespoons kosher or pickling salt
½ tablespoon black pepper
4 tablespoons Mexican oregano
4-5 bay leaves
2 large sweet Vidalia onions (or white onions), sliced
2.5 to 3 lbs of carrots, sliced (preferably with a wavy knife for texture)
A generous amount of jalapeños, sliced into coins
Whole cloves of garlic
Preparing Your Brine
")
In a large pot, combine the vinegar, water, sugar, salt, black pepper, and Mexican oregano.
Add bay leaves to the mixture to infuse additional flavor.
Heat the brine over medium-high heat and allow it to simmer until all ingredients are well blended and the oregano has settled.
Preparing the Jars
Sanitize your jars by placing them in a hot water bath canner filled with clean water. Allow them to heat thoroughly while you prepare your vegetables.
Peel and slice your carrots, onions, and jalapeños. If using homegrown garlic, ensure it is properly cured before use.
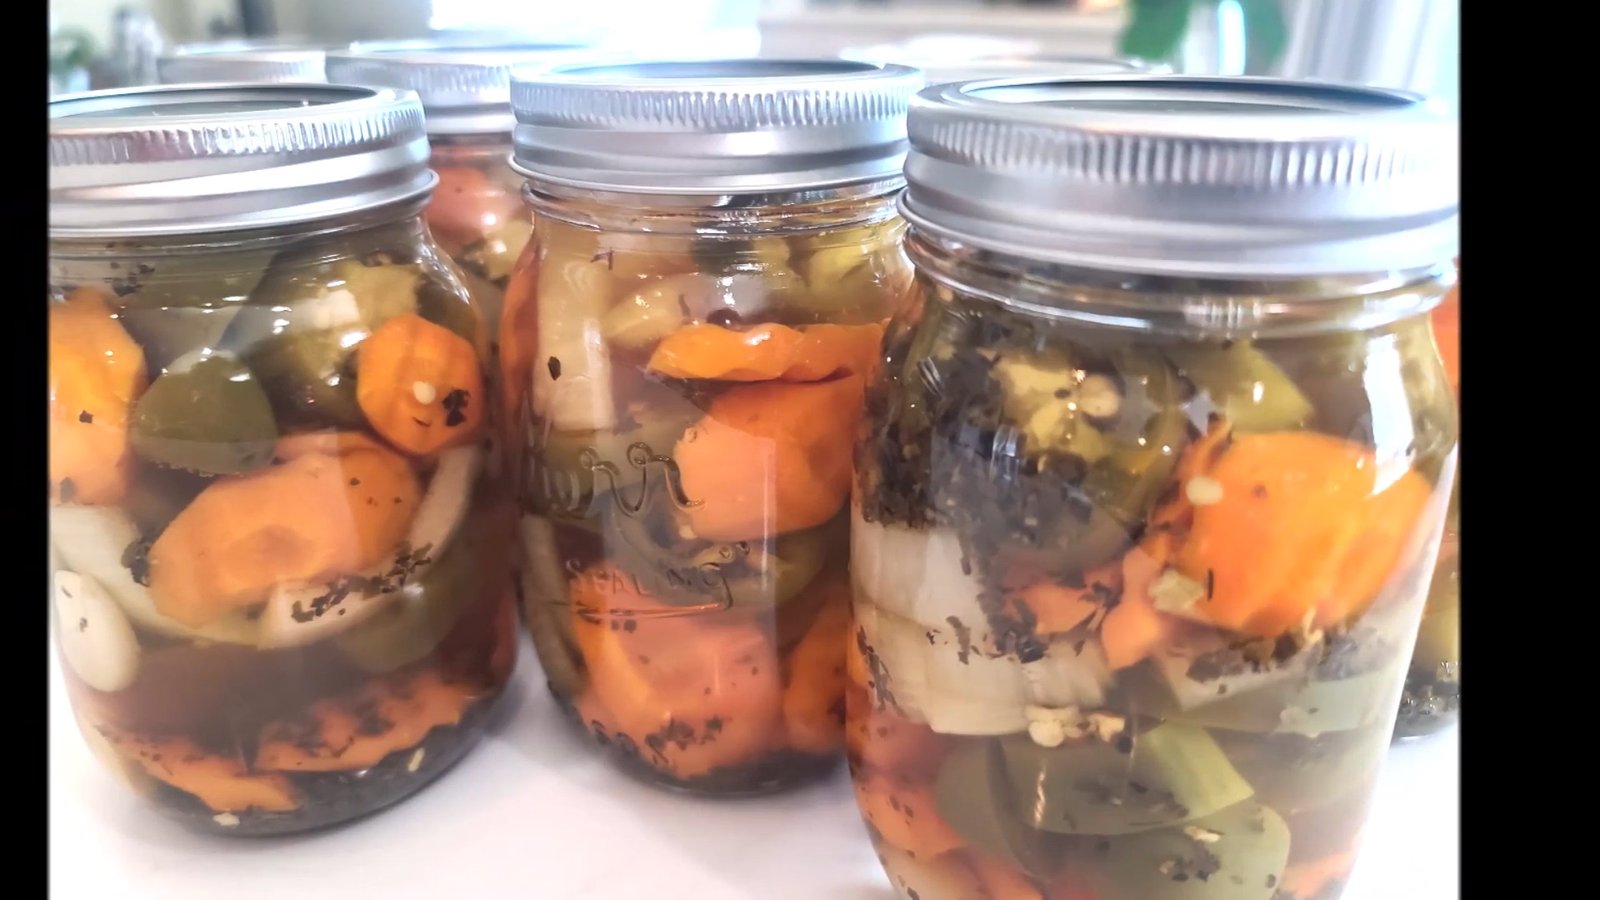
Carefully pack each jar with a combination of jalapeños, onions, carrots, and a clove of garlic. Layer them for an aesthetically pleasing presentation.
Filling and Sealing the Jars
Once your brine is ready, stir it to ensure an even distribution of oregano and pour it into each jar, leaving ½ inch to 1 inch of headspace.
Use a de-bubbling tool to remove air pockets and adjust the liquid level if needed.
Wipe the rims of the jars with a clean cloth to ensure a proper seal.
Secure the jars with high-quality canning lids and rings, tightening them to fingertip tightness.
Processing the Jars
Carefully place the jars into the water bath canner.
Bring the water to a rolling boil and process the jars for 10 minutes.
After the timer ends, turn off the heat and let the jars sit in the hot water for an additional 5 minutes before removing them.
Cooling and Storing Your Pickled Vegetables
Carefully remove the jars and place them on a towel-lined countertop.
Avoid tilting the jars as the seals need time to set.
")
Allow the jars to cool completely, listening for the satisfying “pop” that indicates a successful seal.
Store your pickled vegetables in a cool, dark place for optimal preservation. For the best flavor, let them sit for at least a few days before consuming.
Enjoying Your Homemade Pickled Vegetables
These Mexican pickled vegetables are a perfect addition to tacos, grilled meats, sandwiches, or as a spicy and tangy side dish. The balance of heat from the jalapeños, sweetness from the onions, and the savory depth of the brine make these an irresistible treat.
")
Canning Tips for Success
Always use high-quality canning lids and rings to ensure a proper seal and prevent spoilage.
If you experience floating vegetables, don’t worry! They will settle as they absorb the brine.
Label your jars with the date so you can track their shelf life.
Experiment with additional spices such as cumin or coriander for a unique twist.
Canning Mexican pickled vegetables is a simple yet rewarding process that allows you to enjoy fresh, homemade condiments year-round. With a little preparation and the right ingredients, you’ll have a delicious and shelf-stable snack ready whenever you crave a burst of flavor!
by : Linda's Pantry
")
0 servings