Nutrition Facts
0 servings

Hey everyone, it’s Angie, and today we are canning peaches! Canning peaches is one of my favorite projects because it's super easy and the end result is absolutely delicious. Let’s walk through the step-by-step process of canning peaches, along with my tips and tricks along the way.
")
What You'll Need:
Peaches: Look for freestone peaches as they are easier to peel and separate from the pit compared to cling peaches.
Water Bath Canner: Essential for the canning process.
Jars with Lids and Rings: For storing the canned peaches.
Sugar: To make the syrup (I'll share a simple trick for this later).
Preparing the Peaches
Wash and Peel: Start by heating a pot of water. Place the peaches in the hot water until their color dulls. This indicates they are ready to be taken out.

Blanching: Transfer the peaches from the hot water to cold water in the sink. This process helps the peels come off easily.
Peeling and Pitting: Once the peaches are in the cold water, peel them, remove the pits, and place them in a bowl with a mixture of two quarts of water and two quarts of Fruit Fresh to prevent browning.
Preparing the Canner and Jars
Water in the Canner: Fill your water bath canner with hot water from the tap but don't heat it yet. This prevents the jars from cracking due to sudden temperature changes.
Prepping Jars and Lids: Wash and sterilize the jars and lids. Keep the lids warm by placing them in a pan of water on low heat.
Making the Syrup
Instead of the traditional method, we’ll mix the syrup directly in each jar:
Sugar: For a light syrup, add ¼ cup of sugar per quart jar. For a heavy syrup, use ½ cup of sugar. I prefer slightly less than ½ cup.
")
Hot Water: Add hot water from the tap to dissolve the sugar, ensuring it’s evenly distributed.
Filling the Jars
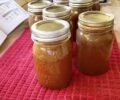
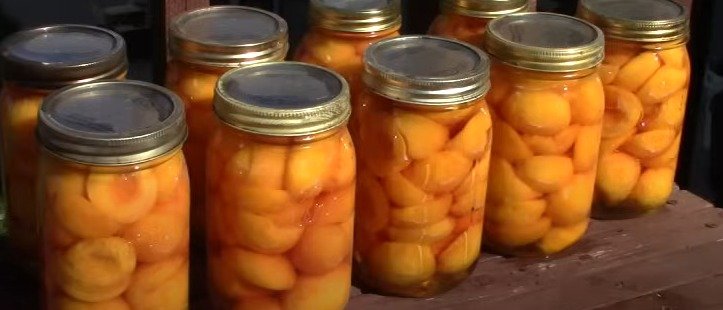
Add Peaches: Carefully place the peeled and pitted peach halves into the jars, filling up to the neck.
Top with Syrup: Ensure there’s enough liquid to cover the peaches, leaving about ½ inch of headspace.
Clean the Rims: Wipe the jar rims to remove any residue for a good seal.
Seal the Jars: Place the lids on the jars and screw on the rings finger-tight.
Canning Process
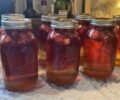
Into the Canner: Place the jars in the canner with at least an inch of water above them. Turn on the heat.
Processing Time: Process pint jars for 25 minutes and quart jars for 30 minutes. Adjust the time for your altitude using the following guide:
1,000-3,000 feet: Add 5 minutes
3,000-6,000 feet: Add 10 minutes
6,000-8,000 feet: Add 15 minutes
8,000-10,000 feet: Add 20 minutes
Start Timing: Begin timing once the water starts boiling.
Finishing Up
Remove from Heat: Turn off the heat and remove the canner from the stove. Let the jars sit for a few minutes.
")
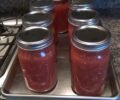
Cooling: Use a jar lifter to place the jars on a cooling rack or a wooden bench. Let them cool completely.
Check Seals: Once cool, the lids should pop down, indicating a proper seal. Any unsealed jars can be stored in the fridge and enjoyed first.
That's it! You’ve successfully canned peaches. Enjoy your delicious homemade canned peaches throughout the year.
Hey everyone, it’s Angie, and today we are canning peaches! Canning peaches is one of my favorite projects because it's super easy and the end result is absolutely delicious. Let’s walk through the step-by-step process of canning peaches, along with my tips and tricks along the way.
What You'll Need:
Peaches: Look for freestone peaches as they are easier to peel and separate from the pit compared to cling peaches.
Water Bath Canner: Essential for the canning process.
Jars with Lids and Rings: For storing the canned peaches.
Sugar: To make the syrup (I'll share a simple trick for this later).
Preparing the Peaches
Wash and Peel: Start by heating a pot of water. Place the peaches in the hot water until their color dulls. This indicates they are ready to be taken out.
Blanching: Transfer the peaches from the hot water to cold water in the sink. This process helps the peels come off easily.
Peeling and Pitting: Once the peaches are in the cold water, peel them, remove the pits, and place them in a bowl with a mixture of two quarts of water and two quarts of Fruit Fresh to prevent browning.
Preparing the Canner and Jars
Water in the Canner: Fill your water bath canner with hot water from the tap but don't heat it yet. This prevents the jars from cracking due to sudden temperature changes.
Prepping Jars and Lids: Wash and sterilize the jars and lids. Keep the lids warm by placing them in a pan of water on low heat.
Making the Syrup
Instead of the traditional method, we’ll mix the syrup directly in each jar:
Sugar: For a light syrup, add ¼ cup of sugar per quart jar. For a heavy syrup, use ½ cup of sugar. I prefer slightly less than ½ cup.
Hot Water: Add hot water from the tap to dissolve the sugar, ensuring it’s evenly distributed.
Filling the Jars
Add Peaches: Carefully place the peeled and pitted peach halves into the jars, filling up to the neck.
Top with Syrup: Ensure there’s enough liquid to cover the peaches, leaving about ½ inch of headspace.
Clean the Rims: Wipe the jar rims to remove any residue for a good seal.
Seal the Jars: Place the lids on the jars and screw on the rings finger-tight.
Canning Process
Into the Canner: Place the jars in the canner with at least an inch of water above them. Turn on the heat.
Processing Time: Process pint jars for 25 minutes and quart jars for 30 minutes. Adjust the time for your altitude using the following guide:
1,000-3,000 feet: Add 5 minutes
3,000-6,000 feet: Add 10 minutes
6,000-8,000 feet: Add 15 minutes
8,000-10,000 feet: Add 20 minutes
Start Timing: Begin timing once the water starts boiling.
Finishing Up
Remove from Heat: Turn off the heat and remove the canner from the stove. Let the jars sit for a few minutes.
Cooling: Use a jar lifter to place the jars on a cooling rack or a wooden bench. Let them cool completely.
Check Seals: Once cool, the lids should pop down, indicating a proper seal. Any unsealed jars can be stored in the fridge and enjoyed first.
That's it! You’ve successfully canned peaches. Enjoy your delicious homemade canned peaches throughout the year.
0 servings