Nutrition Facts
0 servings


If you've ever wondered how to make sauerkraut that will last your family all year, you're in the right place. In this guide, I’ll walk you through our full process for fermenting and storing sauerkraut—enough to feed our household from one summer harvest through the next. Whether you're preserving cabbage for the first time or looking to improve your kraut-making routine, this post is packed with tips from years of experience.
From Garden to Jar: A Full Circle of Homegrown Sauerkraut
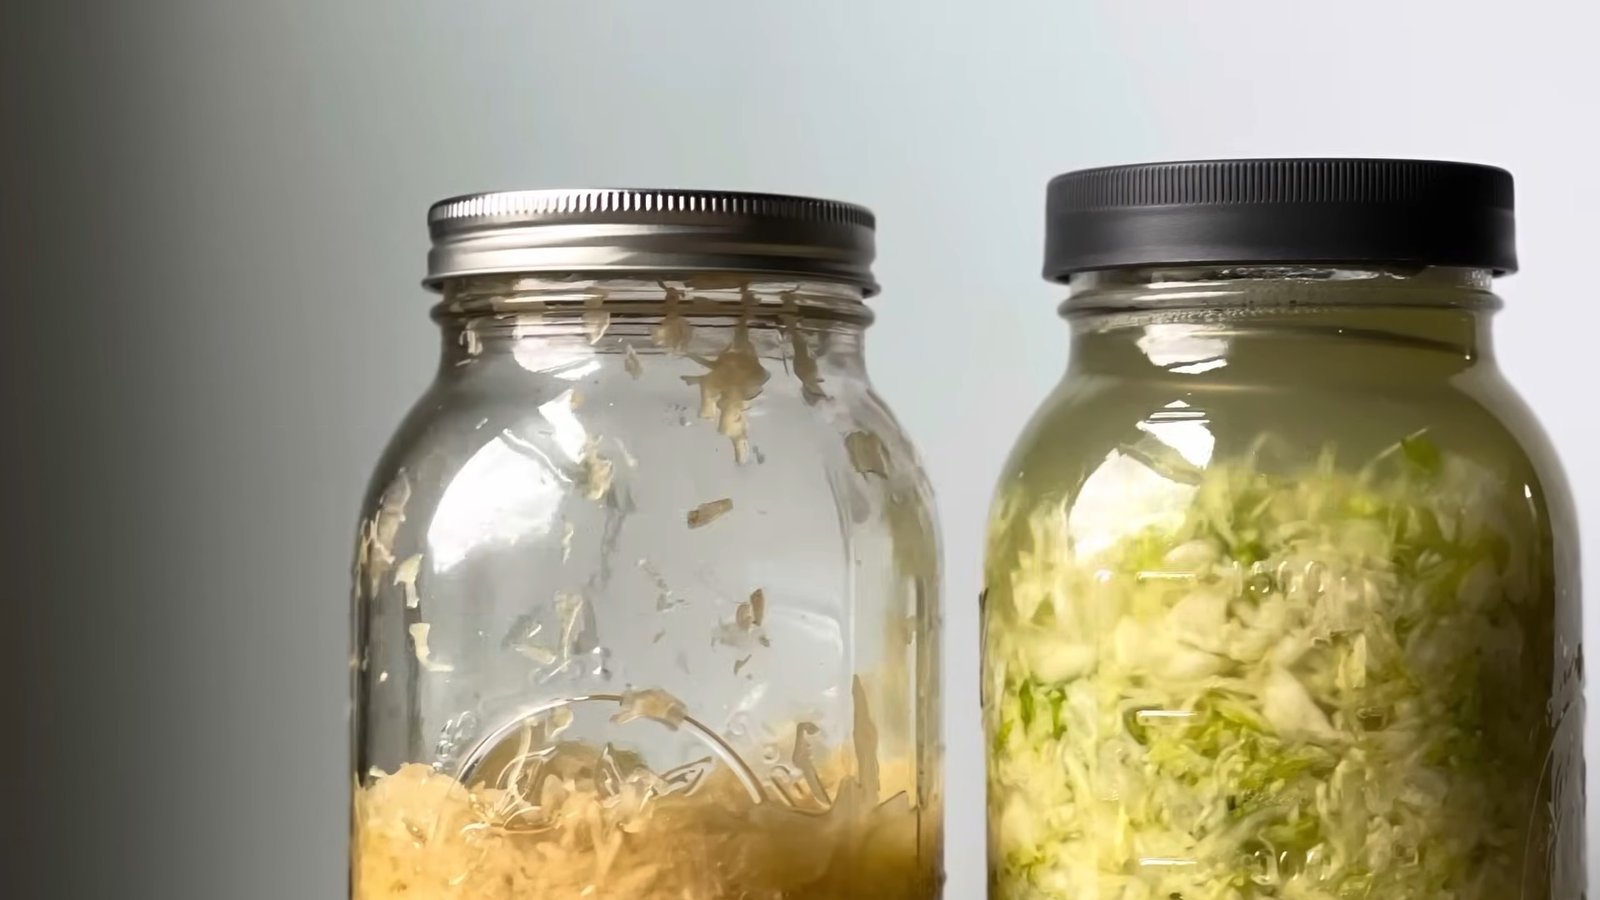
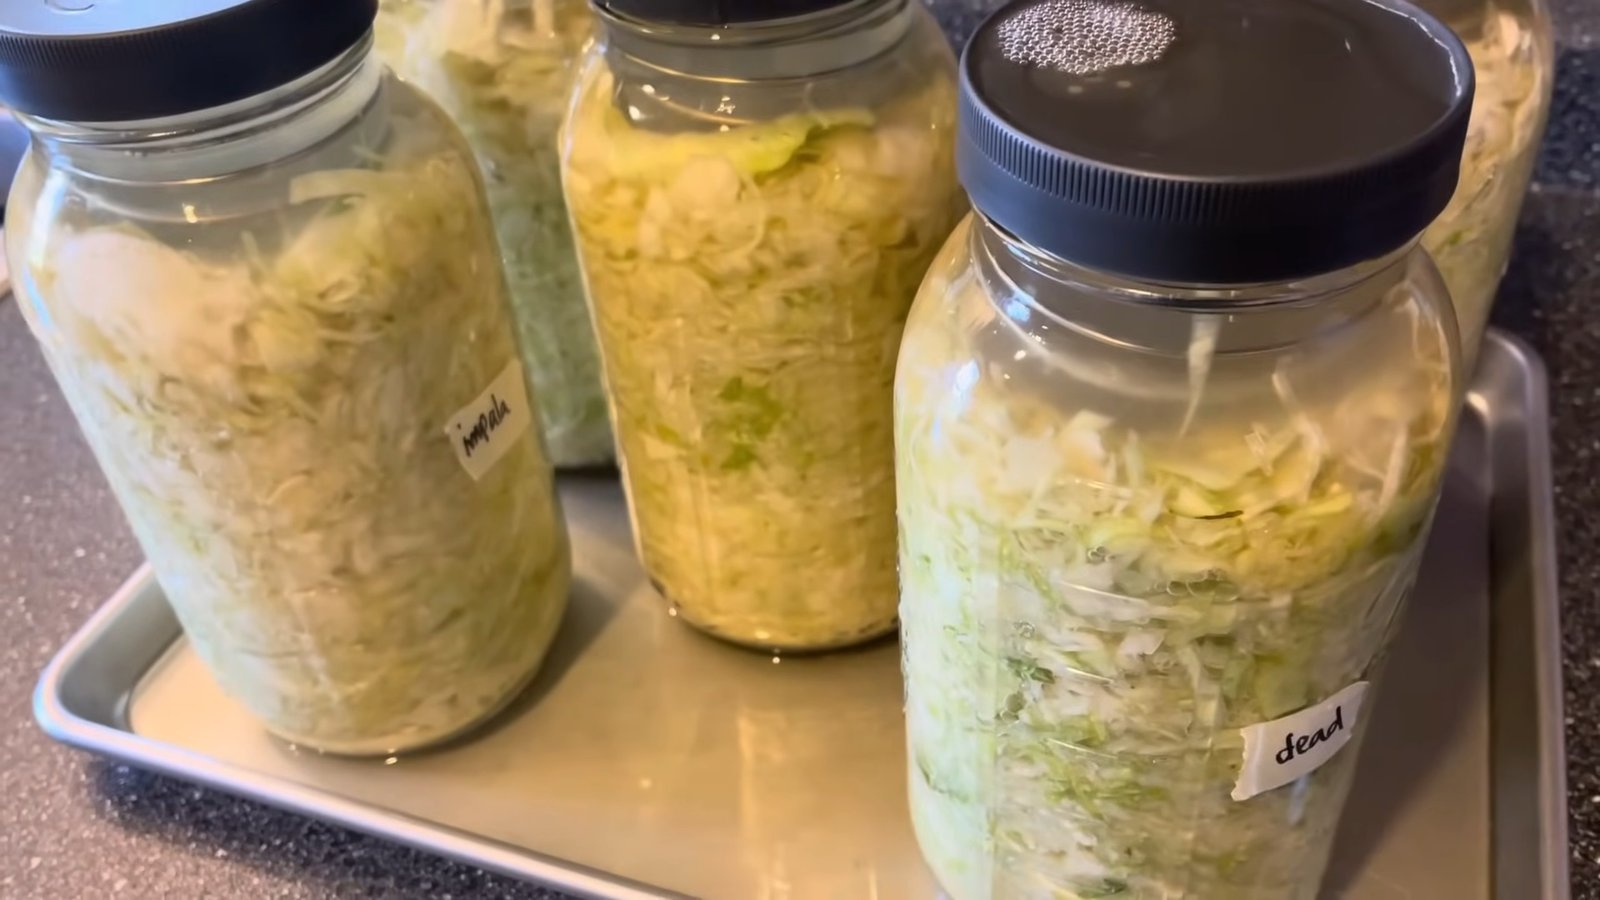
Before we dive into the step-by-step method, here’s a moment worth sharing: we’re making this year’s sauerkraut just as we’re finishing the very last jar from last year’s garden. It’s a satisfying, full-circle moment that highlights just how rewarding food preservation can be. Producing a year’s worth of anything feels like a huge accomplishment—especially sauerkraut, which is one of our most important staples. We preserve about five gallons of kraut each year.
What Is Sauerkraut?
For those new to fermenting, sauerkraut is simply fermented cabbage—and it’s easier to make than you might think. With just two ingredients (cabbage and salt), you can create a long-lasting, gut-healthy food that’s been used by cultures for thousands of years to preserve the harvest.
Why Make Sauerkraut at Home?
Preserve cabbage when it’s abundant
Save money vs. store-bought fermented foods
Avoid preservatives and additives
Customize flavor and texture to your liking
Fermenting cabbage helps stretch your garden harvest into the cold months when fresh produce is scarce. It's one of the simplest and oldest preservation methods around.
Ingredients and Tools for Homemade Sauerkraut
Basic ingredients:
Fresh cabbage (any variety)
Sea salt (non-iodized, no additives)
Helpful tools:
Sharp knife or kraut cutter
Large mixing bowl
Kitchen scale
Half-gallon mason jars
Fermentation lids with airlocks
Spring weights or glass fermentation weights
")
Kraut pounder (or clean fist!)
Jar funnel (optional, but tidy)
Step-by-Step: How to Make Sauerkraut
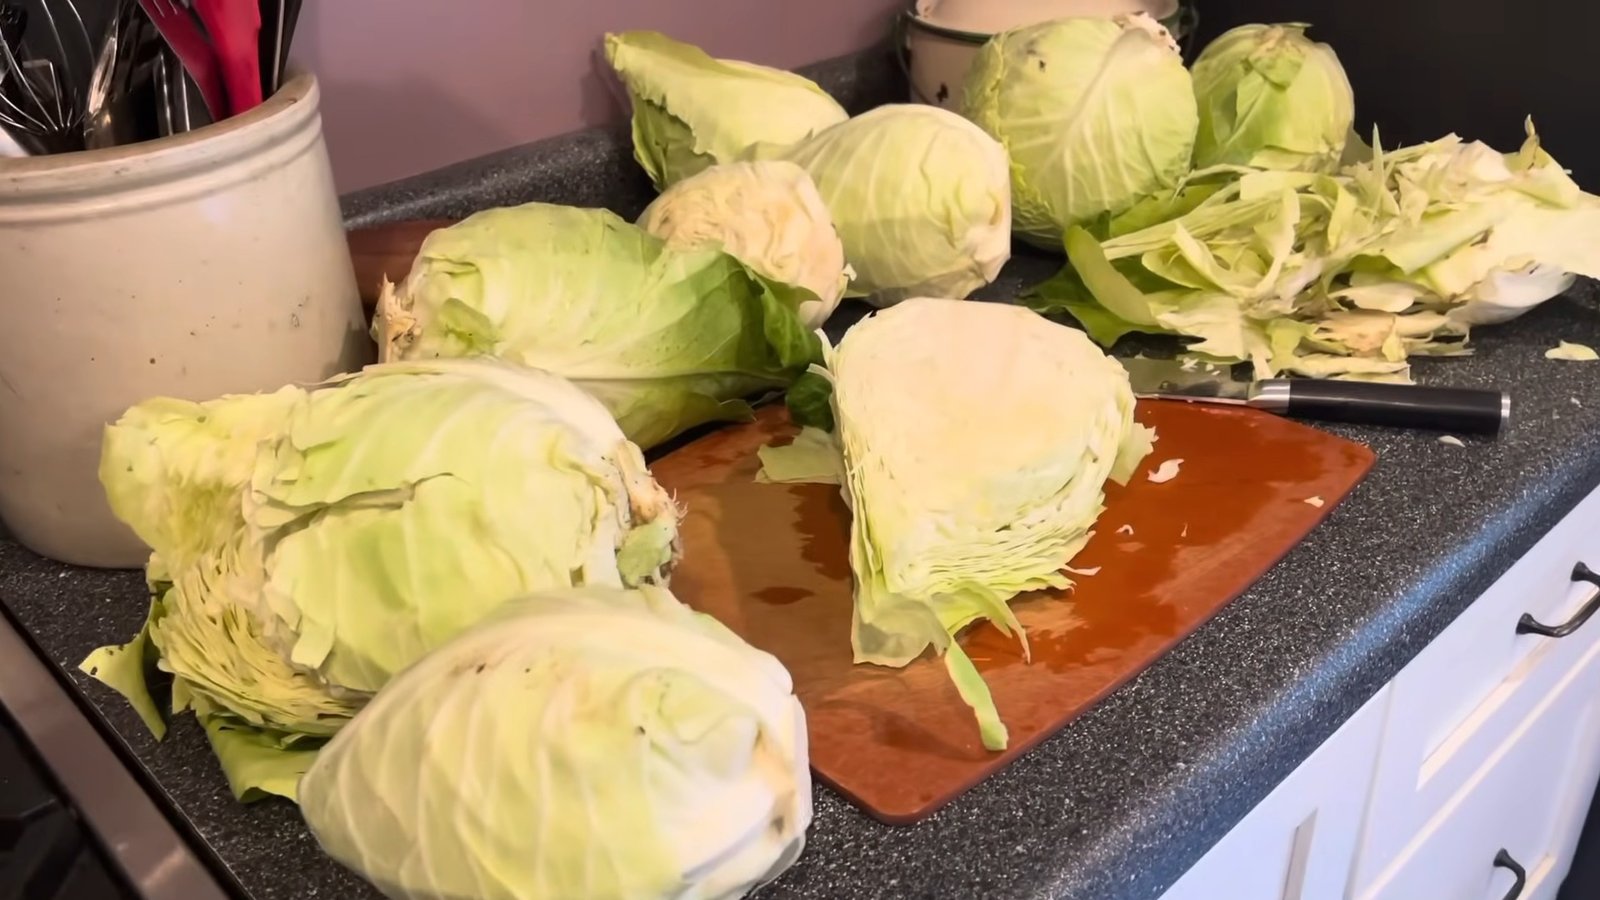
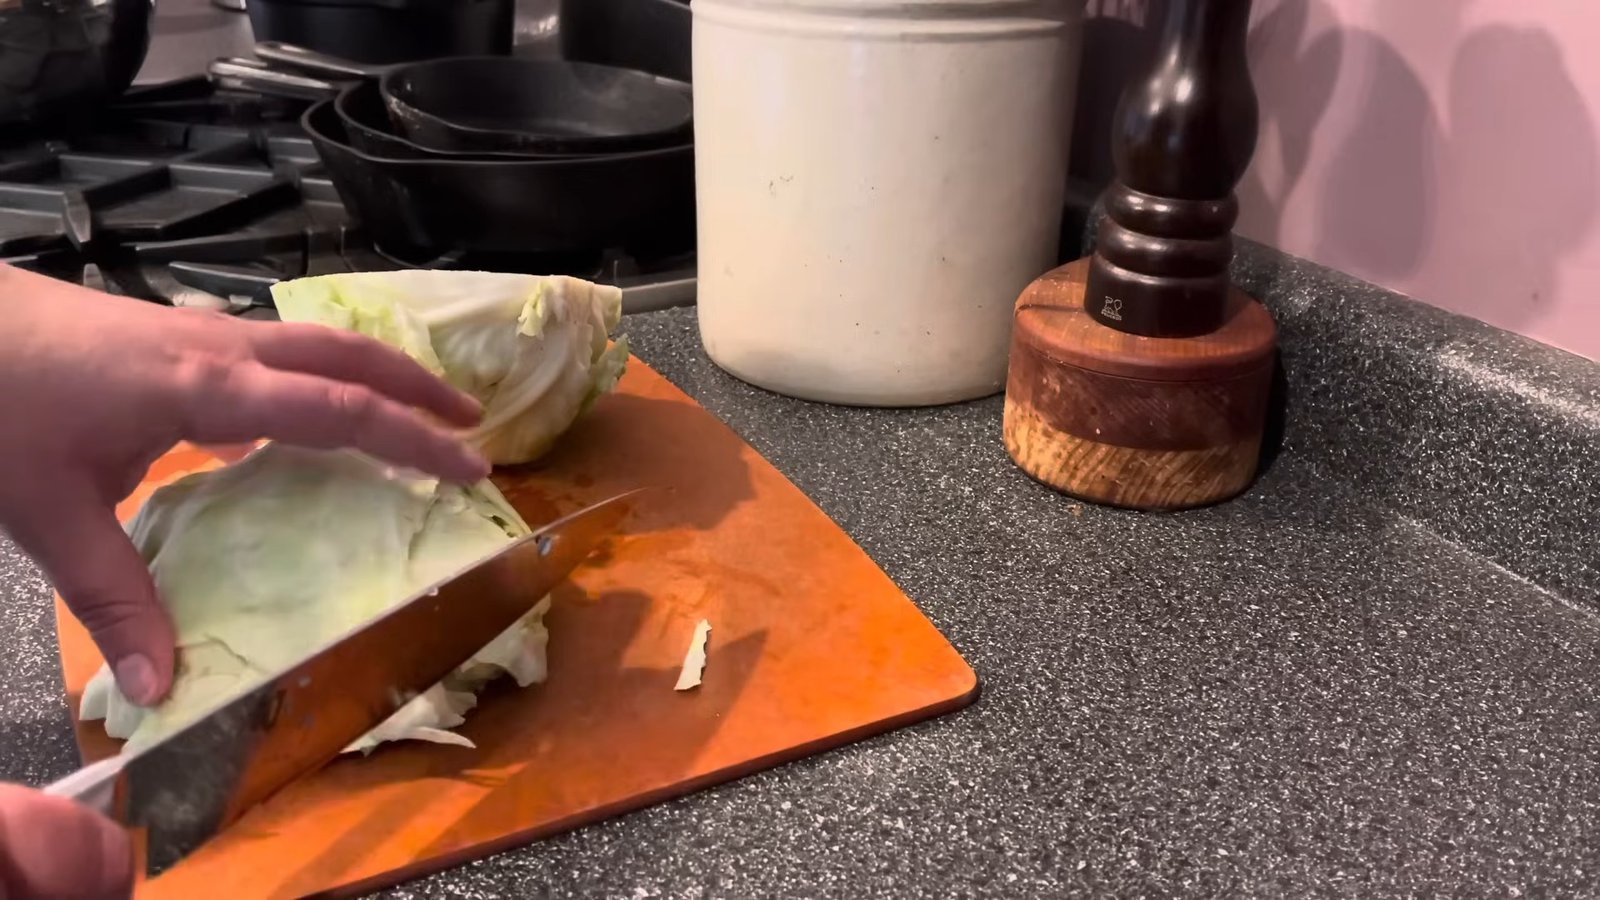
1. Shred the Cabbage
Cut your cabbage in half through the core, place it flat-side down, and slice into thin shreds. The thinner the better—it helps the cabbage release its liquid more efficiently. For large batches, a kraut cutter speeds things up.
2. Weigh the Cabbage and Add Salt
Weigh 4 pounds of shredded cabbage per half-gallon jar. Use 2 tablespoons of high-quality sea salt per 4 pounds of cabbage. Avoid iodized or additive-laden salts.
Layer cabbage and salt in a large bowl (¼ cabbage, ¼ salt) to help evenly distribute the salt. Let it sit 10 minutes to start drawing out moisture.
3. Massage the Cabbage
After the initial rest, knead the cabbage like bread dough. This helps break down the fibers and releases even more brine. Let it sit, knead again, and repeat until you see plenty of liquid at the bottom of the bowl.
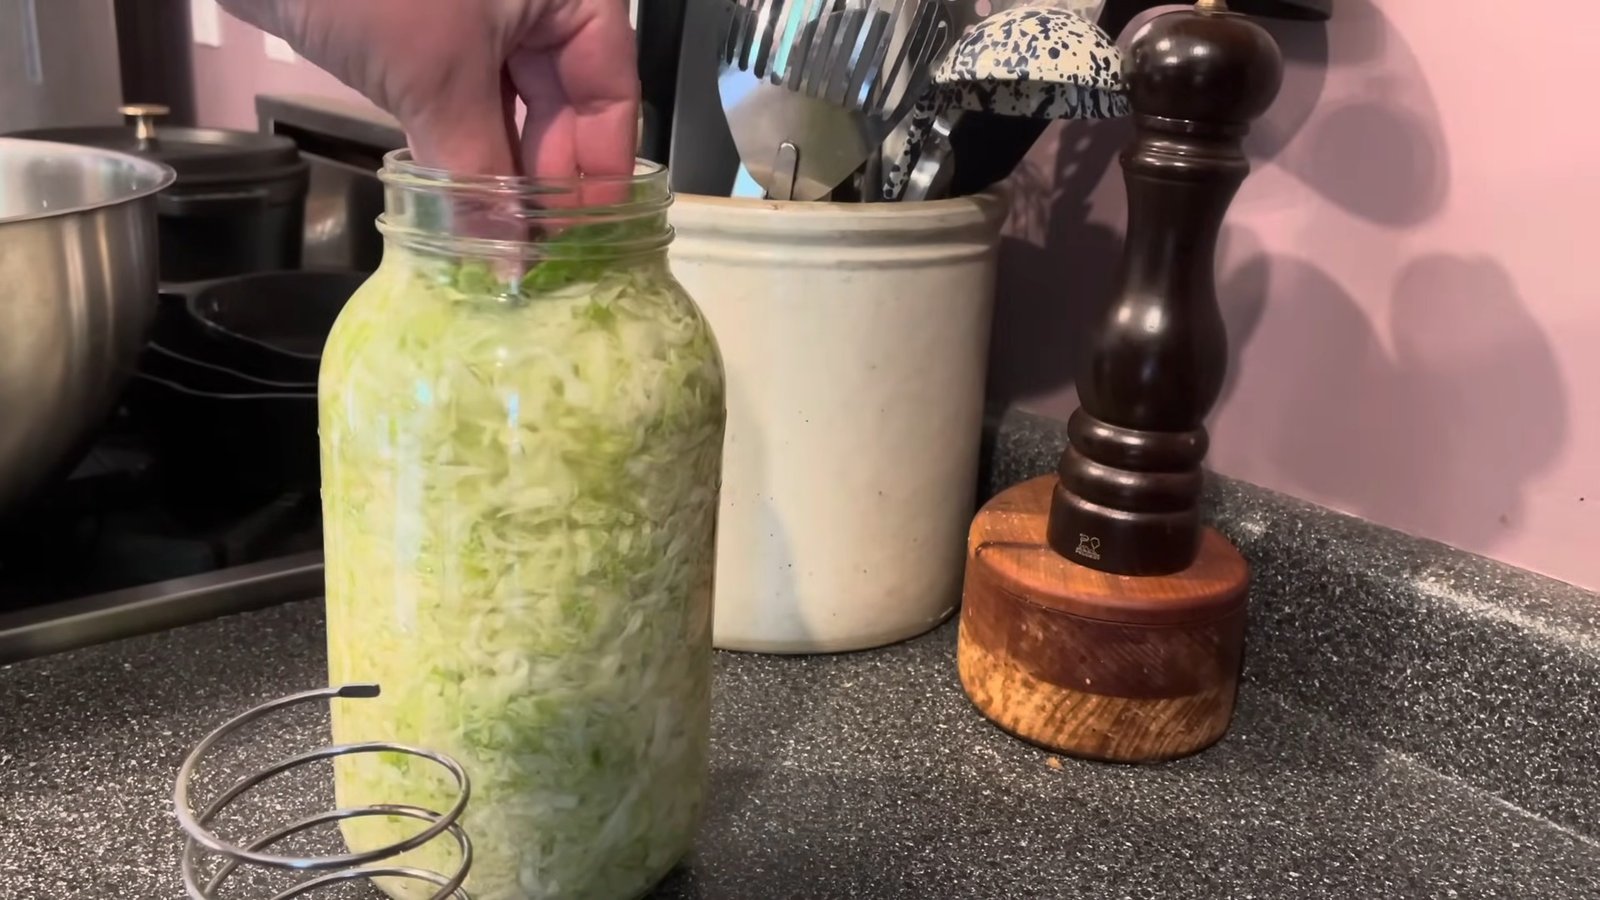
4. Pack into Jars
Using clean hands, transfer a bit of kraut into a wide-mouth jar and pack it down hard with a kraut pounder or your fist. Continue adding and pounding every few inches until the jar is full. The goal is to eliminate air pockets and submerge the cabbage under its own brine.
")
5. Use a Fermentation Weight and Lid
Save a whole cabbage leaf to use as a cap. Place it on top of the kraut, then add a spring weight or fermentation weight. Attach a fermentation lid with an airlock to allow gases to escape.
Place your jar on a tray to catch overflow—fermentation usually kicks off within 2–3 days and can be quite active!
Monitoring the Fermentation
As the cabbage ferments, it will release more brine that may leak from the jar. Collect and save this kraut juice—you’ll use it later to top off your jars before long-term storage.
If foam or residue builds up on your lid or jar, simply rinse with cool water—no soap needed.
Fermentation speed depends on two factors:
Temperature of your kitchen
Your preferred flavor and tang
We typically ferment our sauerkraut for 2 to 3 weeks. Some people ferment for just one week, while others prefer 4–8 weeks. Taste-test every few days to find your perfect balance.
How to Know When Sauerkraut Is Done
You'll notice a color change from vibrant green and white to a muted, yellowish hue. Texture becomes softer, and the kraut develops a complex, tangy flavor. Once it tastes the way you like, it’s ready to be moved to cold storage.
")
Prepping Sauerkraut for Long-Term Storage
Top off the liquid: Use saved kraut juice or a mix of ½ bottled lemon juice and ½ water (never salt water—it can brown the kraut).
Remove floaters: Use a spoon to remove any cabbage pieces not submerged in brine.
Wipe the jar: Clean the top lip and inside walls with a paper towel to prevent mold.
Seal and chill: Use a plastic or rust-free metal lid and store in the fridge or a cold root cellar.
")
After moving to the fridge, the liquid level may drop—check jars within a day or two and top them off again if needed.
Final Thoughts on Fermenting Sauerkraut
Making sauerkraut at home is one of the most satisfying and practical ways to preserve your harvest. With just cabbage, salt, and a little patience, you can stock your pantry or fridge with jars of probiotic-rich, immune-boosting kraut that lasts for months.
Whether you're fermenting one jar or 20, this timeless skill brings food security, nutrition, and flavor to your home.
")
If you've ever wondered how to make sauerkraut that will last your family all year, you're in the right place. In this guide, I’ll walk you through our full process for fermenting and storing sauerkraut—enough to feed our household from one summer harvest through the next. Whether you're preserving cabbage for the first time or looking to improve your kraut-making routine, this post is packed with tips from years of experience.
From Garden to Jar: A Full Circle of Homegrown Sauerkraut
Before we dive into the step-by-step method, here’s a moment worth sharing: we’re making this year’s sauerkraut just as we’re finishing the very last jar from last year’s garden. It’s a satisfying, full-circle moment that highlights just how rewarding food preservation can be. Producing a year’s worth of anything feels like a huge accomplishment—especially sauerkraut, which is one of our most important staples. We preserve about five gallons of kraut each year.
What Is Sauerkraut?
For those new to fermenting, sauerkraut is simply fermented cabbage—and it’s easier to make than you might think. With just two ingredients (cabbage and salt), you can create a long-lasting, gut-healthy food that’s been used by cultures for thousands of years to preserve the harvest.
Why Make Sauerkraut at Home?
Preserve cabbage when it’s abundant
Save money vs. store-bought fermented foods
Avoid preservatives and additives
Customize flavor and texture to your liking
Fermenting cabbage helps stretch your garden harvest into the cold months when fresh produce is scarce. It's one of the simplest and oldest preservation methods around.
Ingredients and Tools for Homemade Sauerkraut
Basic ingredients:
Fresh cabbage (any variety)
Sea salt (non-iodized, no additives)
Helpful tools:
Sharp knife or kraut cutter
Large mixing bowl
Kitchen scale
Half-gallon mason jars
Fermentation lids with airlocks
Spring weights or glass fermentation weights
Kraut pounder (or clean fist!)
Jar funnel (optional, but tidy)
Step-by-Step: How to Make Sauerkraut
1. Shred the Cabbage
Cut your cabbage in half through the core, place it flat-side down, and slice into thin shreds. The thinner the better—it helps the cabbage release its liquid more efficiently. For large batches, a kraut cutter speeds things up.
2. Weigh the Cabbage and Add Salt
Weigh 4 pounds of shredded cabbage per half-gallon jar. Use 2 tablespoons of high-quality sea salt per 4 pounds of cabbage. Avoid iodized or additive-laden salts.
Layer cabbage and salt in a large bowl (¼ cabbage, ¼ salt) to help evenly distribute the salt. Let it sit 10 minutes to start drawing out moisture.
3. Massage the Cabbage
After the initial rest, knead the cabbage like bread dough. This helps break down the fibers and releases even more brine. Let it sit, knead again, and repeat until you see plenty of liquid at the bottom of the bowl.
4. Pack into Jars
Using clean hands, transfer a bit of kraut into a wide-mouth jar and pack it down hard with a kraut pounder or your fist. Continue adding and pounding every few inches until the jar is full. The goal is to eliminate air pockets and submerge the cabbage under its own brine.
5. Use a Fermentation Weight and Lid
Save a whole cabbage leaf to use as a cap. Place it on top of the kraut, then add a spring weight or fermentation weight. Attach a fermentation lid with an airlock to allow gases to escape.
Place your jar on a tray to catch overflow—fermentation usually kicks off within 2–3 days and can be quite active!
Monitoring the Fermentation
As the cabbage ferments, it will release more brine that may leak from the jar. Collect and save this kraut juice—you’ll use it later to top off your jars before long-term storage.
If foam or residue builds up on your lid or jar, simply rinse with cool water—no soap needed.
Fermentation speed depends on two factors:
Temperature of your kitchen
Your preferred flavor and tang
We typically ferment our sauerkraut for 2 to 3 weeks. Some people ferment for just one week, while others prefer 4–8 weeks. Taste-test every few days to find your perfect balance.
How to Know When Sauerkraut Is Done
You'll notice a color change from vibrant green and white to a muted, yellowish hue. Texture becomes softer, and the kraut develops a complex, tangy flavor. Once it tastes the way you like, it’s ready to be moved to cold storage.
Prepping Sauerkraut for Long-Term Storage
Top off the liquid: Use saved kraut juice or a mix of ½ bottled lemon juice and ½ water (never salt water—it can brown the kraut).
Remove floaters: Use a spoon to remove any cabbage pieces not submerged in brine.
Wipe the jar: Clean the top lip and inside walls with a paper towel to prevent mold.
Seal and chill: Use a plastic or rust-free metal lid and store in the fridge or a cold root cellar.
After moving to the fridge, the liquid level may drop—check jars within a day or two and top them off again if needed.
Final Thoughts on Fermenting Sauerkraut
Making sauerkraut at home is one of the most satisfying and practical ways to preserve your harvest. With just cabbage, salt, and a little patience, you can stock your pantry or fridge with jars of probiotic-rich, immune-boosting kraut that lasts for months.
Whether you're fermenting one jar or 20, this timeless skill brings food security, nutrition, and flavor to your home.
0 servings