Nutrition Facts
0 servings


Red pepper relish is a delicious, versatile condiment that enhances sandwiches, meats, and more. With a balance of sweet and tangy flavors, this homemade relish is a great addition to your pantry. Follow this detailed guide to make and safely can your own batch of red pepper relish.
Ingredients for Red Pepper Relish
To get started, gather the following ingredients:
10 bell peppers (mostly red, with some orange or yellow for variety)
2 medium-sized yellow onions
1 jalapeño pepper (or substitute with cherry peppers if available)
2 cups white sugar
1½ teaspoons mustard seed
1 teaspoon celery seed
2 teaspoons paprika
1 tablespoon kosher salt (or canning salt, but avoid iodized table salt)
1 cup apple cider vinegar
1 cup white vinegar
Calcium chloride (optional, for crispness)
Step 1: Prepare the Vegetables
")
Remove the stems and seeds from the bell peppers and jalapeño.
Finely chop most of the peppers and onions, reserving about 3 bell peppers, half of one onion, and the whole jalapeño for the food processor.
Pulse these reserved vegetables in a food processor until finely chopped but not pureed.
Mix all the chopped vegetables together in a large stainless steel bowl.
Step 2: Draw Out Excess Moisture
Sprinkle kosher salt over the chopped vegetables and mix well.
Cover the mixture with ice and let it sit for 1-2 hours to draw out excess moisture.
Once the ice has mostly melted, remove any remaining chunks and drain the vegetables.
")
Rinse thoroughly with cold water to remove excess salt and drain well.
Step 3: Prepare the Brine
In a large pot over medium-high heat, combine:
Apple cider vinegar
White vinegar
Mustard seed
Celery seed
Paprika
White sugar
Stir until the sugar is fully dissolved and bring to a boil.
Add the drained vegetables, stir well, and bring the mixture to a gentle boil.
Reduce heat and simmer for 10 minutes.
")
Step 4: Prepare Jars for Canning
Place pint jars in a canner filled with hot (but not boiling) water.
Keep jars warm until ready to fill to prevent temperature shock.
Heat canning lids in warm water (not boiling) to soften the rubber seal.
Step 5: Fill and Process the Jars
(Optional) Add 1/8 teaspoon calcium chloride to each pint jar to enhance crispness.
Using a canning funnel, fill each jar with relish, leaving ½ inch of headspace.
")
Remove air bubbles using a de-bubbling tool or spatula.
Wipe jar rims clean and secure lids with rings tightened to finger-tight.
Submerge jars in the hot water bath canner, ensuring at least 1 inch of water covers the tops.
Bring water to a full rolling boil and process:
Pint jars: 10 minutes
Quart jars: 15 minutes
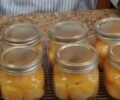
Step 6: Cooling and Storing
")
After processing, turn off the heat and let jars sit in the canner for a few minutes.
Carefully remove jars using a jar lifter and place them on a towel-lined counter.
")
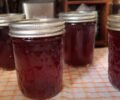
Allow jars to cool undisturbed for 12-24 hours.
Check seals by pressing the center of each lid; if it doesn’t pop, the seal is secure.
Store sealed jars in a cool, dark place and enjoy your red pepper relish for up to one year!
Final Thoughts
Homemade red pepper relish is a fantastic way to preserve fresh peppers and add a burst of flavor to meals. By following these canning steps, you ensure a safe and delicious relish that you can enjoy all year long. Happy canning!
")
Red pepper relish is a delicious, versatile condiment that enhances sandwiches, meats, and more. With a balance of sweet and tangy flavors, this homemade relish is a great addition to your pantry. Follow this detailed guide to make and safely can your own batch of red pepper relish.
Ingredients for Red Pepper Relish
To get started, gather the following ingredients:
10 bell peppers (mostly red, with some orange or yellow for variety)
2 medium-sized yellow onions
1 jalapeño pepper (or substitute with cherry peppers if available)
2 cups white sugar
1½ teaspoons mustard seed
1 teaspoon celery seed
2 teaspoons paprika
1 tablespoon kosher salt (or canning salt, but avoid iodized table salt)
1 cup apple cider vinegar
1 cup white vinegar
Calcium chloride (optional, for crispness)
Step 1: Prepare the Vegetables
Remove the stems and seeds from the bell peppers and jalapeño.
Finely chop most of the peppers and onions, reserving about 3 bell peppers, half of one onion, and the whole jalapeño for the food processor.
Pulse these reserved vegetables in a food processor until finely chopped but not pureed.
Mix all the chopped vegetables together in a large stainless steel bowl.
Step 2: Draw Out Excess Moisture
Sprinkle kosher salt over the chopped vegetables and mix well.
Cover the mixture with ice and let it sit for 1-2 hours to draw out excess moisture.
Once the ice has mostly melted, remove any remaining chunks and drain the vegetables.
Rinse thoroughly with cold water to remove excess salt and drain well.
Step 3: Prepare the Brine
In a large pot over medium-high heat, combine:
Apple cider vinegar
White vinegar
Mustard seed
Celery seed
Paprika
White sugar
Stir until the sugar is fully dissolved and bring to a boil.
Add the drained vegetables, stir well, and bring the mixture to a gentle boil.
Reduce heat and simmer for 10 minutes.
Step 4: Prepare Jars for Canning
Place pint jars in a canner filled with hot (but not boiling) water.
Keep jars warm until ready to fill to prevent temperature shock.
Heat canning lids in warm water (not boiling) to soften the rubber seal.
Step 5: Fill and Process the Jars
(Optional) Add 1/8 teaspoon calcium chloride to each pint jar to enhance crispness.
Using a canning funnel, fill each jar with relish, leaving ½ inch of headspace.
Remove air bubbles using a de-bubbling tool or spatula.
Wipe jar rims clean and secure lids with rings tightened to finger-tight.
Submerge jars in the hot water bath canner, ensuring at least 1 inch of water covers the tops.
Bring water to a full rolling boil and process:
Pint jars: 10 minutes
Quart jars: 15 minutes
Step 6: Cooling and Storing
After processing, turn off the heat and let jars sit in the canner for a few minutes.
Carefully remove jars using a jar lifter and place them on a towel-lined counter.
Allow jars to cool undisturbed for 12-24 hours.
Check seals by pressing the center of each lid; if it doesn’t pop, the seal is secure.
Store sealed jars in a cool, dark place and enjoy your red pepper relish for up to one year!
Final Thoughts
Homemade red pepper relish is a fantastic way to preserve fresh peppers and add a burst of flavor to meals. By following these canning steps, you ensure a safe and delicious relish that you can enjoy all year long. Happy canning!
0 servings