Nutrition Facts
0 servings

Welcome to Bonita’s Kitchen! Today we’re sharing a timeless favorite—bread and butter pickles—a sweet and tangy treat that’s been a pantry staple for generations. Whether you’re an experienced home canner or a curious beginner, this step-by-step guide will show you how to make and preserve these delicious pickles from scratch.
What Are Bread and Butter Pickles?
Despite the name, bread and butter pickles don’t actually contain bread or butter. They got their name during the Great Depression, when families would make these pickles in large batches to store for the winter months. With limited ingredients available, a simple sandwich made with homemade white bread, a bit of butter, and a scoop of these pickles became a hearty, affordable meal.
These pickles are made with thinly sliced small cucumbers and white onions, flavored with spices like mustard seed, celery seed, turmeric, and white pepper. The result? A perfectly balanced mix of sweet, tangy, and savory that pairs beautifully with sandwiches, charcuterie boards, or as a crunchy side dish.
Ingredients
Vegetables:
8 cups of small cucumbers, thinly sliced
8 cups of white onions, thinly sliced
Salt:
2 tablespoons sea salt
Pickling Brine:
2 cups white vinegar
1½ cups white sugar
2 tablespoons yellow mustard
1 tablespoon mustard seed
1 teaspoon celery seed
1 teaspoon turmeric
½ teaspoon white pepper
Optional:
2–3 bay leaves
1 tablespoon pickling spice (in cheesecloth or tea infuser)
Step-by-Step Instructions
Step 1: Prepare the Vegetables
Start by slicing your cucumbers and onions very thinly—about 8 cups each. Place them in a large pot or bowl, then sprinkle the sea salt evenly over the top. Gently mix everything together.
Cover the mixture with 4–5 cups of ice, put the lid on, and let it sit at room temperature for 2–3 hours. This process helps to slightly soften the vegetables before cooking.
Tip: If the ice melts before the time is up, feel free to add a bit more to keep the mixture cold.
Step 2: Sterilize Your Mason Jars
Before you start cooking, sterilize your mason jars. This is an essential step in safe home canning. You can do this by boiling the jars in a water bath canner for 10 minutes. Keep them warm until you’re ready to fill them.
Step 3: Make the Pickling Brine
In a large saucepan, combine:
2 cups of white vinegar
1½ cups of white sugar
2 tablespoons mustard
1 tablespoon mustard seed
1 teaspoon celery seed
1 teaspoon turmeric
½ teaspoon white pepper
If you're using bay leaves and pickling spice, wrap them in cheesecloth or use a small tea infuser and add them to the pot.
Stir the mixture and bring it to a boil, letting it simmer for about 10 minutes to allow the spices to infuse the brine.
")
Step 4: Add the Vegetables
After draining the cucumbers and onions thoroughly, add them to the hot brine. Stir well and heat just until it begins to boil again—this takes only a few minutes. You don’t want to overcook the vegetables; they should remain slightly crisp.
")
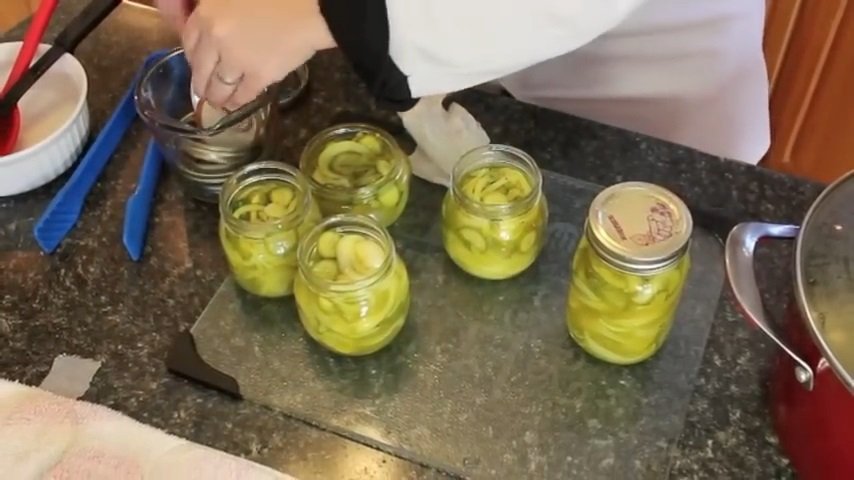
Step 5: Fill the Jars and Process
Using a sterilized funnel and ladle, fill your hot jars with the pickles and brine, leaving ½ inch of headspace at the top. Remove any air bubbles, clean the jar rims, and apply the lids and bands.
Place the jars in your water bath canner, ensuring the water covers the jars by at least an inch. Boil for 10 minutes to safely seal and preserve your pickles.
")
Step 6: Cool and Store
After processing, remove the jars and let them cool on a towel-lined surface. As they cool, you'll hear the satisfying "pop" of the lids sealing. Once fully cooled, check the seals, label the jars, and store them in a cool, dark place.
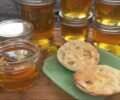
Enjoy Your Homemade Pickles!
Now for the best part—tasting your bread and butter pickles! Serve them with freshly baked bread and butter for a nostalgic treat, or use them to brighten up burgers and sandwiches.
These pickles are shelf-stable for up to a year and make lovely gifts for family and friends.
From our kitchen to yours—happy canning!
")
Welcome to Bonita’s Kitchen! Today we’re sharing a timeless favorite—bread and butter pickles—a sweet and tangy treat that’s been a pantry staple for generations. Whether you’re an experienced home canner or a curious beginner, this step-by-step guide will show you how to make and preserve these delicious pickles from scratch.
What Are Bread and Butter Pickles?
Despite the name, bread and butter pickles don’t actually contain bread or butter. They got their name during the Great Depression, when families would make these pickles in large batches to store for the winter months. With limited ingredients available, a simple sandwich made with homemade white bread, a bit of butter, and a scoop of these pickles became a hearty, affordable meal.
These pickles are made with thinly sliced small cucumbers and white onions, flavored with spices like mustard seed, celery seed, turmeric, and white pepper. The result? A perfectly balanced mix of sweet, tangy, and savory that pairs beautifully with sandwiches, charcuterie boards, or as a crunchy side dish.
Ingredients
Vegetables:
8 cups of small cucumbers, thinly sliced
8 cups of white onions, thinly sliced
Salt:
2 tablespoons sea salt
Pickling Brine:
2 cups white vinegar
1½ cups white sugar
2 tablespoons yellow mustard
1 tablespoon mustard seed
1 teaspoon celery seed
1 teaspoon turmeric
½ teaspoon white pepper
Optional:
2–3 bay leaves
1 tablespoon pickling spice (in cheesecloth or tea infuser)
Step-by-Step Instructions
Step 1: Prepare the Vegetables
Start by slicing your cucumbers and onions very thinly—about 8 cups each. Place them in a large pot or bowl, then sprinkle the sea salt evenly over the top. Gently mix everything together.
Cover the mixture with 4–5 cups of ice, put the lid on, and let it sit at room temperature for 2–3 hours. This process helps to slightly soften the vegetables before cooking.
Tip: If the ice melts before the time is up, feel free to add a bit more to keep the mixture cold.
Step 2: Sterilize Your Mason Jars
Before you start cooking, sterilize your mason jars. This is an essential step in safe home canning. You can do this by boiling the jars in a water bath canner for 10 minutes. Keep them warm until you’re ready to fill them.
Step 3: Make the Pickling Brine
In a large saucepan, combine:
2 cups of white vinegar
1½ cups of white sugar
2 tablespoons mustard
1 tablespoon mustard seed
1 teaspoon celery seed
1 teaspoon turmeric
½ teaspoon white pepper
If you're using bay leaves and pickling spice, wrap them in cheesecloth or use a small tea infuser and add them to the pot.
Stir the mixture and bring it to a boil, letting it simmer for about 10 minutes to allow the spices to infuse the brine.
Step 4: Add the Vegetables
After draining the cucumbers and onions thoroughly, add them to the hot brine. Stir well and heat just until it begins to boil again—this takes only a few minutes. You don’t want to overcook the vegetables; they should remain slightly crisp.
Step 5: Fill the Jars and Process
Using a sterilized funnel and ladle, fill your hot jars with the pickles and brine, leaving ½ inch of headspace at the top. Remove any air bubbles, clean the jar rims, and apply the lids and bands.
Place the jars in your water bath canner, ensuring the water covers the jars by at least an inch. Boil for 10 minutes to safely seal and preserve your pickles.
Step 6: Cool and Store
After processing, remove the jars and let them cool on a towel-lined surface. As they cool, you'll hear the satisfying "pop" of the lids sealing. Once fully cooled, check the seals, label the jars, and store them in a cool, dark place.
Enjoy Your Homemade Pickles!
Now for the best part—tasting your bread and butter pickles! Serve them with freshly baked bread and butter for a nostalgic treat, or use them to brighten up burgers and sandwiches.
These pickles are shelf-stable for up to a year and make lovely gifts for family and friends.
From our kitchen to yours—happy canning!
0 servings