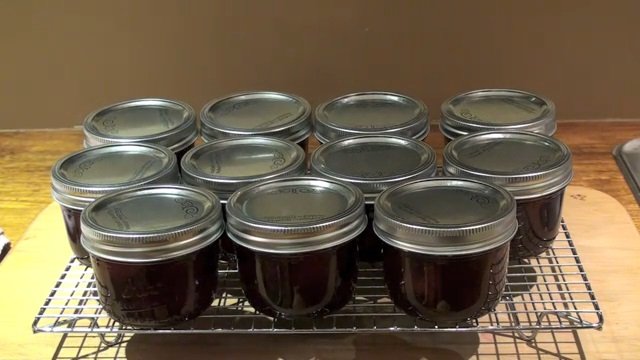

If you’ve ever dreamed of making your own strawberry jam but felt overwhelmed by the process, this guide is for you. Making strawberry jam is easier than it looks — even if it seems like there are a lot of moving parts. With just fresh strawberries, jam-setting sugar, and some basic kitchen tools, you can preserve the taste of summer in a jar!
Whether you're new to home canning or just want to try a small batch, follow along for a simple, foolproof recipe that uses jam sugar and a water bath method for safe long-term storage.
🍓 Why Use Jam Sugar?
Strawberries are naturally low in pectin, the key ingredient that helps jam set. Jam-setting sugar is regular sugar that already contains added pectin, eliminating the need for lemon juice or separate pectin packets. It’s a one-step solution that makes the process simpler and more reliable — perfect for beginners.
🔁 Alternatively, you can use standard sugar and add pectin separately, but jam sugar makes it much easier to ensure a good set.
🛠 Tools You’ll Need
Jam sugar (equal weight to your strawberries)
Strawberries, hulled and washed
Large stockpot or jam pan
Sterilized half-pint jars
Jar funnel and ladle
Jar lifter/tongs
Canning pot or deep pan with lid
Strawberry huller or knife
Candy thermometer (optional)
Frozen plate (for wrinkle test)

🔥 Step 1: Sterilize Your Jars
Preheat your oven to 110°C / 225°F. Place clean jars, lids, and bands inside and bake for 10 minutes. Turn the oven off and leave them inside until your jam is ready. This keeps everything sterile and hot for safe filling.
🍓 Step 2: Prepare the Strawberries
Wash and hull the strawberries using a knife or a handy strawberry huller tool. Toss the hulled berries into a bowl and weigh them. For this batch, we used 1.4 kg of strawberries — so we’ll need 1.4 kg of jam sugar to match.
🥣 Step 3: Combine and Cook
Add both the strawberries and jam sugar into your large pot. Turn the heat to medium-low and gently stir until all the sugar has dissolved. This slow heating step is important to prevent burning and allows the berries to soften gradually.
Once softened, you can lightly mash some of the berries for a mix of pulp and whole fruit. Use a basic masher — or leave them whole if you prefer chunkier jam.
🔥 Step 4: Bring to a Boil
Once the sugar has dissolved:
Increase the heat to high.
Bring the mixture to a full rolling boil (jam should bubble rapidly).
Boil for about 10 minutes, stirring often.
Use a candy thermometer to monitor the temperature (most jam sets at around 220°F / 104°C), or do the wrinkle test:
Take your frozen plate from the freezer.
Drop a spoonful of jam on it.

Let it sit for 30 seconds, then push it with your finger.
If the surface wrinkles, your jam is ready to jar!
🫙 Step 5: Fill the Jars
Carefully remove your hot jars from the oven using jar tongs. Using your ladle and funnel:
Fill each jar with hot jam, leaving ½ inch (1.25 cm) of headspace.
Wipe rims clean with a damp cloth to ensure a good seal.

Place lids on top and screw on bands finger-tight.

💦 Step 6: Process in a Water Bath
Place the filled jars into your boiling water canner (or a deep pot with a towel on the bottom). Ensure jars are fully submerged, bring to a boil, and process for 10 minutes.

Once done, remove the lid and let the jars rest in the water for 5 minutes before lifting them out with tongs. Place them on a towel to cool for 12 hours.
✅ Step 7: Check the Seals
After 12 hours, press down on each lid:
If the lid doesn’t move, the seal is good.
If it pops or bounces, that jar didn’t seal and should be refrigerated and used first.

Label your jars and store in a cool, dark place. Once opened, refrigerate and consume within a few weeks.

0 servings