Nutrition Facts
0 servings


If you're looking to preserve the rich, flavorful taste of San Marzano tomatoes, water bath canning is a great way to do it. In today’s post, we’re walking through a full day of tomato processing—from washing to canning—done in a small kitchen with a big batch of tomatoes. Whether you're prepping for pasta sauce, chili, or tomato soup, this guide will walk you through everything step-by-step.
Starting with 100 Pounds of San Marzano Tomatoes
Early in the morning, I headed out and picked up 100 pounds of San Marzano tomatoes. This heirloom variety is known for its sweet, low-acid flavor and meaty texture—perfect for sauces and purees. Processing that many tomatoes in a small homestead kitchen is no small task, but with the right tools and prep, it’s absolutely doable.
Essential Tools for Tomato Processing
To make the job easier, I used my electric tomato press—an old but powerful machine that separates seeds and skins from the pulp, leaving a smooth tomato puree. For anyone without an electric press, a manual tomato mill works just as well for smaller batches.
Other tools used:
Large stockpots for boiling
Food-grade 5-gallon buckets
Fine mesh strainers
Potato masher
Water bath canners
Canning jars, lids, and rings
Funnel, jar lifter, and vinegar for rim cleaning
Step-by-Step Tomato Processing Guide
1. Wash and Double Rinse
I filled both sinks with clean water to give all the tomatoes a thorough rinse—first in one sink, then again in the second for a double-wash.
2. Boil to Loosen Skins
Rather than blanching, I placed the tomatoes in boiling water just until the skins began to split. This makes it easier to remove skins while preserving more of the flavor and juice.
3. Strain and Drain
Once the skins split, the tomatoes were removed and strained. I used a potato masher to help push out excess water and keep the pulp thick. This is where a 5-gallon bucket comes in handy for collecting the drained tomatoes.
4. Run Through the Tomato Press
The electric tomato press separated out the skins and seeds, and the pulp flowed into a large bucket—ready for canning. I set up a second bucket to catch the waste for composting.
")
Preparing for Water Bath Canning
Although I have pressure canners, I prefer water bath canning for tomato puree. It preserves the flavor and texture better in my experience.
Canning Setup:
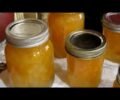
I sterilized and prepared 19 jars, lids, and rings.
Added 1 cup of bottled lemon juice per full 5-gallon bucket of puree to ensure safe acidity levels.
")
Each jar was filled with about an inch of headspace.
")
Rims were wiped with vinegar before adding the lids and rings.
Important Tip: Add vinegar to your canning water to prevent hard water stains on jars.
Water Bath Canning Times
Each batch of jars was processed for 40 minutes in boiling water, ensuring at least 2 inches of water above the jar lids. Only one layer of jars fits in each canner, so I worked in batches—nine jars at a time.
")
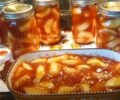
Final Yield and Storage
From this session, I ended up with about 70 jars of rich, homemade tomato puree—perfect for pizza sauce, marinara, tomato soup, and more. All the jars sealed beautifully, and once cooled, I removed the rings, washed the jars, and stored them away.
Wrapping Up and Looking Ahead
This batch represents just half of what I plan to can this season. The next rounds will be smaller, using tomatoes ripened straight from my garden. For those, I’ll likely use a manual tomato mill for quicker, lighter processing days.
")
Whether you're a seasoned canner or just starting out, processing San Marzano tomatoes in bulk can be a rewarding, pantry-filling experience. Stay tuned for more canning tips and recipes from the homestead!
")
If you're looking to preserve the rich, flavorful taste of San Marzano tomatoes, water bath canning is a great way to do it. In today’s post, we’re walking through a full day of tomato processing—from washing to canning—done in a small kitchen with a big batch of tomatoes. Whether you're prepping for pasta sauce, chili, or tomato soup, this guide will walk you through everything step-by-step.
Starting with 100 Pounds of San Marzano Tomatoes
Early in the morning, I headed out and picked up 100 pounds of San Marzano tomatoes. This heirloom variety is known for its sweet, low-acid flavor and meaty texture—perfect for sauces and purees. Processing that many tomatoes in a small homestead kitchen is no small task, but with the right tools and prep, it’s absolutely doable.
Essential Tools for Tomato Processing
To make the job easier, I used my electric tomato press—an old but powerful machine that separates seeds and skins from the pulp, leaving a smooth tomato puree. For anyone without an electric press, a manual tomato mill works just as well for smaller batches.
Other tools used:
Large stockpots for boiling
Food-grade 5-gallon buckets
Fine mesh strainers
Potato masher
Water bath canners
Canning jars, lids, and rings
Funnel, jar lifter, and vinegar for rim cleaning
Step-by-Step Tomato Processing Guide
1. Wash and Double Rinse
I filled both sinks with clean water to give all the tomatoes a thorough rinse—first in one sink, then again in the second for a double-wash.
2. Boil to Loosen Skins
Rather than blanching, I placed the tomatoes in boiling water just until the skins began to split. This makes it easier to remove skins while preserving more of the flavor and juice.
3. Strain and Drain
Once the skins split, the tomatoes were removed and strained. I used a potato masher to help push out excess water and keep the pulp thick. This is where a 5-gallon bucket comes in handy for collecting the drained tomatoes.
4. Run Through the Tomato Press
The electric tomato press separated out the skins and seeds, and the pulp flowed into a large bucket—ready for canning. I set up a second bucket to catch the waste for composting.
Preparing for Water Bath Canning
Although I have pressure canners, I prefer water bath canning for tomato puree. It preserves the flavor and texture better in my experience.
Canning Setup:
I sterilized and prepared 19 jars, lids, and rings.
Added 1 cup of bottled lemon juice per full 5-gallon bucket of puree to ensure safe acidity levels.
Each jar was filled with about an inch of headspace.
Rims were wiped with vinegar before adding the lids and rings.
Important Tip: Add vinegar to your canning water to prevent hard water stains on jars.
Water Bath Canning Times
Each batch of jars was processed for 40 minutes in boiling water, ensuring at least 2 inches of water above the jar lids. Only one layer of jars fits in each canner, so I worked in batches—nine jars at a time.
Final Yield and Storage
From this session, I ended up with about 70 jars of rich, homemade tomato puree—perfect for pizza sauce, marinara, tomato soup, and more. All the jars sealed beautifully, and once cooled, I removed the rings, washed the jars, and stored them away.
Wrapping Up and Looking Ahead
This batch represents just half of what I plan to can this season. The next rounds will be smaller, using tomatoes ripened straight from my garden. For those, I’ll likely use a manual tomato mill for quicker, lighter processing days.
Whether you're a seasoned canner or just starting out, processing San Marzano tomatoes in bulk can be a rewarding, pantry-filling experience. Stay tuned for more canning tips and recipes from the homestead!
0 servings