Nutrition Facts
0 servings


Pickling cucumbers at home is a time-honored tradition that ensures you have delicious, crunchy cucumbers available all year round. Whether you're a seasoned pro or a beginner, this simple yet effective pickling method will guarantee success. Follow this step-by-step guide to create perfectly preserved cucumbers that stay crisp and flavorful for months.
Why This Pickling Method Works
This pickling technique relies on natural fermentation, which enhances the cucumbers’ taste while preserving their texture. By using fresh ingredients and avoiding unnecessary additives like vinegar, aspirin, or sugar, you allow the cucumbers to ferment naturally, resulting in a rich, tangy flavor.
Step-by-Step Pickling Process
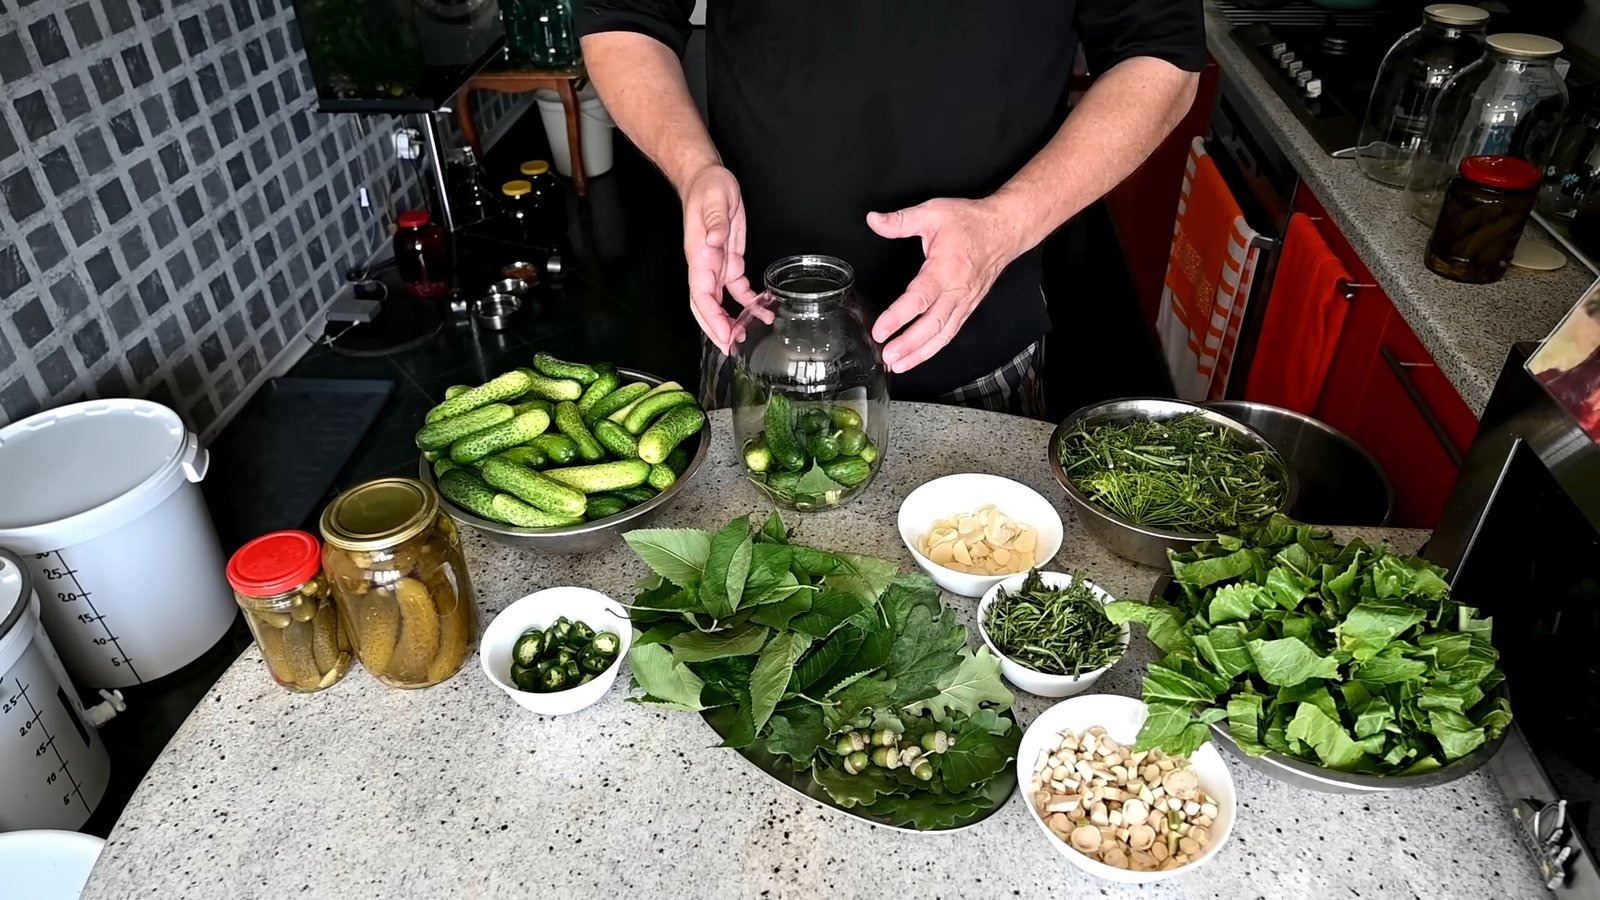
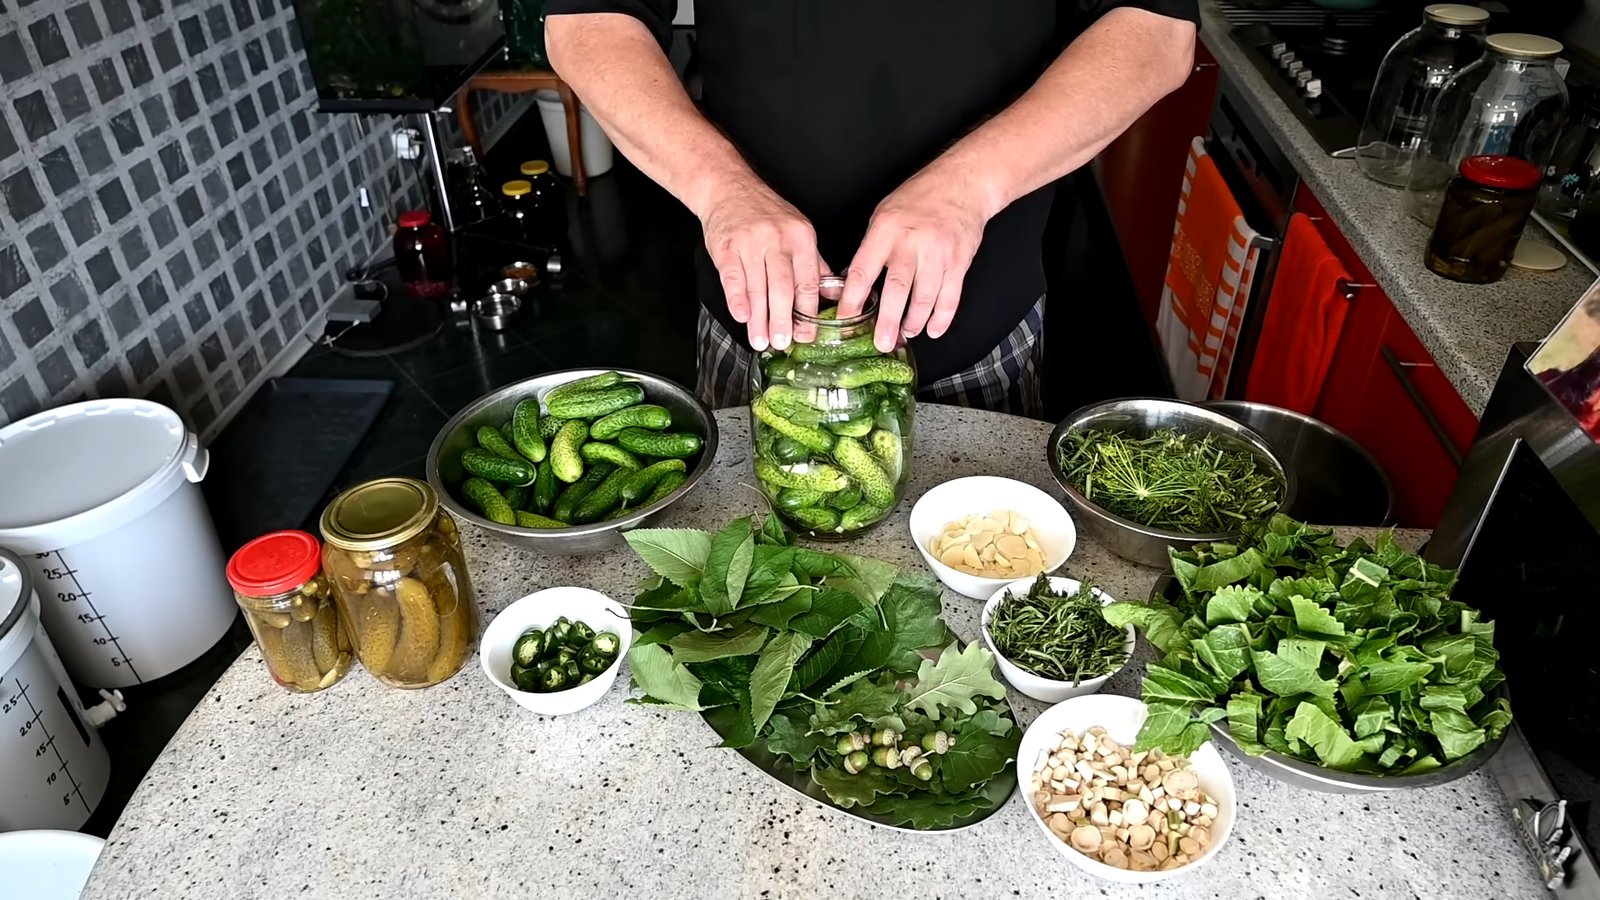
Step 1: Gather Your Ingredients
Before you start, ensure you have the necessary ingredients. You’ll need:
")
Fresh cucumbers (preferably small, firm, and unwaxed)
Garlic cloves (a must-have for flavor)
Dill (both seeds and fresh sprigs)
Horseradish root (optional, but enhances crispness)
Tarragon (optional) for a fragrant aroma
Oak or cherry leaves (optional) to help keep cucumbers firm
")
Hot pepper (optional) for a spicy kick
Non-iodized rock salt (essential for proper fermentation)
Cold, clean water (preferably spring or filtered water)
Step 2: Prepare the Cucumbers
Wash cucumbers thoroughly to remove dirt and debris.
Soak them in cold water for 2-3 hours to enhance their crunch.
Meanwhile, chop horseradish root, tarragon, and other herbs to prepare them for the jars.
Step 3: Prepare the Brine
In a large container, dissolve 1 kg of non-iodized rock salt in 10 liters of cold water.
Stir well until the salt is completely dissolved.
This brine is supersaturated, which is crucial for the initial salting process.
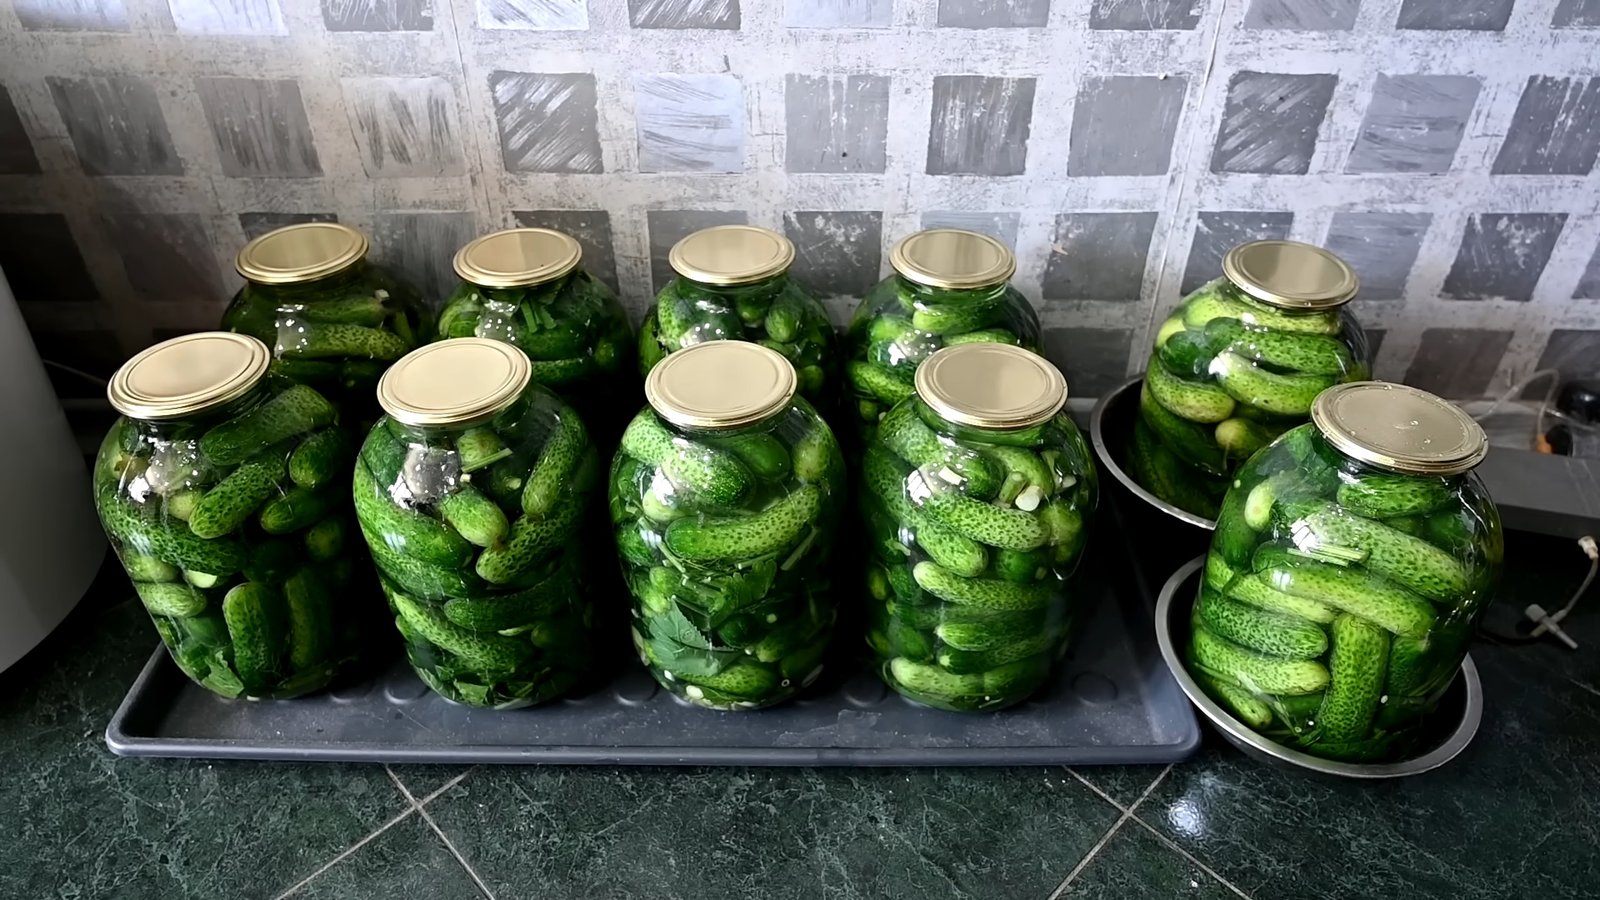
Step 4: Fill the Jars
Use clean, non-sterilized jars—just wash them well.
Add garlic, dill, horseradish root, and other chosen spices to each jar.
Place cucumbers inside, filling the jars tightly but without crushing them.
Pour the prepared cold brine into each jar up to the rim.
Cover with a lid (not tightly sealed) and set the jars on a tray to catch any overflowing brine.
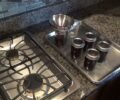
Step 5: Fermentation Process
Allow the cucumbers to ferment for 5-6 days at room temperature (around 30°C or 86°F).
You’ll know fermentation has started when:
!
")
The brine turns cloudy.
Bubbles appear.
Foam forms on top.
Monitor the process—if needed, let the cucumbers ferment longer to ensure full fermentation.
Step 6: Final Preparation
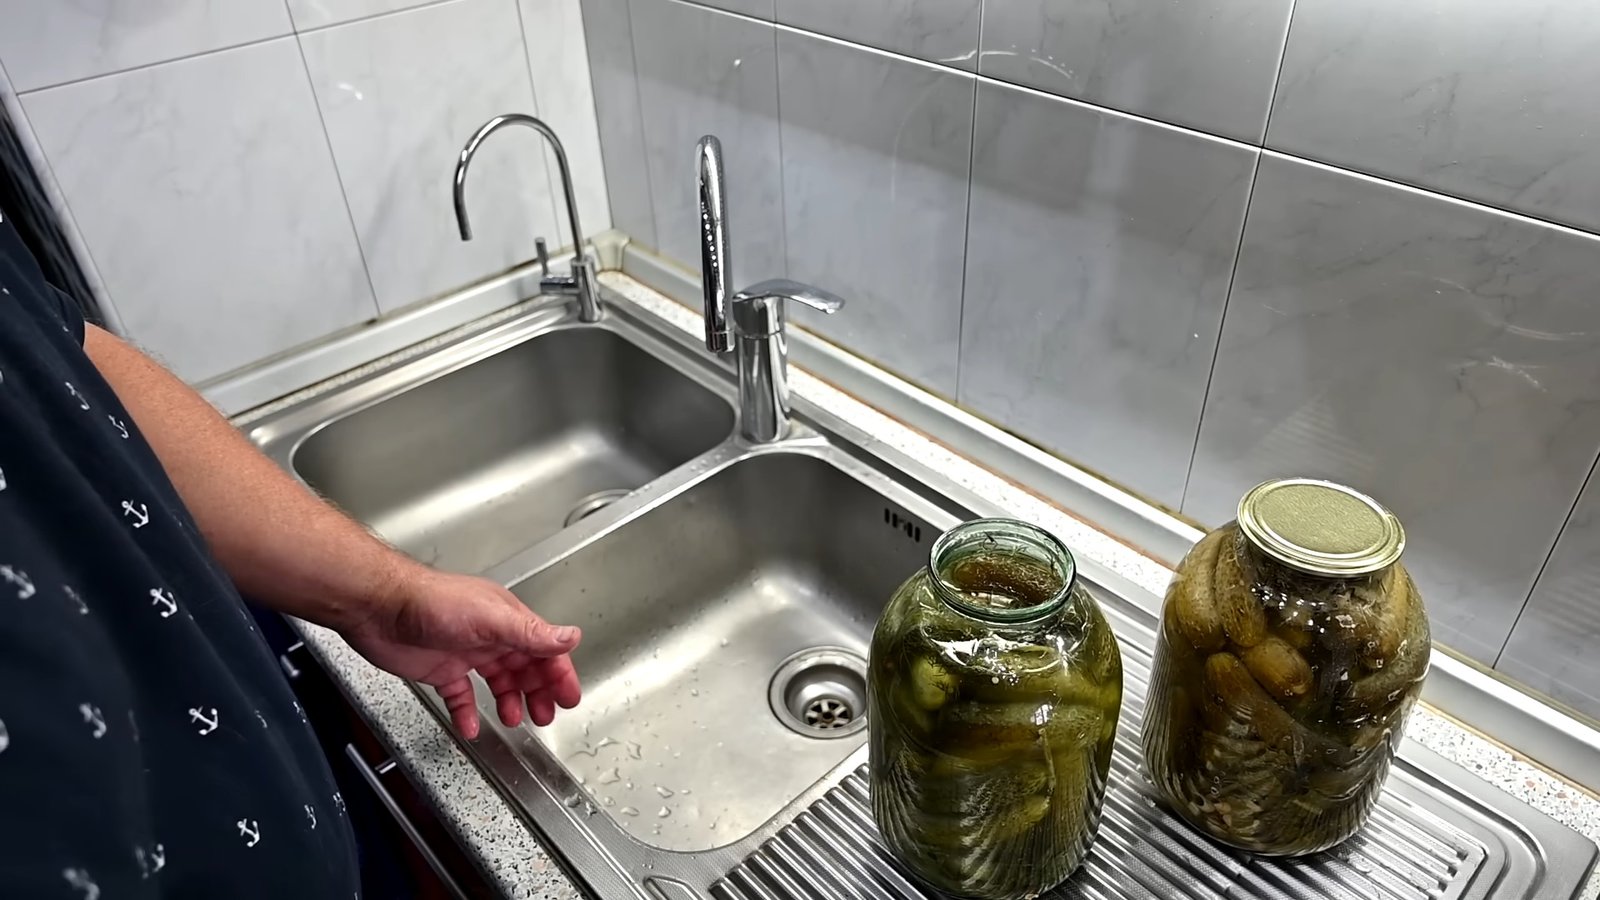
After fermentation, drain the brine and rinse the cucumbers thoroughly.
Transfer any extra cucumbers to fill up the jars.
Pour fresh, clean drinking water into the jars, covering cucumbers completely.
Seal the jars tightly with twist-off or specially heated plastic lids.
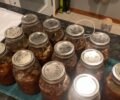
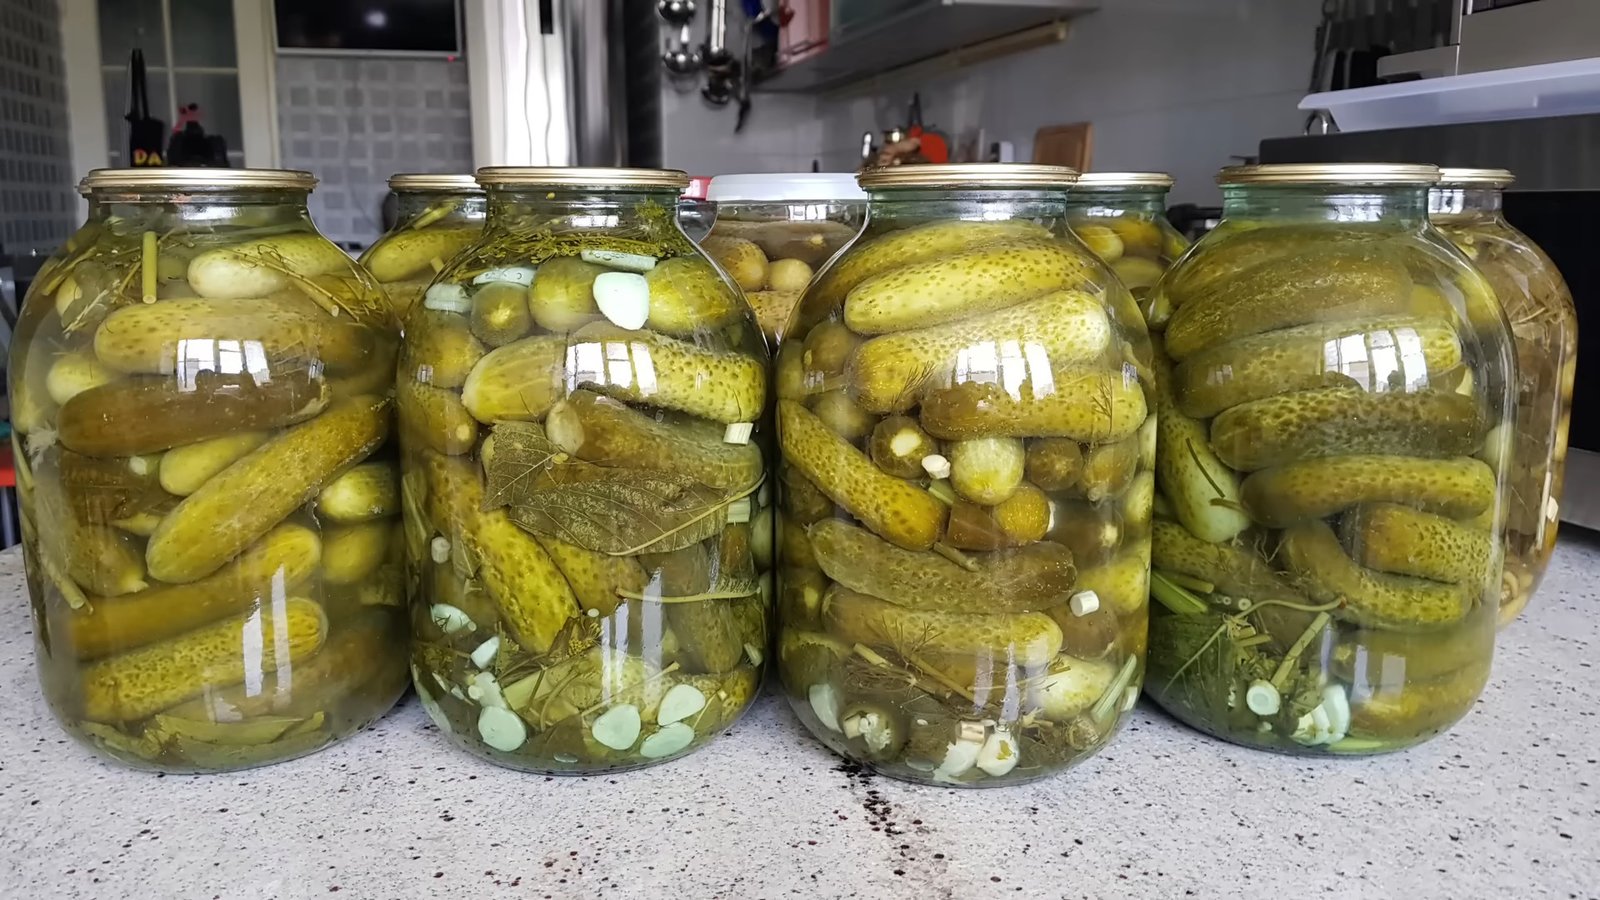
Step 7: Storage and Shelf Life
Let the sealed jars sit for another week to ensure stability.
If the lids remain flat, your cucumbers are ready for long-term storage.
Store them in a cool, dry place—a pantry, cellar, or any room-temperature location.
These pickles can last for years without refrigeration!
Common Mistakes to Avoid
Using the wrong cucumbers: Choose pickling varieties, not salad cucumbers, to prevent them from turning mushy.
Not allowing full fermentation: If the process is cut short, lids may swell, leading to spoilage.
Adding vinegar or sugar: This disrupts the natural fermentation process.
Ignoring fermentation signs: Watch for cloudy brine, bubbles, and foam before proceeding to sealing.
Final Thoughts
With this foolproof method, you can enjoy homemade, naturally fermented pickled cucumbers that stay fresh and delicious for months. Whether you like them spicy, garlicky, or packed with herbs, this recipe allows for customization while maintaining the integrity of the pickling process.
")
Try this traditional pickling technique and savor the taste of crisp, flavorful cucumbers all year long
")
Pickling cucumbers at home is a time-honored tradition that ensures you have delicious, crunchy cucumbers available all year round. Whether you're a seasoned pro or a beginner, this simple yet effective pickling method will guarantee success. Follow this step-by-step guide to create perfectly preserved cucumbers that stay crisp and flavorful for months.
Why This Pickling Method Works
This pickling technique relies on natural fermentation, which enhances the cucumbers’ taste while preserving their texture. By using fresh ingredients and avoiding unnecessary additives like vinegar, aspirin, or sugar, you allow the cucumbers to ferment naturally, resulting in a rich, tangy flavor.
Step-by-Step Pickling Process
Step 1: Gather Your Ingredients
Before you start, ensure you have the necessary ingredients. You’ll need:
Fresh cucumbers (preferably small, firm, and unwaxed)
Garlic cloves (a must-have for flavor)
Dill (both seeds and fresh sprigs)
Horseradish root (optional, but enhances crispness)
Tarragon (optional) for a fragrant aroma
Oak or cherry leaves (optional) to help keep cucumbers firm
Hot pepper (optional) for a spicy kick
Non-iodized rock salt (essential for proper fermentation)
Cold, clean water (preferably spring or filtered water)
Step 2: Prepare the Cucumbers
Wash cucumbers thoroughly to remove dirt and debris.
Soak them in cold water for 2-3 hours to enhance their crunch.
Meanwhile, chop horseradish root, tarragon, and other herbs to prepare them for the jars.
Step 3: Prepare the Brine
In a large container, dissolve 1 kg of non-iodized rock salt in 10 liters of cold water.
Stir well until the salt is completely dissolved.
This brine is supersaturated, which is crucial for the initial salting process.
Step 4: Fill the Jars
Use clean, non-sterilized jars—just wash them well.
Add garlic, dill, horseradish root, and other chosen spices to each jar.
Place cucumbers inside, filling the jars tightly but without crushing them.
Pour the prepared cold brine into each jar up to the rim.
Cover with a lid (not tightly sealed) and set the jars on a tray to catch any overflowing brine.
Step 5: Fermentation Process
Allow the cucumbers to ferment for 5-6 days at room temperature (around 30°C or 86°F).
You’ll know fermentation has started when:
!
The brine turns cloudy.
Bubbles appear.
Foam forms on top.
Monitor the process—if needed, let the cucumbers ferment longer to ensure full fermentation.
Step 6: Final Preparation
After fermentation, drain the brine and rinse the cucumbers thoroughly.
Transfer any extra cucumbers to fill up the jars.
Pour fresh, clean drinking water into the jars, covering cucumbers completely.
Seal the jars tightly with twist-off or specially heated plastic lids.
Step 7: Storage and Shelf Life
Let the sealed jars sit for another week to ensure stability.
If the lids remain flat, your cucumbers are ready for long-term storage.
Store them in a cool, dry place—a pantry, cellar, or any room-temperature location.
These pickles can last for years without refrigeration!
Common Mistakes to Avoid
Using the wrong cucumbers: Choose pickling varieties, not salad cucumbers, to prevent them from turning mushy.
Not allowing full fermentation: If the process is cut short, lids may swell, leading to spoilage.
Adding vinegar or sugar: This disrupts the natural fermentation process.
Ignoring fermentation signs: Watch for cloudy brine, bubbles, and foam before proceeding to sealing.
Final Thoughts
With this foolproof method, you can enjoy homemade, naturally fermented pickled cucumbers that stay fresh and delicious for months. Whether you like them spicy, garlicky, or packed with herbs, this recipe allows for customization while maintaining the integrity of the pickling process.
Try this traditional pickling technique and savor the taste of crisp, flavorful cucumbers all year long
0 servings