
Nutrition Facts
0 servings

If you're looking to boost your gut health with delicious homemade ferments, this wild fermented carrots recipe is a must-try. These crunchy carrot sticks are slightly tender, bursting with natural flavor, and loaded with beneficial probiotics. Whether you're new to fermenting or a seasoned home fermenter, these carrots are likely to become a staple in your kitchen.
Why You’ll Love Wild Fermented Carrots
✅ Naturally probiotic-rich
✅ No starter culture needed
✅ Great for snacking or adding to meals
✅ Easy to make with simple ingredients
✅ Long shelf life when properly stored
")
Ready to learn how to ferment carrots the right way? Follow the detailed guide below or check the linked video instructions for a visual step-by-step tutorial. If it’s your first time, watch the full video to catch all the helpful tips and fermentation notes!
Ingredients for Fermented Carrots
Fresh, raw carrots (garden or grocery store variety)
Fresh dill (garden-fresh or store-bought)
2–4 garlic cloves, peeled
Optional: fresh ginger slices
Salt for brine – Make sure it’s pure salt with no anti-caking agents
Filtered water
How to Prepare Wild Fermented Carrots
")
Step 1: Prep the Jar
Wash a quart (or liter-sized) glass jar in hot soapy water. You want a clean environment to avoid bad bacteria interfering with your ferment.
Step 2: Prep the Carrots
Peel your carrots – the skin can be tough and slightly bitter. Then, trim the ends and cut them into sticks that will fit comfortably in your jar, leaving about 2–3 inches (5–7 cm) of headspace.
Tip: Thicker sticks stay crunchier. If you prefer a softer texture, cut them thinner.
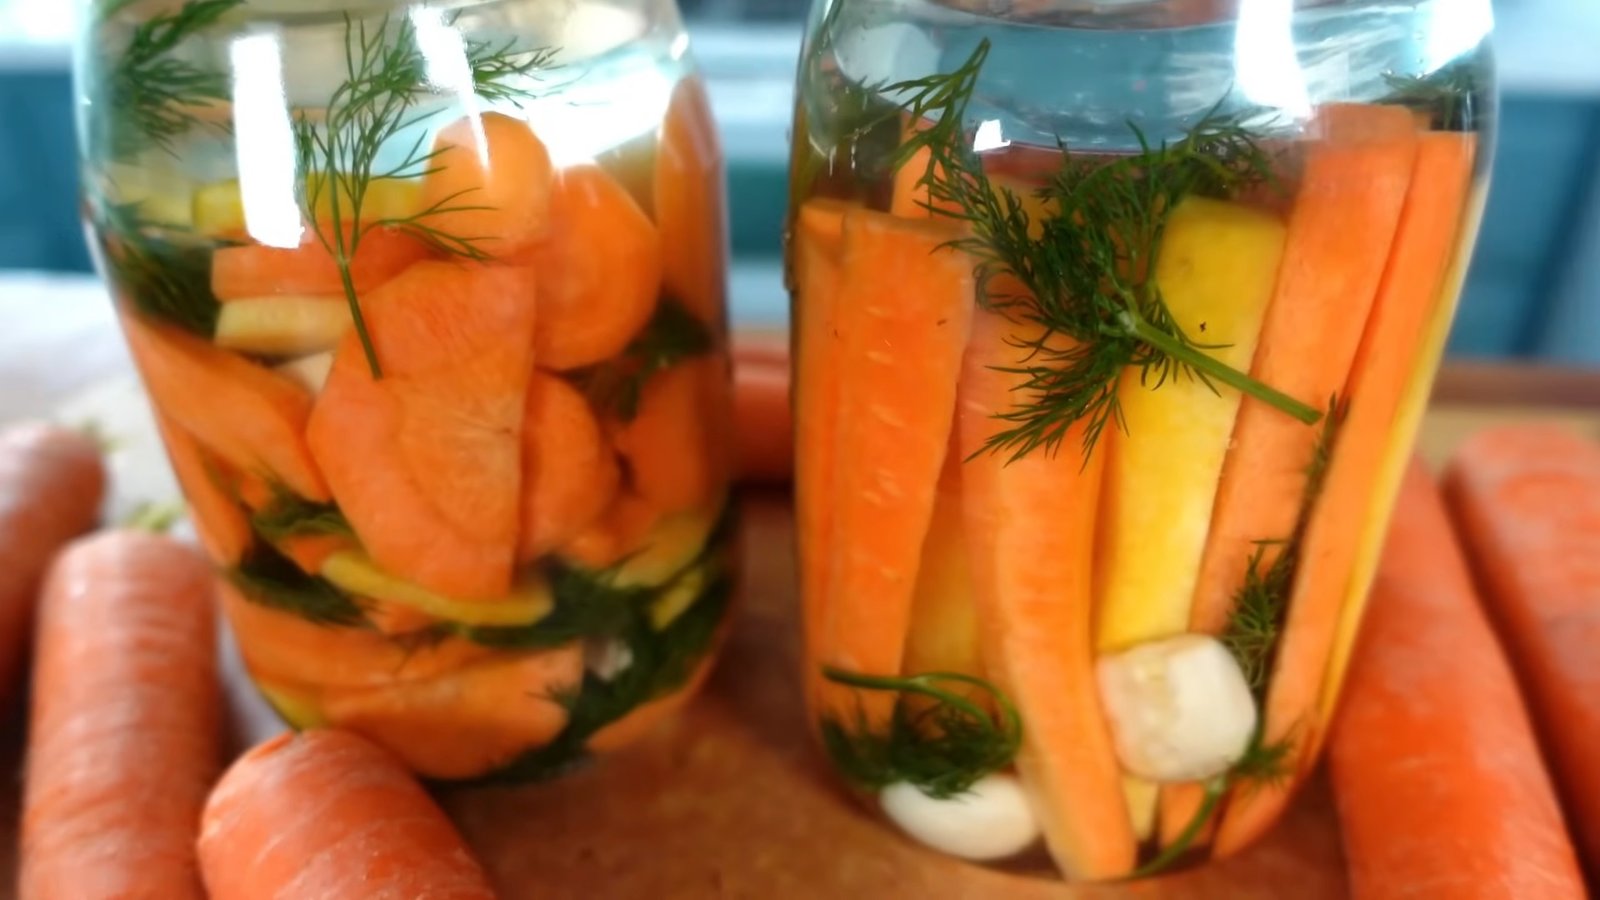
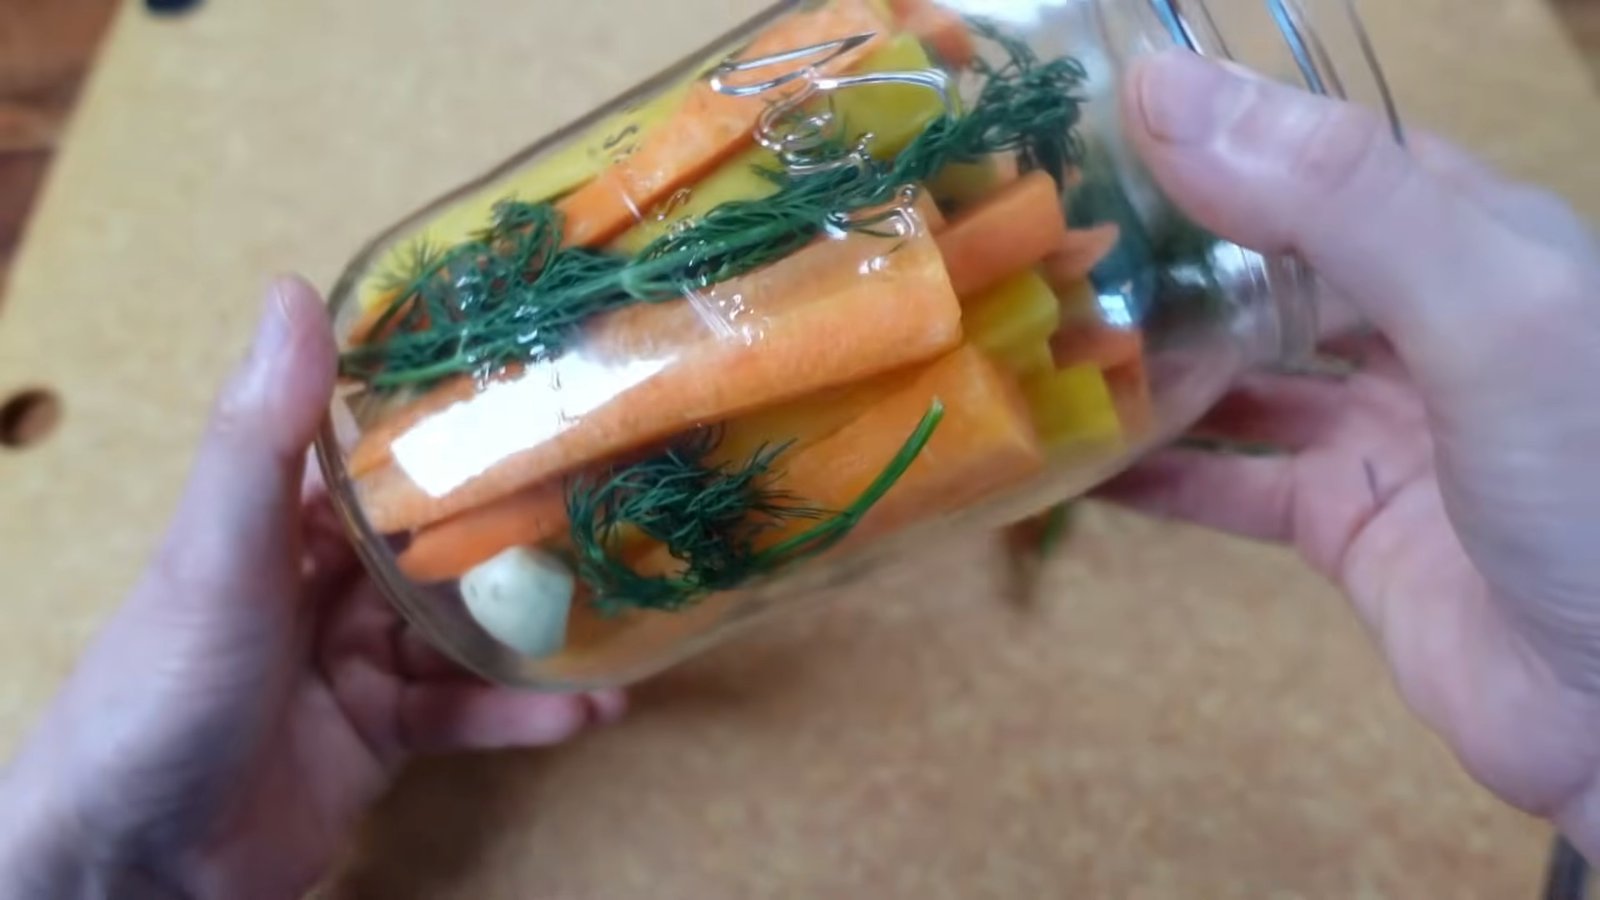
Step 3: Layer the Ingredients
Load the jar on its side for easier packing. Add carrot sticks tightly, layering in fresh dill, peeled garlic, and optional ginger slices as you go. Pack tightly to reduce gaps and keep everything below the brine line later.
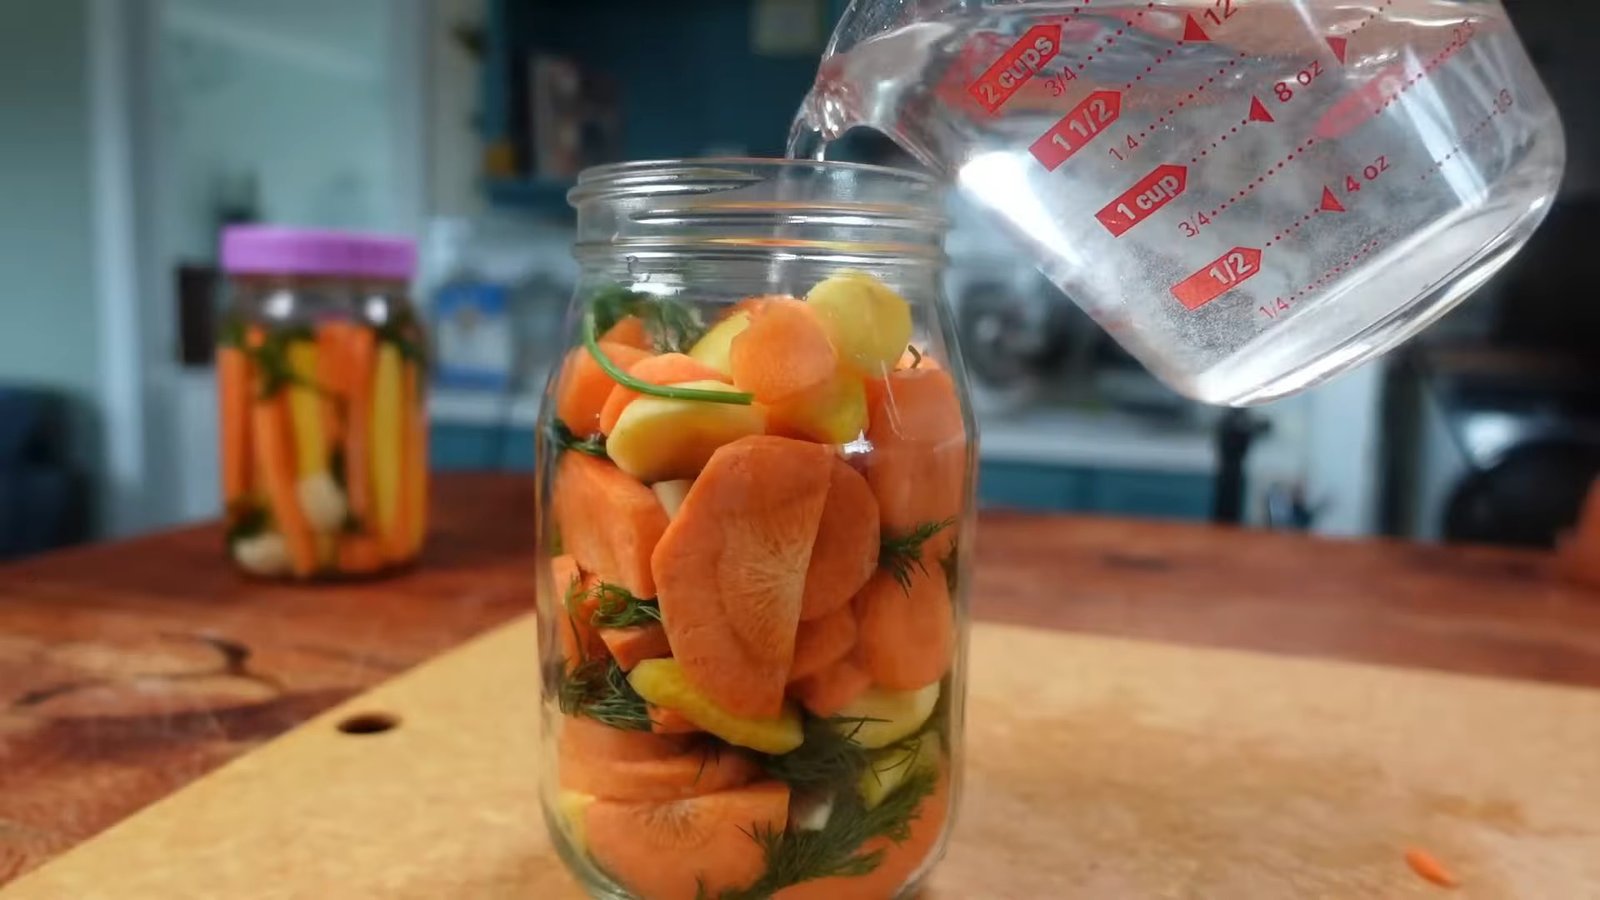
Making the Fermentation Brine
Mix:
1 tablespoon (or 18g) of fine salt
With 1½ cups (350ml) of filtered water
Stir until fully dissolved and pour over the packed carrots.
If you're short on brine:
Mix ¼ teaspoon (1–2g) salt with 2 tablespoons (20ml) of water and top up the jar.
Fermentation Tools You’ll Need
Glass fermentation weight – Keeps the veggies submerged
Loose-fitting lid – Allows gas to escape
Optional: pH meter or test strips for tracking fermentation safety
Never skip the weight! During days 2–4, CO₂ builds up and can cause carrots to float, exposing them to air and risking mold. Keep everything under the brine to ensure a safe ferment.
")
Optional Variation: Sliced Carrot Ferment
Want a twist? Use carrot slices instead of sticks. Layer them the same way, pressing down with a tamper or chopstick to remove air gaps. Use the same saltwater brine recipe.
How Long to Ferment Carrots
Fermentation takes 7 to 21 days at room temperature (70–80°F / 21–27°C), depending on your taste preferences:
7–8 days: Milder flavor, firmer texture
14–21 days: Tangier flavor, slightly softer texture
Place your jar on a towel or plate to catch brine overflow, and keep it on the counter away from direct sunlight.
Signs of a Healthy Fermentation
By Day 2–3, expect:
Slight color change (from bright to muted)
Cloudy brine (a good sign!)
CO₂ bubbles forming
Check the ferment daily for floaters and remove anything that rises above the brine with a clean spoon.
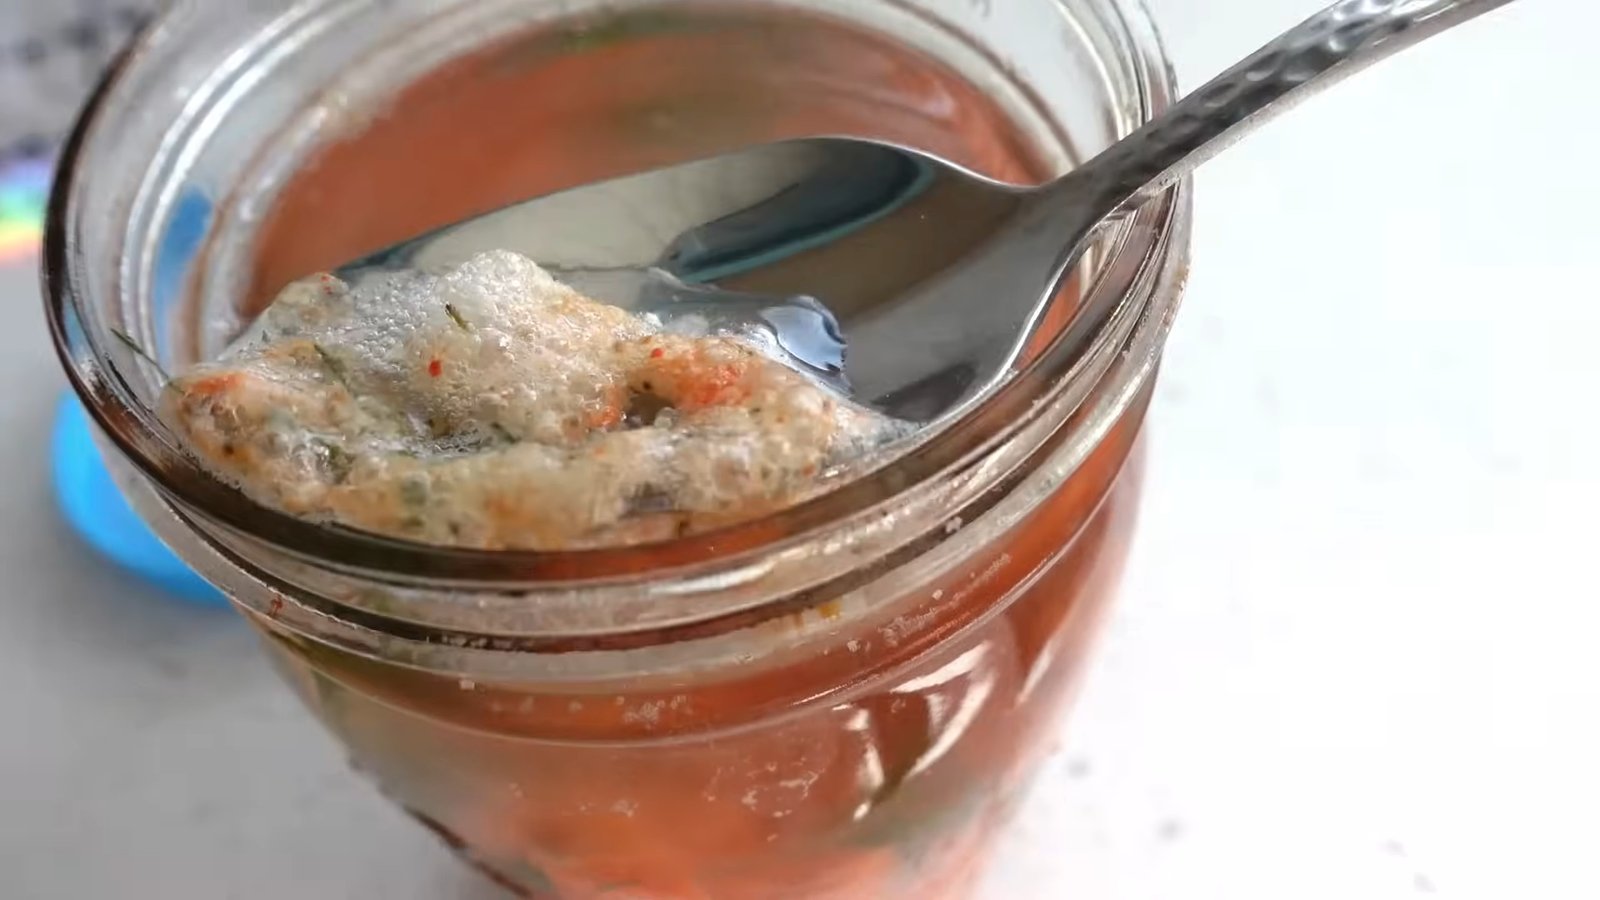
Normal but Ugly: Kahm Yeast
A thin white film (Kahm yeast) may develop on the surface. It’s harmless, but remove it if you like. Mold, however, is a different story. If you see fuzzy or colorful growth, toss the batch.
How to Know When It's Ready
You can test:
pH Level: Below 4.5 means it’s safe. Ideal pH is 3.5–4.0.
Smell: A sweet-sour, tangy aroma is perfect. If it smells rotten or foul, discard it.
Even if you don’t use a pH meter, your senses (sight and smell) are strong indicators of a healthy or spoiled ferment.
Storing Fermented Carrots
Once you’re happy with the taste:
Remove the fermentation weight.
Tightly close the lid.
Store in the refrigerator for long-term use.
Fermented carrots last several months when kept cold and submerged.
Final Tips for Fermenting Success
Use only pure salt (no additives!)
Keep everything under the brine
Check daily during the first week
Don’t panic over cloudiness or bubbles – they’re signs of success!
")
If you're looking to boost your gut health with delicious homemade ferments, this wild fermented carrots recipe is a must-try. These crunchy carrot sticks are slightly tender, bursting with natural flavor, and loaded with beneficial probiotics. Whether you're new to fermenting or a seasoned home fermenter, these carrots are likely to become a staple in your kitchen.
Why You’ll Love Wild Fermented Carrots
✅ Naturally probiotic-rich
✅ No starter culture needed
✅ Great for snacking or adding to meals
✅ Easy to make with simple ingredients
✅ Long shelf life when properly stored
Ready to learn how to ferment carrots the right way? Follow the detailed guide below or check the linked video instructions for a visual step-by-step tutorial. If it’s your first time, watch the full video to catch all the helpful tips and fermentation notes!
Ingredients for Fermented Carrots
Fresh, raw carrots (garden or grocery store variety)
Fresh dill (garden-fresh or store-bought)
2–4 garlic cloves, peeled
Optional: fresh ginger slices
Salt for brine – Make sure it’s pure salt with no anti-caking agents
Filtered water
How to Prepare Wild Fermented Carrots
Step 1: Prep the Jar
Wash a quart (or liter-sized) glass jar in hot soapy water. You want a clean environment to avoid bad bacteria interfering with your ferment.
Step 2: Prep the Carrots
Peel your carrots – the skin can be tough and slightly bitter. Then, trim the ends and cut them into sticks that will fit comfortably in your jar, leaving about 2–3 inches (5–7 cm) of headspace.
Tip: Thicker sticks stay crunchier. If you prefer a softer texture, cut them thinner.
Step 3: Layer the Ingredients
Load the jar on its side for easier packing. Add carrot sticks tightly, layering in fresh dill, peeled garlic, and optional ginger slices as you go. Pack tightly to reduce gaps and keep everything below the brine line later.
Making the Fermentation Brine
Mix:
1 tablespoon (or 18g) of fine salt
With 1½ cups (350ml) of filtered water
Stir until fully dissolved and pour over the packed carrots.
If you're short on brine:
Mix ¼ teaspoon (1–2g) salt with 2 tablespoons (20ml) of water and top up the jar.
Fermentation Tools You’ll Need
Glass fermentation weight – Keeps the veggies submerged
Loose-fitting lid – Allows gas to escape
Optional: pH meter or test strips for tracking fermentation safety
Never skip the weight! During days 2–4, CO₂ builds up and can cause carrots to float, exposing them to air and risking mold. Keep everything under the brine to ensure a safe ferment.
Optional Variation: Sliced Carrot Ferment
Want a twist? Use carrot slices instead of sticks. Layer them the same way, pressing down with a tamper or chopstick to remove air gaps. Use the same saltwater brine recipe.
How Long to Ferment Carrots
Fermentation takes 7 to 21 days at room temperature (70–80°F / 21–27°C), depending on your taste preferences:
7–8 days: Milder flavor, firmer texture
14–21 days: Tangier flavor, slightly softer texture
Place your jar on a towel or plate to catch brine overflow, and keep it on the counter away from direct sunlight.
Signs of a Healthy Fermentation
By Day 2–3, expect:
Slight color change (from bright to muted)
Cloudy brine (a good sign!)
CO₂ bubbles forming
Check the ferment daily for floaters and remove anything that rises above the brine with a clean spoon.
Normal but Ugly: Kahm Yeast
A thin white film (Kahm yeast) may develop on the surface. It’s harmless, but remove it if you like. Mold, however, is a different story. If you see fuzzy or colorful growth, toss the batch.
How to Know When It's Ready
You can test:
pH Level: Below 4.5 means it’s safe. Ideal pH is 3.5–4.0.
Smell: A sweet-sour, tangy aroma is perfect. If it smells rotten or foul, discard it.
Even if you don’t use a pH meter, your senses (sight and smell) are strong indicators of a healthy or spoiled ferment.
Storing Fermented Carrots
Once you’re happy with the taste:
Remove the fermentation weight.
Tightly close the lid.
Store in the refrigerator for long-term use.
Fermented carrots last several months when kept cold and submerged.
Final Tips for Fermenting Success
Use only pure salt (no additives!)
Keep everything under the brine
Check daily during the first week
Don’t panic over cloudiness or bubbles – they’re signs of success!
0 servings